App Store Screenshot Guidelines to Boost App Store Growth
Master the essential app store screenshot guidelines. Learn how to design high-converting visuals for iOS and Android to boost app downloads and growth.
App store screenshot guidelines are the rulebook for creating a high-converting visual gallery for your app. They cover the non-negotiables: the number of images you can upload, the exact pixel dimensions required, and the approved file formats. Nailing these technicals is the first step toward a professional-looking store page that turns curious visitors into loyal users.
Think of it this way: these guidelines exist to create a consistent, high-quality experience for everyone browsing the Apple App Store and Google Play. Following them signals to potential users that your app is polished, trustworthy, and worth the download. This guide will give you actionable insights to create efficient and high-converting app store screenshots for both iOS and Android.
Your Quick Reference to Screenshot Specifications
The goal of app store screenshots is to show people what your app does and why they need it—fast. But before you get creative with storytelling and vibrant design, you have to nail the technical basics. So many app updates get rejected simply because of a mismatch in dimensions or the wrong file type. It’s a completely avoidable mistake that delays your launch and hurts your app's credibility.
This visual breakdown covers some of the most important specs to remember when planning your screenshot strategy for maximum app store growth.
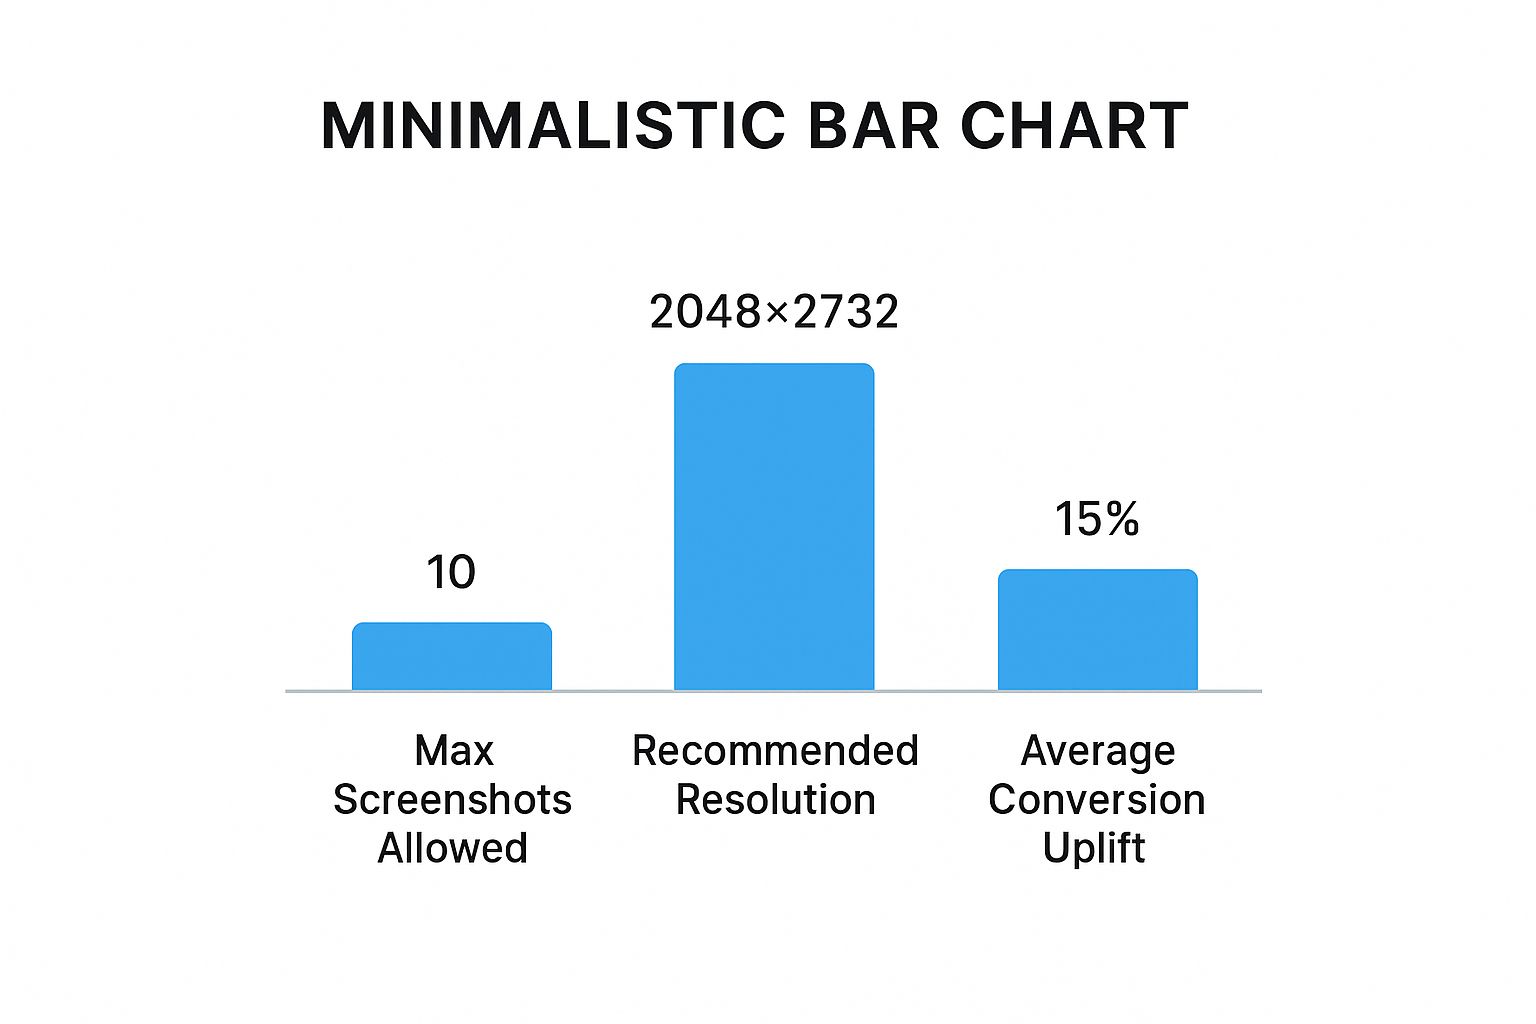
As you can see, you get up to 10 slots on the App Store. It's not just about filling them; it's about making each one count. Using high-resolution, well-designed images with vibrant colors can lift your conversion rate by an average of 15%. That's a huge win for a one-time design effort.
Apple App Store vs Google Play Screenshot Specifications
To make things even easier, here is a side-by-side comparison of the core requirements for both major app stores. This table gives you a quick look at the most critical details, from the number of images to file formats.
When you're designing, an editor can handle the heavy lifting for you. For instance, if you use a tool like ScreenshotWhale and select a template for the "iPhone 16 Pro Max," the canvas is automatically set to the correct 1290 x 2796 pixels. No more guesswork or digging through documentation.
Getting these technical specs right isn’t just about avoiding rejection; it’s your first chance to showcase quality and professionalism, which directly impacts conversions.
| Specification | Apple App Store (iOS) | Google Play Store (Android) |
|---|---|---|
| Max Screenshots | Up to 10 | Up to 8 |
| Min Screenshots | At least 1 | At least 2 |
| Required Devices | iPhone, iPad | Phone, Tablet (7-inch & 10-inch) |
| File Formats | PNG or high-quality JPEG | PNG or JPEG (no alpha) |
| Aspect Ratio | Varies by device | 16:9 or 9:16 recommended |
This table is your go-to reference. Once you have these foundations locked in, you can move on to the more creative part: designing high-converting screenshots that persuade people to download.
Core Screenshot Requirements for iOS and Android
Getting your app's screenshots right seems simple until you're staring at an App Store rejection notice. The foundational rules for Apple and Google are your starting point, and knowing them inside and out saves you headaches and boosts your app store growth.
These guidelines aren't just bureaucratic hoops; they shape your entire visual strategy. The two platforms have different philosophies: Apple is all about an authentic, what-you-see-is-what-you-get preview, while Google gives you more room to get creative with your marketing.
This difference is clear in their policies. On Apple’s App Store, you can upload up to 10 screenshots, and they demand that every single one is an actual capture from within your app. No lifestyle photos, no fancy marketing graphics—just the app itself.
Google Play, on the other hand, lets you upload up to 8 screenshots (with a minimum of two) and is much more flexible. You can use portrait or landscape images, and dimensions can range from 320 to 3840 pixels, as long as the aspect ratio stays between 2:1 and 1:2. This opens the door to more creative, high-converting storytelling. For a deeper look, check out these insights on app store screenshot specifics.
Apple App Store: The Focus on Authenticity
Apple's guidelines are strict for a good reason: they want to build user trust through transparency. The core idea is to show a true-to-life representation of your app. No surprises.
- No Embellishments: Forget adding marketing graphics, photos of people using a phone, or any imagery that isn't part of your app's actual user interface. They will reject it.
- Device Specificity: You must provide screenshots for every device your app supports, like iPhone, iPad, and Apple Watch. The dimensions have to match their required specifications down to the pixel.
- Status Bar Cleanliness: This is a strong best practice. A clean status bar—showing full Wi-Fi, full battery, and the classic 9:41 AM time—signals a polished, professional app. It's a small detail that says you care.
This approach ensures users know exactly what they’re downloading, managing expectations and leading to better reviews and higher conversions.
Google Play Store: Flexibility and Creativity
On Google Play, the vibe is completely different. They give developers more creative freedom, allowing you to treat screenshots as powerful marketing tools. If you use it right, this flexibility can be a game-changer for your app store growth.
"On Google Play, screenshots can be more than just UI captures; they can be powerful marketing assets that tell a story, highlight benefits, and create an emotional connection with the user before they even download."
While you can use straightforward in-app captures, Google also lets you use promotional graphics, text overlays, and creative compositions. You still have to play by the technical rules for aspect ratios and resolutions, of course.
The platform also requires distinct assets for phones, 7-inch tablets, and 10-inch tablets. This freedom means it’s on you to create visuals that are not just compliant, but genuinely compelling. That’s why following high-converting app store screenshot practices is so critical here.
Designing Screenshots That Drive App Store Growth
Effective app store screenshots are so much more than compliant images. They're your single most powerful tool for boosting conversions. Sure, meeting technical specs gets your app approved, but strategic design is what convinces a user to tap "Install." This is where you stop thinking about simple UI captures and start telling a compelling visual story that drives app store growth.
Think of your screenshot gallery as a visual sales pitch. A user might only glance at it for a few seconds, so every image has to count. Your goal is to create a narrative that guides them from a problem to your app's solution. This story needs to be instantly understandable, look great with appealing, vibrant imagery, and build excitement with each swipe.
This narrative approach is what separates apps that grow from those that stagnate. Instead of just showing random features, you're building a rock-solid case for why your app is essential.
Crafting a Compelling Visual Narrative
Your visual story should hook the user the moment they land on your app page. The first one or two screenshots are critical—they're often visible right in the search results. This is your one shot to grab them.
To build a high-converting narrative, try these actionable techniques:
- Panoramic Layout: A classic for a reason. Create a seamless design where screenshots flow into one another. It encourages users to swipe through the entire gallery, pulling them deeper into your app's world.
- Concise Captions: Use bold, benefit-focused text to explain what’s happening. Focus on the outcome, not the feature. For example, instead of "Calendar View," use "Plan Your Week in Seconds."
- Vibrant, On-Brand Colors: Your color palette must align with your brand and be visually striking. Use bright, intentional colors to draw the eye to key elements and create an emotional connection.
A fitness app, for instance, could lead with a screenshot showing a personalized workout plan (the solution). The next few could show progress tracking and community features. Each image builds on the last, telling a complete story of transformation.
Frame Your Value Proposition Immediately
People make snap judgments. If they can’t figure out what your app does and why they need it in seconds, they're gone. Your initial screenshots must communicate your core benefit instantly. We've written a whole guide on the real power of app store screenshots that goes deeper on this.
Your first screenshot must answer, "What problem does this app solve for me?" Your second should answer, "And how does it do that better than anyone else?"
Practical Example: Imagine you're in a site editor designing your visuals. For your first screenshot, you could select a template with a vibrant gradient background. Place your UI capture in a clean device mockup and add the headline: "Effortless Budgeting in 5 Minutes." This immediately tells the user the primary benefit. The second screenshot could then show off an AI-powered expense tracker, captioned "Let AI Categorize Your Spending," highlighting a key differentiator.
This one-two punch is incredibly effective for grabbing attention and driving installs. When you focus your design on building trust and excitement, you turn a simple image gallery into a genuine growth engine.
Getting Your Screenshot Dimensions Right
When it comes to your app store page, the devil is in the details. Getting your screenshot dimensions and other technical specs perfect is the first step to making sure your visuals look sharp, professional, and trustworthy across every single device.
Inaccurate sizing is an instant red flag. It can lead to stretched or blurry images, automatic rejections, and a subtle message to users that your app lacks polish. Let’s make sure that doesn’t happen.
We’ll break down the key technicals you absolutely need to nail for maximum conversions.
Why a One-Size-Fits-All Approach Fails
Every phone, tablet, and watch has a different screen size and resolution. Trying to use one image for all of them won’t work. The stores will either reject your upload or automatically resize it, leaving your hard work looking distorted.
This is where you need to pay close attention to the specific requirements for each device. Tools that provide device-specific templates are a lifesaver, but you should still understand the fundamentals.
- Device Mockups: Using the correct device frame in your design instantly shows users what your app will look like in their hands.
- Aspect Ratios: This is what keeps your images from being awkwardly stretched or cropped. Get it right, and your UI looks exactly as intended.
- Orientation: Deciding between portrait and landscape isn't just a technical choice; it shapes how users perceive your app's experience.
Speaking of orientation, the data shows a clear preference. A whopping 96% of newly released apps use portrait screenshots. Even in gaming, 80% still opted for portrait. This reflects how we naturally hold our phones, and designing for that habit is just smart ASO. You can dig into these stats over at AsoMobile.
Of course, rules are made to be broken. While portrait is king for most apps, a stunning landscape screenshot can make a gaming or media app stand out from the crowd.
Required Screenshot Dimensions for Popular Devices
The screenshot guidelines for iPhone, iPad, and Android devices are all over the place. To save you the headache of digging through documentation, here’s a quick reference table with the exact pixel dimensions you’ll need for some of the most common devices out there.
| Device | Platform | Portrait Dimensions (Pixels) | Landscape Dimensions (Pixels) |
|---|---|---|---|
| iPhone 16 Pro Max | iOS | 1290 x 2796 | 2796 x 1290 |
| iPad Air (5th Gen) | iOS | 1668 x 2388 | 2388 x 1668 |
| Google Pixel 8 | Android | 1080 x 2400 | 2400 x 1080 |
| Samsung Galaxy S23 Ultra | Android | 1440 x 3088 | 3088 x 1440 |
Bookmark this page. Having these numbers handy will speed up your workflow and help you avoid any last-minute resizing panics before a big launch.
The Smart Way to Create Multiple Screenshot Sizes
Manually creating and resizing screenshots for every device is tedious and prone to human error. It’s the kind of work that burns hours you could be spending on your app itself.
This is where a screenshot tool becomes your best friend. A good editor can take your primary design and export it to every required resolution in just a few clicks. It’s built for busy developers and marketing teams looking for efficiency.
- Upload your core UI screen captures to the canvas.
- Pick your target devices from a list of professional mockups.
- Write your benefit-driven captions and style them with your brand fonts and vibrant colors.
- Hit export, and you’ll get a perfectly sized set of high-converting screenshots ready for upload.
“Using smart templates and automation cuts hours off manual resizing while maintaining pixel-perfect accuracy.” — Leading ASO Expert
When Does Landscape Orientation Make Sense?
While portrait is the default for a reason, landscape orientation can be incredibly powerful for the right kind of app. It’s the go-to choice for games with sprawling UIs and media apps that want to show off rich, cinematic visuals with vibrant imagery.
Think about it—a racing game just feels more immersive with a wide-screen view that matches the gameplay. The same goes for panoramic photo editors or video streaming apps where a horizontal frame gives users a better preview of the experience.
- Showcase Wide UIs: Ensure none of your critical gameplay controls or menus get cropped out.
- Create Immersive Previews: Let users see the full picture, whether it’s a stunning landscape photo or an action-packed scene.
If you decide to go with landscape, a tool that offers batch exports is a lifesaver. You can design once, select your devices, and get all the different sizes you need instantly, all while keeping your brand’s look consistent with slick device mockups and vibrant color presets.
Why Your Screenshots Are Your ASO Secret Weapon
Your App Store screenshots aren't just a gallery of features. They're one of the most powerful tools in your App Store Optimization (ASO) toolkit, directly impacting your page-to-install conversion rate—a metric the App Store algorithms watch like a hawk.
When users land on your app page, your screenshots are your elevator pitch. A strong set of visuals can dramatically lift your conversion rate, which sends a powerful signal to Apple and Google that your app is a winner. This positive feedback can, in turn, boost your visibility in search, contributing directly to app store growth.
It’s a classic feedback loop: better screenshots lead to more downloads, and more downloads improve your app’s overall ranking and visibility. This makes your screenshots a primary driver of organic growth.
The Make-or-Break First Impression
Pay close attention to your first one to three screenshots. In many search results, these are the only visuals a user sees before they even click on your page. They have to do some heavy lifting—instantly communicating your app's core value and tempting people to learn more.
If those first few images are dull, confusing, or poorly designed, you've lost potential users before they even give your product page a chance. This is where your design choices, from punchy captions in a site editor to clean mockups, directly fuel your ASO performance and conversions. For a deeper dive, check out our complete iOS App Store optimization guide.
Test Everything to Squeeze Out More Conversions
To truly maximize your growth, you can't just set your screenshots and forget them. The most successful apps constantly test different visual approaches to figure out what clicks with their audience. This is a core part of refining your message and boosting conversions.
You can experiment with several variables to find that winning formula:
- Different Value Propositions: Test which core benefit drives the most installs. Does "Save Time on Invoicing" convert better than "Get Paid Faster"?
- Visual Styles: Pit a clean, minimalist design against a more dynamic, feature-packed layout with vibrant colors.
- Caption Copy: A/B test different headlines and calls-to-action to see what text motivates users to hit that "Get" button.
Your screenshots are not just descriptive; they are persuasive. Each one should be a carefully crafted argument for why a user should choose your app over a competitor's.
The data backs this up. Well-optimized, high-converting screenshots can improve conversion rates by 18% to 28%. With users spending just seven seconds on average to make a decision, that initial visual impact is everything. It's what drives downloads and helps you climb the charts.
Tools and Workflows for Getting Screenshots Done Right
Let’s be honest, creating high-quality, device-specific screenshots for every required dimension can be a real grind. Manually designing, adding captions, and resizing each image is not just slow—it’s a recipe for mistakes. The right tools and a smart workflow can completely change the game, letting you produce visuals that actually convert, in a fraction of the time.
The whole point is to automate the repetitive stuff so you can focus on the strategy. When you use a dedicated app screenshot generator, you don't need to be a design wizard to create a professional-looking gallery that boosts conversions.
Automating the Grind with App Screenshot Generators
App screenshot generators are built to solve the most common headaches in this process. They combine professionally designed templates with simple drag-and-drop editors, making it dead simple to follow all the app store guidelines while creating neat, appealing imagery.
These tools offer a few huge advantages for efficient workflows:
- Pre-built Templates: Start with layouts already optimized to drive installs, tailored for different app types like fitness, social media, or gaming.
- Device Mockups: Instantly drop your raw screen captures into the latest device frames, from an iPhone 16 Pro Max to a Google Pixel.
- Batch Exporting: The best part. Design everything once, then export your screenshots in every required dimension for phones and tablets. This alone saves hours.
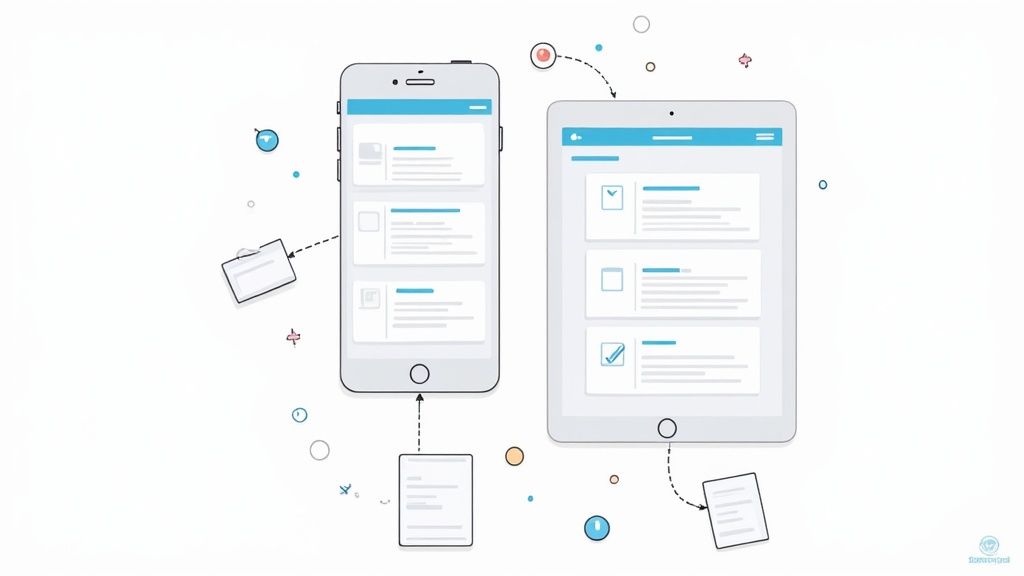
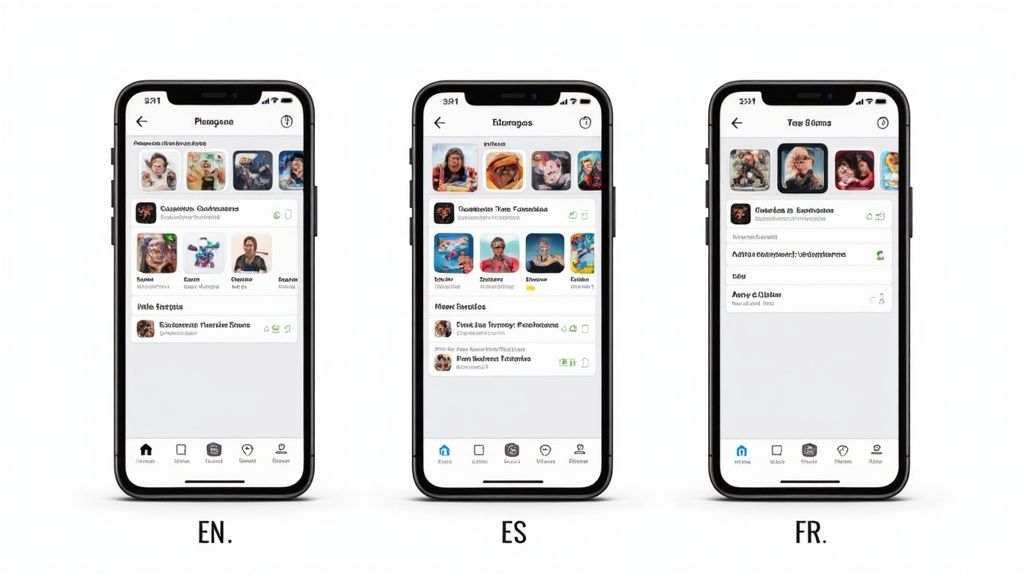
This image gives you a sense of a typical editor interface, showing how quickly you can tweak layouts, captions, and device mockups to create vibrant, high-converting visuals. The interface is usually clean and intuitive, letting you see your final design in real-time and make adjustments on the fly. No more guessing what the final product will look like.
A Step-by-Step Workflow for High-Converting Screenshots
Creating stunning visuals that boost app store growth is easier than you think. By sticking to a structured workflow within a specialized tool, you can guarantee both quality and efficiency.
Here’s a simple, four-step process you can follow in a screenshot site editor:
- Choose a Template and Layout: Pick a pre-designed template that fits your app's style. This gives you a solid foundation built on conversion best practices. For example, choose a layout with a vibrant background color to make your UI pop.
- Upload Your Screen Captures: Just drag and drop your raw, in-app screen captures right onto the device mockups in the editor. The tool should handle the positioning for you.
- Add Compelling Captions and Branding: This is where you sell the benefits. Write headlines that focus on what the user gets. Customize your fonts, colors, and background to match your brand and make your visuals pop.
- Export for All Devices: Once you’re happy with the design, simply select all the target devices you need. The tool will then generate a full set of perfectly sized screenshots, ready to upload.
By automating the technical side of things, you can stop worrying about pixel-perfect alignment and start focusing on crafting a powerful visual story that drives installs.
This streamlined approach doesn't just save time; it helps you maintain a high standard of quality across your entire app store listing. To see how this works in practice, you can play around with the features and templates available in the ScreenshotWhale editor and start creating your own high-converting visuals today.
Of all the things that can trip you up when submitting your app, screenshot mistakes are probably the most common. Getting all the guidelines right feels tricky, and it's frustratingly easy to make a small error that tanks your conversion rate or even gets your update rejected.
But knowing what not to do is half the battle. Your goal is to eliminate any friction that stops someone from understanding your app's value in a few seconds.
By getting ahead of these common pitfalls, you’re not just aiming for a smoother submission—you’re building a much more persuasive product page that boosts conversions.
Ignoring Readability and Text Hierarchy
This one is the absolute classic. I've seen countless screenshots with captions that are just plain unreadable. If someone has to squint to understand your app's main benefit, you've already lost them. They're looking at this on a small phone screen, probably while distracted.
It’s an easy fix. Use a big, bold font for your main headline and something smaller, but still clean, for any subtext. This creates a visual hierarchy that tells the user's eye exactly where to look first.
What Not to Do: Cramming a paragraph of tiny, thin text over a busy part of your UI. Best Practice: A single, punchy headline in a large, readable font. Set it against a clean, vibrant background to hammer home one key benefit per screenshot.
That small change alone can turn a confusing mess into a clear, compelling, high-converting sales pitch.
Creating Misleading or Inaccurate Visuals
Both Apple and Google are incredibly strict about this, and for good reason. Your screenshots absolutely must be an honest representation of your app's current UI and functionality. Showing off mockups of features that aren't actually there is a surefire way to get rejected and, worse, destroy user trust and conversions.
Always start with genuine screen captures from your app. You can—and should—use a tool like ScreenshotWhale to frame these captures in polished device mockups and add that all-important benefit-driven text. But the UI itself has to be real.
This isn’t just about following the rules. It’s about building trust and setting the right expectations. When you do that, you get better user retention and the kind of positive reviews that drive real app store growth.
Frequently Asked Questions
Digging into app store guidelines always brings up a few common questions. Here are the clear, straightforward answers you need to get your visual strategy right and win more downloads.
Can I Use a Video Instead of Screenshots?
Yes, you can—and you should—but videos are a supplement, not a replacement. Both Apple's App Previews and Google's Promo Videos are killer tools for showing your app in motion, but you still have to provide the minimum required static screenshots.
On iOS, your App Preview is the first thing people see. It autoplays silently in the gallery, making it prime real estate for grabbing attention immediately. Over on Google Play, you can feature a YouTube video that users can tap to play. Think of video as the dynamic opening act, with your screenshots providing the detailed story.
How Often Should I Update My App Store Screenshots?
You absolutely have to update your screenshots whenever you roll out a major UI redesign or ship significant new features. Nothing screams "neglected app" like outdated visuals. It's a quick way to lose a user's trust before they even hit the download button.
Beyond the big updates, it's just smart ASO to refresh your visuals every 3-6 months. This gives you a chance to test new messaging, try out different layouts with vibrant imagery, and highlight different value propositions. Continuous testing is how you discover what really connects with your audience, leading to those steady, meaningful gains in conversion rates and app store growth.
How Can I A/B Test My Screenshots?
A/B testing is where the real optimization happens, and thankfully, both stores give you native tools to stop guessing and start making data-driven decisions to boost conversions.
- Google Play Store: Jump into the built-in 'Store listing experiments' feature. It lets you run head-to-head A/B tests on different screenshot variations and gives you clear data on which set drives more installs.
- Apple App Store: The tool you want is 'Product Page Optimization'. You can create up to three alternate product pages—each with different screenshots, icons, and app previews—to see which combination performs best with your audience.
Ready to create stunning, high-converting visuals without the Figma headache? ScreenshotWhale gives you professional templates and a simple drag-and-drop editor to generate compliant, beautiful screenshots with vibrant colors for any device in minutes. Start designing for free today.
Article created using Outrank