
How to Screenshot on an iPad: The Ultimate Guide for App Developers
Learn how to screenshot on an iPad with our complete guide. Master every method from basic captures to advanced tips for any iPad model.
Taking a screenshot on an iPad is a fundamental skill, but for app developers, it's the first step in creating a powerful marketing asset. A great screenshot can be the difference between a download and a scroll-past on the App Store.
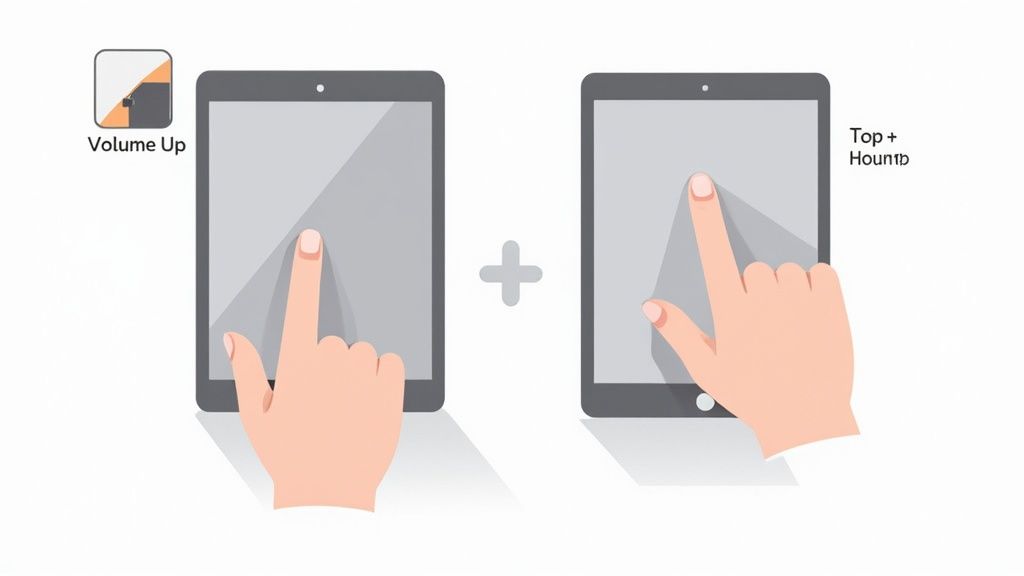
For iPads without a Home button, you’ll want to simultaneously press and release the Top button and the Volume Up button. Got an older model with a Home button? No problem. Just press and release the Top button and the Home button at the same time. You'll know it worked when a little thumbnail of the screenshot pops up in the corner.
Mastering the Basics of iPad Screenshots
The ability to snap a quick screenshot is more than a neat feature; it's an essential tool for showcasing your app's value on the iOS and Android stores. Since Apple introduced the iPad in 2010, capturing the perfect screen has become critical for developers marketing apps on everything from the iPad Air to the powerhouse iPad Pro.
Think about it. A user is browsing the App Store. Your app's screenshots are your visual pitch. They need to be vibrant, clear, and instantly communicate what your app does and why it's worth downloading. This is your chance to stop their thumb from scrolling. A clean, well-composed screenshot is your most efficient tool for driving conversions and boosting app store growth.
The Two Core Methods
Apple keeps the capture process simple, but the button combination you need depends entirely on your iPad's design.
- For iPads with a Home Button: This is the classic method for older models. The Top button + Home button combo is the standard here.
- For iPads without a Home Button: On modern iPad Pro, Air, and mini models, the new standard is the Top button + Volume Up button.
This process is designed to be lightning fast. You press the buttons, see the preview, and you're done.

That instant feedback is key. It lets you know the capture was successful so you can immediately decide if it's the right shot for your app store page. If you're into finding clever tech tricks, you might enjoy ShortGenius for quick tech tips.
Pro Tip: Don't press and hold the buttons. That's a common mistake that will either bring up Siri or the power off screen. All you need is a quick, sharp, simultaneous press and release to get the perfect screenshot every time.
To help you find the right combination for your device at a glance, here’s a handy table.
iPad Screenshot Button Combinations
Find the correct button combination for your iPad model at a glance.
| iPad Model Type | Button Combination to Press |
|---|---|
| iPad models with a Home button | Press and release the Top button and the Home button at the same time. |
| iPad models without a Home button | Press and release the Top button and the Volume Up button at the same time. |
Once you've done it a couple of times, it really becomes muscle memory.
For more helpful guides on getting the most out of your device, feel free to explore our other articles over on the ScreenshotWhale blog.
Capturing Full Webpages and Documents
Sometimes, a single screen view doesn't tell the whole story of your app. Imagine you have a productivity app with a long, scrollable dashboard or a news app with a beautiful article layout. A standard screenshot only grabs what's visible, failing to showcase the full depth of your user experience.
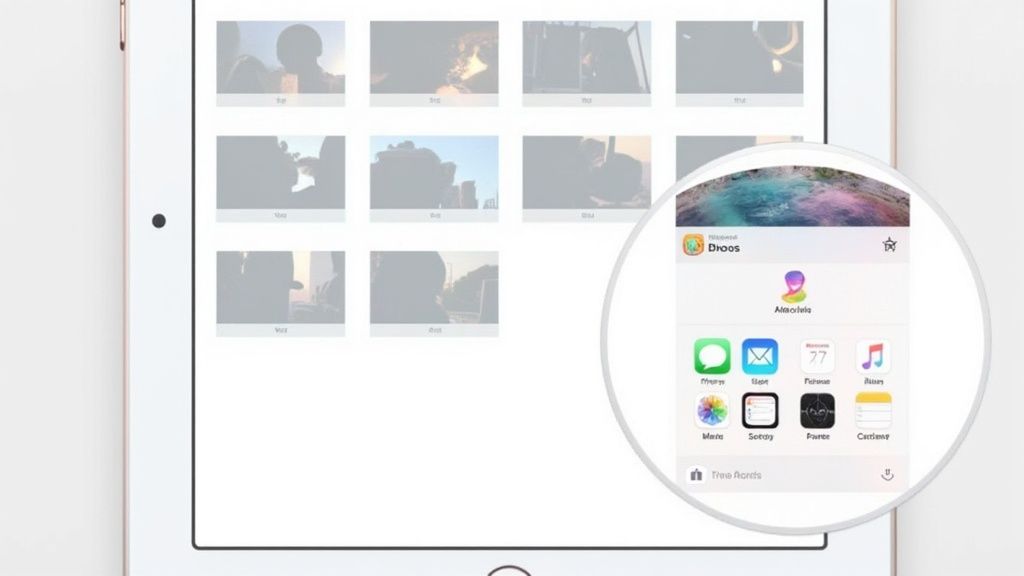
Fortunately, your iPad has a built in feature perfect for this. When you need to capture content that scrolls beyond the visible screen, take a regular screenshot, then immediately tap the thumbnail preview.
Inside the editor, you'll see two options: Screen and Full Page. Tap on Full Page, and your iPad instantly captures the entire scrollable area into one continuous document. This is an incredible tool for creating compelling marketing assets, showing off long features or user flows in a single, clean PDF that can be used in presentations or support documents.
As you can see, the interface shows you a preview of the entire page on the right, confirming that you're about to save the whole thing, not just one small part.
A single full page screenshot can demonstrate a complete user journey, from scrolling through a feed to completing a task, providing a much richer preview for potential users than a static screen ever could.
Going Beyond Static Images
While a full page capture is great, sometimes you need to show your app in action. That's where screen recording comes in. A short, dynamic video can demonstrate a key feature or the smooth performance of your UI far more effectively than a static image. You can add the screen recording button to your Control Center for quick access.
When to Use Each Method
Choosing the right capture method is key to creating high converting app store assets.
- Full Page Screenshot: Use this to showcase features with extensive content, like a settings menu, a long article, or a complete user profile. The final PDF is great for support docs and marketing materials.
- Screen Recording: This is essential for demonstrating dynamic features, animations, or the overall flow of your app. A short video can dramatically increase user understanding and conversions.
Mastering both techniques allows you to create a comprehensive and appealing visual package for your app on both the Android and iOS stores.
Editing Your Screenshots Like a Pro
A raw screenshot is rarely ready for the App Store. The magic happens in the editing process, where you turn a simple capture into a high converting marketing asset. A well edited screenshot with vibrant colors and clear callouts is essential for boosting app store growth.
The moment you tap that screenshot thumbnail, your iPad opens Instant Markup. This built in editor is your first stop for creating appealing imagery. For app store screenshots, you want to focus on clarity and visual appeal. Use the highlighter to draw attention to a key feature, or add text to explain a benefit.
For example, if you have a finance app, take a screenshot of the main dashboard. Then, use the shape tool to draw a neat box around the "Total Savings" feature and add a text overlay that says, "Track Your Goals Instantly!" This simple annotation turns a static image into a direct benefit statement.
Essential Markup Tools
The toolbar has everything you need to create efficient and high converting app store screenshots.
- Pen and Highlighter: Use these to circle key UI elements or underline important text. Stick to your app's brand colors for a cohesive look.
- Text Tool: Add short, benefit oriented captions. Use a clean, readable font. For instance, on a weather app screenshot, add "Get Hyperlocal Forecasts."
- Shape Tool: Neatly frame important parts of your app. Hold your finger down after drawing a shape, and it will snap into a perfect geometric form, giving your screenshots a professional polish.
- Magnifier: This is brilliant for zooming in on a small but powerful detail in your UI that users might otherwise miss.
The markup tools in iPadOS are a huge productivity boost for developers. In fact, more than 60% of iPad users are using screenshots for work, a testament to the power of visual communication.
When you're done, tapping "Done" lets you save the edited shot to Photos or Files. This flexibility is great for managing your asset creation workflow and keeping your camera roll from getting cluttered.
For more advanced designs, like adding device frames or creating a narrative across multiple screenshots, you'll want to use a dedicated screenshot editor. And if you're creating mockups, there are even tools for creating fake text screenshots.
By mastering these editing tools, every screenshot becomes an opportunity to communicate your app's value and drive more downloads.
Hands-Free and Alternative Screenshot Methods
Fumbling for physical buttons isn't always practical, especially when you need to capture a precise moment in your app's animation or user flow. Your iPad has powerful accessibility features that offer fantastic, flexible ways to snap a screenshot.
One of the best alternatives is AssistiveTouch. This feature puts a small, persistent virtual button on your screen that you can customize. Think of it as a dedicated shortcut for your most common actions. You can set it so a single tap, double tap, or long press instantly captures your screen, allowing you to keep one hand free to interact with your app.
Setting Up AssistiveTouch
Getting this going is a breeze.
- Head over to Settings > Accessibility > Touch.
- Tap on AssistiveTouch and flip the switch on.
- Under the "Custom Actions" section, assign "Screenshot" to either Single-Tap, Double-Tap, or Long Press. My personal preference is Double-Tap. It’s easy to do but hard to trigger by accident.
Using Siri for a Truly Hands-Free Experience
For moments when you can't touch the iPad at all, Siri is your best friend. As long as you have "Hey Siri" enabled, taking a screenshot is as simple as saying it out loud.
Just say, "Hey Siri, take a screenshot," and it'll immediately capture whatever's on your display.
This is a game changer for developers trying to capture a screen during a complex gesture or animation. It lets you interact with the app naturally and capture the perfect frame without having to reach for the buttons.
Which Screenshot Method Is Right for You?
With a few different options at your disposal, you can choose the one that best fits your workflow for creating app store assets.
This quick table breaks it down.
| Method | Best For | Setup Required? |
|---|---|---|
| Physical Buttons | The fastest, most direct method for everyday use. | No |
| AssistiveTouch | One handed use or capturing precise moments in an app. | Yes |
| Siri | Capturing screens during complex gestures or multitasking. | Yes |
Ultimately, the best method is the one that helps you create the most compelling screenshots for your app store page.
Both AssistiveTouch and Siri are incredibly robust alternatives to the standard button combo. They give you the power to capture your screen effortlessly, turning your iPad into an even more versatile tool for app marketing.
Putting Your Screenshots to Work
Taking a screenshot is just the start. The real value comes from transforming it into a high converting asset for the iOS and Android stores. Every screenshot you snap on your iPad automatically gets saved into your Photos app, in a dedicated "Screenshots" album. This keeps your raw captures organized and ready for editing.
Once you have a great screenshot, the iPad's built in Share Sheet is your command center for your workflow. With just a tap, you can AirDrop an image to your Mac for more advanced editing in a tool like Photoshop, or send it directly into an app like Slack to get feedback from your team.
Keeping Your Library Tidy
Not every screenshot will make the final cut for your app store page. To keep your workflow efficient, delete rejected captures as you go. This prevents your Photos app from becoming a digital junk drawer and makes it easier to find your best assets.
For your final, polished screenshots, think beyond the Photos app. When you tap "Done" after marking up an image, choose Save to Files. This lets you organize your final assets by app version or feature, creating a clean, professional library that’s ready for upload to App Store Connect or Google Play Console.
Taking screenshots has become a core part of how we work and communicate. In fact, surveys show that over 75% of iPad users snap screenshots multiple times a week for everything from work and school to social media. You can dive deeper into these Apple user statistics.
With such frequent use, having a system for organizing and sharing is crucial. It ensures your app store presence is always up to date with neat, appealing imagery that drives conversions. And if you’re sharing those captures online, you might want to learn a few tricks for crafting the perfect social media screenshot.
Got Questions About iPad Screenshots? We've Got Answers
Even though taking a screenshot on an iPad is straightforward, a few common questions always pop up. Let's clear up some of the most frequent ones.
First, where do the screenshots go? Your iPad automatically saves every single screenshot you take directly to your Photos app.
Inside Photos, you'll find a dedicated album named "Screenshots." This keeps all your captures neatly organized and separate from your personal photos, making it easy to find the raw images you need for your app store marketing.
What to Do When Screenshots Won't Work
So, what happens if your iPad suddenly stops taking screenshots? It's a common hiccup, but don't panic. It's almost always a simple fix.
- Is your case getting in the way? A bulky or poorly fitting case can stop you from pressing the buttons down all the way at the same time. Try taking it off and see if that solves it.
- Have you tried restarting it? The classic advice still works. A simple restart can clear out minor software glitches that might be blocking the screenshot function.
- Is your iPadOS up to date? Make sure you're running the latest version of the operating system. Apple often includes bug fixes in these updates that can resolve weird issues.
Another popular question is whether you can screenshot a video. Yes, you absolutely can.
When you take a screenshot while a video is playing, your iPad captures that exact frame as a still image. This is perfect for grabbing a key moment from your app's video trailer to use as a promotional image.
And don't forget, if your physical buttons are not cooperating, you've got solid backups. Both AssistiveTouch and Siri are fantastic alternatives for taking screenshots. These accessibility features are great workarounds and can even become your preferred method for capturing your app in action.