Guide to Launching an App on App Store
Discover how to launch your app on the App Store with essential steps and optimization tips.
Before you even consider clicking that “Publish” button, there's vital groundwork that must be laid. Uploading your app to the App Store isn't merely about coding; it involves setting up your developer account, ensuring your digital credentials are ready, and adhering to Apple's guidelines.
Your Pre-Launch Must-Do List
Consider this phase as constructing a solid foundation. Without it, your app remains just a file on your computer, not a product in the App Store. A seamless launch begins long before your initial build is uploaded. By handling these account, legal, and technical tasks now, you’ll avoid major headaches later on.
And bear in mind, this all occurs after you've navigated through the complete mobile app development journey, from concept to fully tested build.
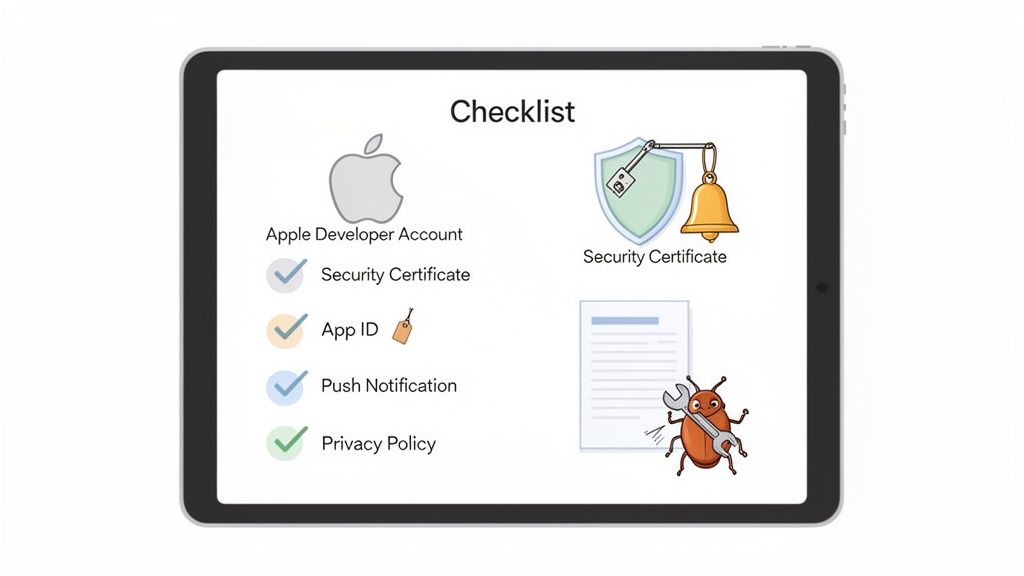
Join the Apple Developer Program
Your first step: secure your spot in the Apple Developer Program. There's no alternative route.
With a yearly cost of $99, this membership grants access to vital tools:
- App Store Connect: This is your central hub where you manage app listings, metadata, pricing, and submissions.
- Beta Testing Tools: Access TestFlight, allowing you to bring in up to 10,000 testers for pre-launch trials.
- Certificates, Identifiers, and Profiles: The digital proofs that authenticate your identity and secure your app's connection to your developer account.
- Advanced App Features: Integrate capabilities like Push Notifications, Apple Pay, or iCloud with your membership.
Enrolling is straightforward, but don't procrastinate. An Apple ID with two-factor authentication is required, and validation could take a few days. Do this early on.
This overview illustrates how account, legal, and technical factors intertwine.
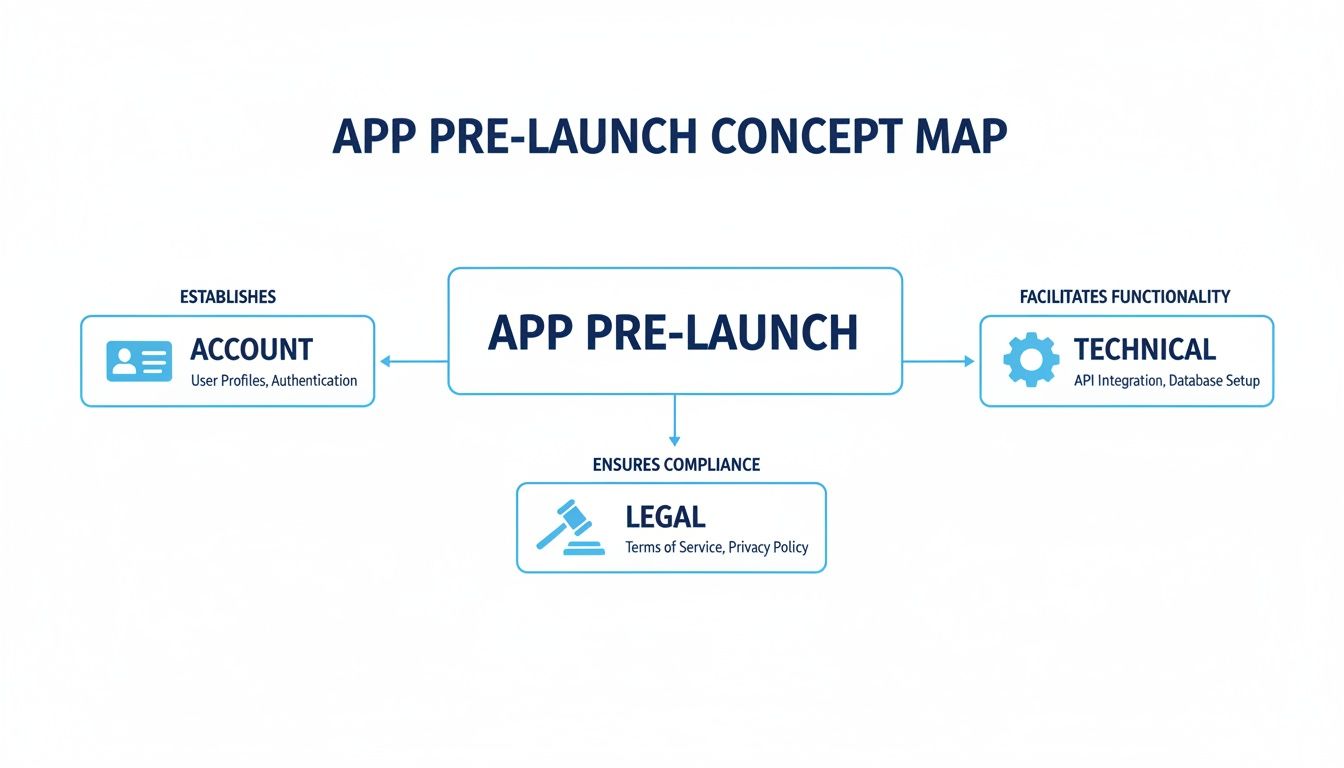
It's a blend of administrative duties and technical preparation for a successful submission.
Create Your Technical Identifications
Once your developer account is operational, it's time to generate the technical documents that serve as your app's digital ID. These elements work collectively to validate your code, identify your app, and enable services.
It's all managed through the "Certificates, Identifiers & Profiles" section of the developer portal:
- App ID (Bundle Identifier): Your unique app fingerprint, formatted like
com.yourcompany.yourappname. Choose wisely; it can't be changed once your app is live. - Certificates: Your developer identity card. A development certificate is needed for personal device testing and a distribution certificate for App Store submission.
- Provisioning Profiles: These link your App ID and certificates, specifying which devices can run the app and what features it can utilize.
Key Insight: Treat these credentials as your app's passport. Without the proper App ID, certificates, and profiles, your app can't be securely signed, uploaded, or distributed through the App Store.
Establish Legal and Strategic Foundations
Avoid letting technical requirements overshadow legal and strategic factors. Ignoring Apple’s standards or missing legal documents can lead to quick rejection.
A privacy policy is imperative. It needs to be publicly accessible and linked from your App Store listing. Clearly explain the data your app collects and its usage. Apps targeted at children face even stricter privacy rules.
Finally, immerse yourself in Apple’s Human Interface Guidelines. They're not just recommendations; they define iOS’s visual and functional essence. An app that feels out of place or confusing is likely to be rejected. Attention to these details is essential for a smooth review.
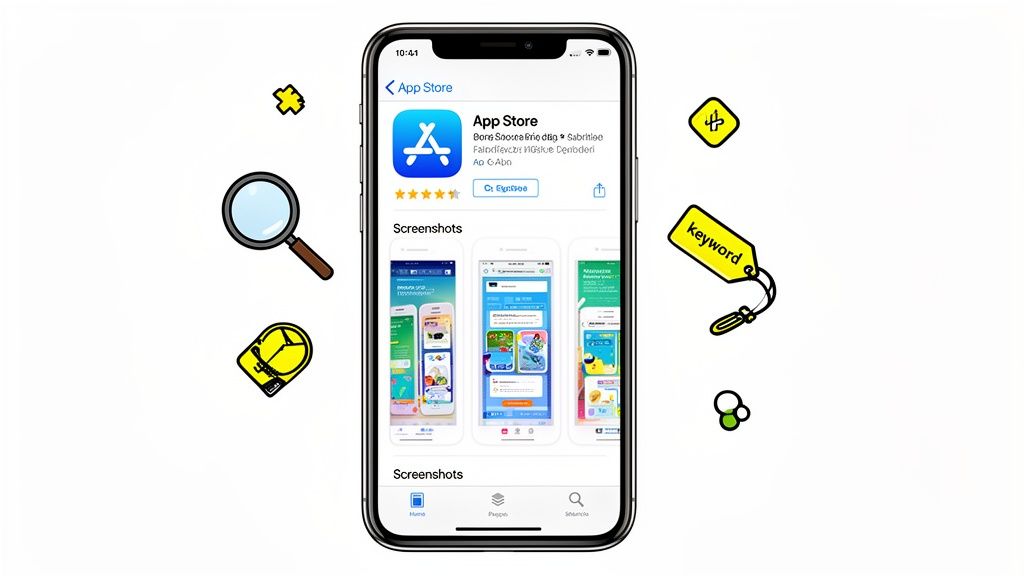
Creating a Compelling App Store Listing
Your App Store page acts as your digital storefront. This is the initial impression, and it’s essential it’s strong. Before anyone clicks to download, they’re evaluating your app based on its name, screenshots, and description. Effective listings don’t just highlight features; they offer an experience that prospects will enhance their lives.
Getting this right is crucial not just for cosmetics, but for survival. The competition is fierce, with a predicted 38 billion annual downloads by 2026, and top performers take the majority. The remaining 884,932 publishers face a tough challenge. 38% had their app rejected last year, often due to metadata errors that hampered their launch.
This is where App Store Optimization (ASO) becomes essential, driving up to 65-70% of organic app installs. Here’s how to achieve success.
Perfecting Your App Name and Subtitle
The first words potential users read are your app’s name and subtitle. Together, they must capture interest and convey function quickly.
Your App Name should be catchy and simple to spell. While 30 characters are available, shorter names usually work better while conveying your app's purpose. For instance, names like “Calm” or “Duolingo” not only brand themselves well, but also imply their functionalities.
A Subtitle serves as a 30-character pitch, providing prime space for high-value keywords and directly conveying your app’s main benefit. So instead of “Photo Editor,” using “Pro Photo & Video Editor” captures more search traffic and indicates a broader range of functions.
These elements are fundamental for discoverability. A powerful name and subtitle can spur app store growth the moment you publish.
Creating High-Impact Screenshots
Realistically, your screenshots might be the most critical aspect of your product page. Users are visual creatures. They will likely browse your screenshots before considering your description. These visuals should do more than showcase your UI; they should narrate a compelling story about the value you offer.
Your initial few screenshots should act as a brief guide, focusing on your app’s foremost “wow” moments. They should instantly answer: “What problem does this solve for me?”
Here are some actionable tips to enhance visuals:
- Highlight Benefits, Not Just Features: Show outcomes, not just actions. Instead of displaying a button, exhibit what occurs once pressed. Rather than a blank calendar, present a full week with captions like “Plan Your Week Instantly.”
- Leverage Clear, Bold Captions: Every screenshot needs a brief, impactful caption at the top with a readable, large font describing the main advantage.
- Create a Visual Storyline: Organize your screenshots logically. Start with your primary value and follow with secondary features, presenting the full experience.
- Utilize Vibrant Colors and Ensure Brand Cohesion: Your visuals should stand out. Use your brand’s colors and high-quality device mockups for a polished, professional look. Tools like ScreenshotWhale can help apply polished templates promptly, ensuring alignment across Android and iOS platforms.
Pro Tip: Your app icon is equally vital. It appears everywhere—from search results to user home screens. Keep it simple, distinguishable, and ensure it looks good at all scales. Avoid text unless it’s part of your logo.
Crafting Engaging Descriptions and Optimizing Keywords
Your app’s metadata, the combination of text and visual assets on your product page, blends art and science. Here's a quick breakdown of the essential elements you need:
Crucial Metadata for App Store Listing
| Metadata Element | Character Limit | ASO Best Practice |
|---|---|---|
| App Name | 30 characters | Memorable, innovative, suggesting the app's function. Prioritize your most important keyword. |
| Subtitle | 30 characters | Your one-liner pitch. Use top keywords to define your app's primary benefit. |
| Description | 4000 characters | Begin with an engaging hook. Use digestible paragraphs and lists. Integrate keywords seamlessly. |
| Keyword Field | 100 characters | Utilize all characters. Separate by commas without spaces. Include competitor terms and user queries. |
| App Icon | 1024x1024 px | Uncomplicated, noticeable, and devoid of text (unless it’s your trademark). Must stand out in search outcomes. |
| Screenshots | Up to 10 images | Craft a visual narrative. Emphasize benefits using bold text. The initial 2-3 are crucial. |
| App Preview | Up to 3 videos | Brief (15-30 sec) clips showing the app in action. Given the autoplay is muted, visuals are crucial. |
Nailing these components is pivotal. They collaboratively craft a cohesive narrative that attracts relevant users and persuades them to download.
While some users quickly skim your complete description, Apple’s algorithm analyzes every word. This is the opportunity to expand on features and strategically plant keywords.
Divide the text into brief, approachable paragraphs. Bullet points are advantageous here; they let you list significant features and benefits, making information easily digestible. Always start with a compelling introduction before diving deeper.
Finally, consider the keyword field. It’s your secret weapon for discovery. With 100 characters (separated by commas, no spaces), fill it with potential search terms a user might input to find an app like yours. Think from your target audience's perspective. What challenges are they solving? Include competitor brands, problem-focused queries (“learn Spanish”), and feature-centered terms (“language lessons”). These keywords, coupled with your name and subtitle, form the core of a robust ASO plan.
Now that you have your compelling app description and standout screenshots ready, it’s time to shift towards technical tasks for submission. We need to consolidate your app's code into a final build and send it to Apple.
For many, this phase seems intimidating, but it’s fairly straightforward. It's like packaging your finished product, sealing the box, and sending it off. Let’s explore the correct approach using Xcode and App Store Connect.
Fine-Tuning Your Xcode Project Settings
Before generating your final build, check some critical settings within your Xcode project. Ensuring these are correct from the start is vital for seamless uploads and helps prevent frustrating validation errors.
Firstly, access your project settings and click the "Signing & Capabilities" tab. It’s where those certificates and profiles from earlier come into play. Ensure "Automatically manage signing" is enabled. This option allows Xcode to handle the complex task of selecting the appropriate distribution certificate and provisioning profile, reducing errors significantly.
Next, adjust your app’s versioning correctly. A minor detail, but essential for both your initial release and subsequent updates.
- Version Number (Marketing Version): This is what users see on the App Store, such as 1.0, 1.1, or 2.0. It follows familiar software versioning practices and must be updated with each new release.
- Build Number: Consider this an internal counter. Every build uploaded to App Store Connect must have a distinct number. A typical method is simply to increment: 1, 2, 3, etc. Even if you submit five different builds for version 1.0, they should be sequential: build 1, build 2, and so forth.
Overlooking the build number is a common reason for upload failures. Ensure it’s updated each time.
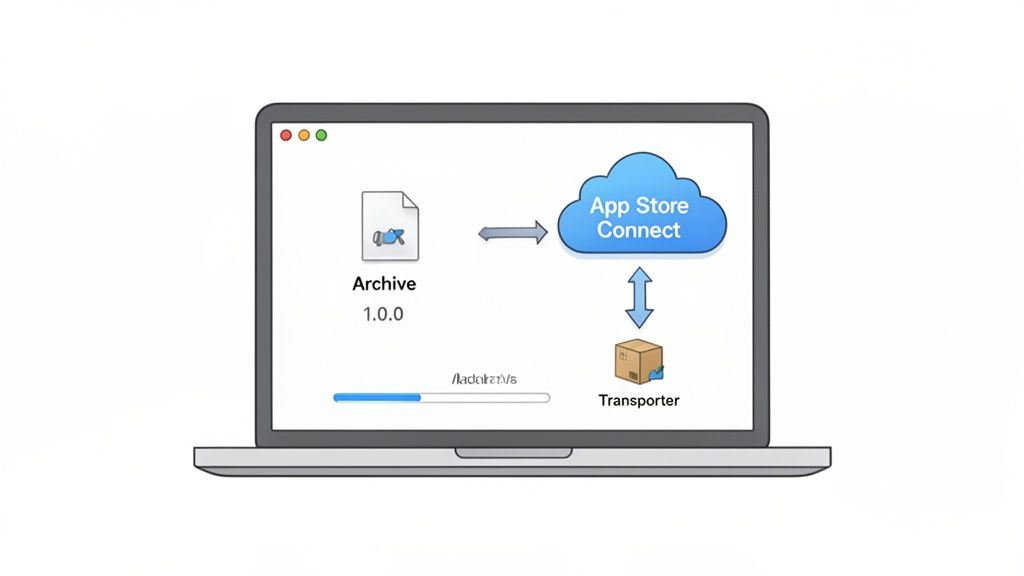
Archiving and Deploying the Build
When your settings are ready, you can generate the archive. An archive is the compiled version of your app, bundled with its resources, suitable for the App Store.
Begin by checking your build destination in Xcode, setting it to "Any iOS Device (arm64)". This configures Xcode to create a generic build compatible with all modern devices, rather than one specific to the iPhone connected to your Mac.
Navigate from Xcode’s top menu to Product > Archive. This initiates the build process. If successful, the Organizer window should present your new archive at the top of the list.
There are a couple of paths to deliver it to Apple:
- Distribute App: This button initiates the upload to App Store Connect. Xcode runs several checks for common issues, and if everything is in order, uploads commence.
- Validate App: This is a recommended step before distribution. It conducts the same checks without immediately uploading, offering a chance to correct any errors before committing, potentially saving you time.
Key Insight: Always utilize the "Validate App" option first. It’s akin to proofreading an email before sending. Catching minor errors here prevents the frustrating cycle of upload failures and rejections.
Once validated, proceed to “Distribute App” following the prompts. Processing times on Apple's end can range from minutes to an hour post-upload. Monitor its status in App Store Connect's “TestFlight” tab. Once processed, attach it to your app version for review submission.
Navigating the App Store Evaluation Process
With “Submit for Review” selected in App Store Connect, congratulations are in order! A significant step forward, yet the anticipation begins. Your app now joins Apple’s review queue, evaluated by an actual team analyzing its adherence to high standards.
This scope isn’t limited to identifying bugs; it examines safety, quality, and whether your app delivers an excellent iOS experience.
The App Store is bustling. Just last week, 14,117 new apps debuted, averaging 2,215 daily. In such a landscape, rejections are common. Approximately 38% faced rejection last year due to guideline breaches. For deeper insights, explore App Store publishing stats on 42matters.com.
Sidestepping Common Rejection Traps
A proactive approach to avoiding rejection involves anticipating the typical red flags. Think like a reviewer. They’ve encountered everything and hold a list of immediate disqualifiers. Tackling these pre-submission spares you future complications.
Common pitfalls include:
- Broken Features: Non-functional links, unresponsive buttons, or failing logins lead to instant rejection. Test thoroughly. Ensure every feature works as intended.
- Misleading Metadata: Ensure your screenshots, app name, and description accurately represent the current version of your app. Don’t flaunt future features. Present what users will have access to immediately.
- Inadequate Utility: Apple maintains a high standard for ecosystem value. Apps resembling simple web wrappers or hastily created projects might be flagged for lacking substantial functionality.
- Misuse of In-App Purchases (IAP): Selling digital content or subscriptions necessitates Apple’s IAP. Sneaking in alternative links, like Stripe, to avoid fees is typically detected and rejected.
Providing Clear Reviewer Instructions
The “Notes for Reviewer” field in App Store Connect is immensely beneficial. Always fill this in. It’s your opportunity to communicate directly with the reviewer.
If your app needs a login, provide a functional demo account. Supply a username and password, ensuring access to all features without encountering obstacles or inaccessible components.
Contextual Scenario: If your app synchronizes with proprietary hardware unavailable to reviewers, provide alternative methods. For instance, write: “This app pairs with our unique heart rate monitor. Since reviewers might not have one, tap the ‘Demo Mode’ button at login to access simulated workout data.” Issue resolved.
Recognizing the Human Aspect of Reviews
Ultimately, recognize the person reviewing your app. They lack knowledge of your vision or the effort invested. What they see is the build you presented.
Your app should be intuitive, polished, and fully operational from the very beginning. If handling user data, be meticulously transparent. Have a readily available, easy-to-understand privacy policy. Request permissions only when necessary, and provide clear explanations.
Paying attention to these elements heightens your chances of a swift approval. When you aim to publish an app to the app store, a streamlined review is the optimal beginning.
Launching Your App and Boosting Its Success
Having cleared the review, your app is on the verge of launch—congratulations! This milestone is significant, yet this moment isn’t the conclusion. The real journey is just beginning. Pressing the release button is merely the starting signal for engaging users and establishing a lasting brand. The subsequent actions delineate thriving apps from those fading into obscurity.
Post-launch, your role evolves from developer to strategist focused on growth. Understanding how to manage your launch and optimize those initial crucial days and weeks sets the foundation for sustained success.
Maximizing Your Launch Alternatives
App Store Connect offers significant control over your app’s launch. There’s no need to go live immediately upon approval, and you shouldn’t if a marketing plan is in play. This adaptability provides a tactical edge.
Your options are:
- Immediate Release: Deploy your app instantly upon Apple’s green light. Suitable for small apps or updates not requiring a coordinated marketing initiative.
- Scheduled Release: The preferred choice for comprehensive launches. Choose a future date and time for automatic release on the App Store, aligning with press statements, social media promotions, and influencer partnerships.
- Manual Release: This keeps your app in an “approved, awaiting your decision” status. You can login and initiate the release anytime, ideal for time-critical launches demanding precision.
This scheduled approach permits the building of anticipation and ensures all marketing efforts converge, making a significant impact. Post-launch, shift focus to executing proven mobile app marketing campaigns to sustain momentum.
Tracking Your Analytics in App Store Connect
Once live, App Store Connect Analytics becomes indispensable. This platform provides direct insights into how users discover and interact with your app. Monitoring these metrics is more than beneficial—it’s the foundation for informed decision-making.
From day one, crucial metrics to monitor include:
- Impressions: How often your app icon is visible on the App Store for over a second. It’s your primary visibility gauge.
- Product Page Engagement: How many click to view the complete app listing. Indicates whether your icon and name effectively draw interest.
- Conversion Rate: Critical. Represents the percentage of individuals downloading post-page visit. Low figures indicate a need for more compelling screenshots or descriptions.
- Download Volume: Total count of initial installs.
These statistics narrate an insightful story. High impressions with few page views suggest an unappealing icon or name. High page views, yet a low conversion rate, often points to issues with screenshots and previews.
Iterating on Feedback and Improvement
Your early adopters are invaluable. Their reviews and ratings serve as not only public testimony but also direct product insights. Read every single review, positives and negatives alike. Identify trends in bug mentions, feature requests, or common confusion.
Takeaway: Reviews aren’t just meant for potential users; they offer a conduit to communicate with your audience. Use this feedback to inform your product roadmap and prioritize updates crucial for your active users.
This feedback cycle is what maintains engagement. When users see their suggestions implemented, they feel acknowledged and transition from users to advocates. For a thorough exploration, check the comprehensive mobile app marketing strategies.
The financial potential is extensive. Since 2008, developers have collectively earned more than $550 billion on the App Store. However, this revenue isn’t equally distributed. Of the 1,916,393 apps available, only 4.59% are paid; the rest 95.41% are free, relying on engaging screenshots to drive downloads. We understand that apps with outstanding visuals can experience conversion increases of 20-30%. More on this in this TechCrunch feature.
This is why keeping your product page current is essential. When deploying a major update featuring a new UI or additional features, ensure your screenshots reflect these changes. An outdated page indicates an abandoned app. Tools like ScreenshotWhale streamline the workflow, enabling quick and visually cohesive updates with ease, ensuring your app consistently shines.
Embarking on the app store submission for the first or even multiple times raises common questions. Here, we address the frequently encountered queries to save you time and stress.
How Long Does the App Store Evaluation Really Take?
The answer isn’t definitive—it varies.
Apple states most reviews complete within 24 to 48 hours, often accurate. However, certain factors can extend this timeline. Submitting a new app from an untested account could attract closer inspection, extending review duration.
Conversely, minor updates to an established app might clear in a few hours. Also, submissions around major holidays might result in longer queues.
Expediting the process:
- Leave comprehensive reviewer notes. If an app requires login or includes complex features, supply a demo account and explain functionality. Facilitate their evaluation.
- Ensure seamless app execution. Avoid delays from buggy apps or those crashing upon launch.
What’s the Financial Outlay?
The entry barrier is straightforward. For Apple, it's a $99 annual fee for the Apple Developer Program. This fee is mandatory, renewed yearly to maintain live apps. Google Play Console charges a one-time $25 fee.
However, those fees are just the entry cost. Additional expenses include:
- Third-party services or APIs: Many apps utilize external services like analytics, storage, or notifications, each with subscription costs.
- Promotional and advertising efforts: Driving app downloads requires ads, social media, or other outreach investments.
- Ongoing support: Remember the long-term costs, including server maintenance, bug repairs, and updates.
The initial developer fee is just the admission cost. The true investment lies in developing, maintaining, and promoting your app post-launch.
Simultaneous Launch on Both Platforms?
Indeed. Combined launches on the Apple App Store and Google Play Store often capture a wider audience simultaneously.
Note, it's not identical processes. Even with cross-platform frameworks, each store's submission differs significantly. They each feature unique guidelines, metadata needs, and independent review teams. You’ll need two distinct product pages, specific screenshots for each platform's aspect ratios, and managing two workflows. When launching to the app store, be prepared to customize your submission per environment.
If Rejected, What Next?
Firstly, remain calm. Rejection is almost a rite of passage, impacting indies and industry giants alike. It’s an obstacle, not the end.
Apple always specifies your app's violation. Your task is to carefully review and understand the issue. Avoid minor tweaks; address the real reason for rejection.
If their feedback seems vague, use the Resolution Center for clarification. Treat rejection as a roadblock, not a dead end. Correct, learn, and resubmit.
Establishing an attractive, effective App Store presence is vital for success. With ScreenshotWhale, you can craft appealing, brand-aligned screenshots quickly, ensuring your app leaves a memorable impression. Simplify design tasks and boost user conversion today.