How to Publish an App on Google Play: A Complete Guide
Learn how to publish app on google play with this step-by-step guide. From technical prep to a high-converting store listing, launch confidently.
Welcome to the complete guide on getting your app live on Google Play. Navigating the Play Store for the first time can feel a little intimidating, but the entire journey really boils down to three clear stages: setting up your account, preparing the app for release, and crafting a store listing that actually gets downloads.
This is your roadmap to a successful launch, built from real-world experience.
Your Blueprint for a Successful Google Play Launch
Launching an app is so much more than just a technical checklist; it is a strategic process. Think of this guide as your co-pilot, here to help you steer clear of the common mistakes that trip up even seasoned developers and get your app into the hands of millions.
To really build momentum from day one, it helps to understand the bigger picture. Applying effective product launch strategies is crucial for grabbing that initial user base and getting the flywheel spinning. A great release always comes down to careful planning.
This is the high-level view of the journey we are about to take, from the initial setup all the way to a live, production-ready app.
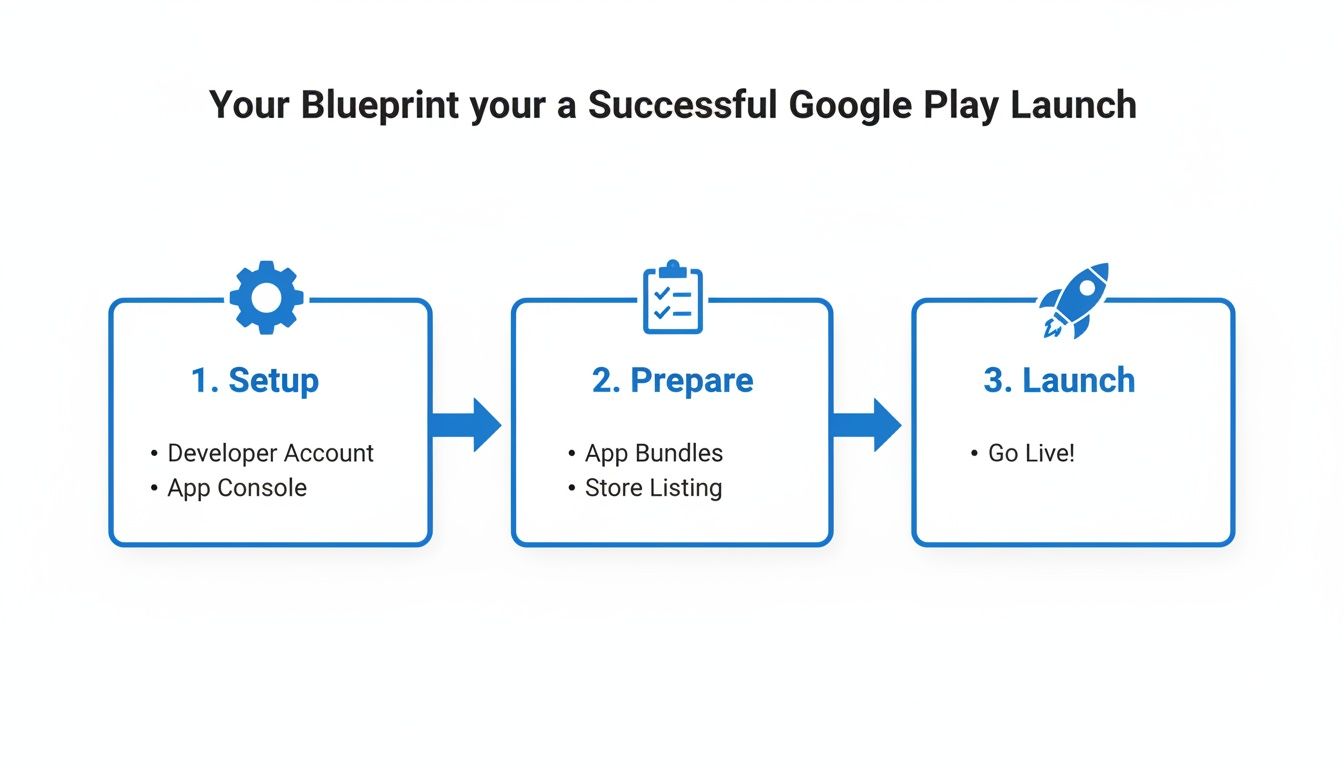
Each of these steps builds on the last, ensuring you move smoothly from code to a live app without hitting any major roadblocks.
Standing Out in a Crowded Market
Let's be real: publishing on Google Play means stepping into an incredibly crowded arena. We are talking about 1,728 new apps dropping every single day, feeding a frenzy of over 110 billion downloads in a quarter.
With nearly 1.9 million non-gaming apps already competing for eyeballs, just being on the store is not enough. Visibility is everything. This is why having sharp, ASO-optimized visuals is not a "nice-to-have" it is a requirement for survival. Your app's features need to jump off the page, and the right presentation makes all the difference for app store growth.
A successful launch is not just about making your app available. It is about making it discoverable, desirable, and downloadable from day one. Your store listing is the final, critical step in converting interest into installs.
We will walk through everything you need, from the technical must-haves to the art of creating a store presence that converts. Specifically, we will cover:
- Setting up your developer account and getting your app bundle ready for prime time.
- Crafting a store listing that turns casual browsers into loyal users.
- Managing your testing tracks and rolling out your app like a pro.
Preparing Your App for a Flawless Submission
Before you even touch the Google Play Console, there is some critical prep work to do. Getting this right is the difference between a smooth launch and getting stuck in a frustrating cycle of rejections. A solid submission starts here, with the technical foundation of your app.
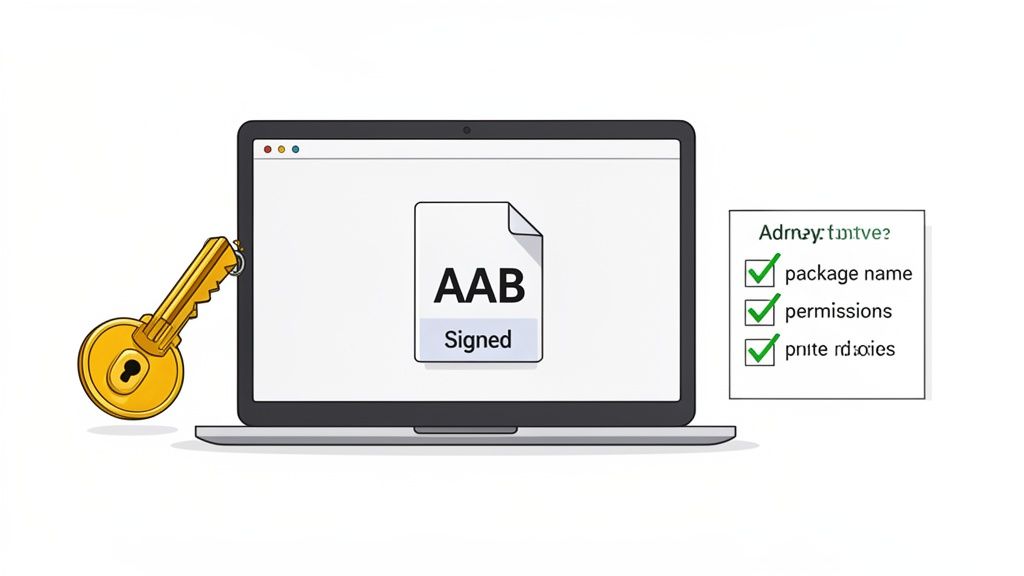
First things first: packaging. Since 2021, Google has required all new apps to be submitted as an Android App Bundle (AAB). This is not just another hoop to jump through; it is a massive win for you and your users. The AAB contains all your app's code and resources, but it lets Google Play do the heavy lifting of creating and serving optimized APKs for each user's specific device.
The result? Your users get faster downloads and smaller app sizes, which is a big deal for user satisfaction and retention.
Securing Your App with a Digital Signature
Every single app on Google Play has to be digitally signed with a certificate that you, and only you, control. This signature is basically your app's fingerprint. It proves you are the author and guarantees that your updates are legitimate. This is all managed through a keystore, which is a file holding your private upload key.
Let me be crystal clear: your keystore is the master key to your app's entire future. If you lose it, you can never publish an update to your app again. Seriously. You would be forced to publish a completely new app, starting from scratch and losing all your users and reviews.
Critical Takeaway: Back up your keystore file and its passwords. Then back it up again somewhere else. Put it on a secure cloud drive, an external hard drive, anywhere safe. Losing this is one of the most devastating and easily preventable mistakes a developer can make.
When you opt into Play App Signing (which is required), Google uses this upload key to verify it's you, then re-signs the final APKs with its own key before delivering them to users. It is an extra layer of security that protects you and your users.
Configuring Your App's Manifest
Think of your AndroidManifest.xml file as your app's ID card. It tells the Android system and Google Play everything they need to know before even running your code. Nailing these details is non-negotiable.
Here’s a quick checklist of the absolute must-haves:
- Unique Package Name: This is your app's permanent ID on the store (e.g.,
com.yourcompany.yourapp). It has to be totally unique, and once you publish, you cannot change it. Choose it carefully. - Version Code and Name: The
versionCodeis just an integer that you must increase with every release. It is how the system knows it is an update. TheversionNameis what your users see, like "1.0.1". - Target API Level: Google constantly raises the bar here to make sure apps are secure and performant. New apps and updates have to target a recent Android API level. As of late 2025, for example, apps will need to target at least API level 35.
- Permissions: Be honest and transparent. Declare every permission your app needs, like camera or location access, but only request what is absolutely essential for your app to function.
Beyond the code, start thinking about your store presence now. While you will upload screenshots later in the process, having a professionally designed feature graphic ready can make a huge difference, especially if you hope to get featured by Google. Getting these assets sorted out early on means that when you finally get to the point of figuring out how to publish your app on Google Play, the technical side is already buttoned up and ready to go.
Crafting a High-Converting Google Play Store Listing
With all the technical prep work behind you, it is time to build your app's digital storefront. This is where your code and assets transform into a product people actually want to download. Think of your store listing as your most critical marketing asset it is the final step between a curious visitor and a new user.
First impressions happen in a blink. Someone browsing the Play Store will make a snap judgment based almost entirely on your app icon, title, and the first few screenshots they see. This is where solid App Store Optimization (ASO) becomes your best friend, driving both visibility and conversions.
The Core Elements of Your Store Listing
A great listing is a careful mix of compelling text and eye-catching visuals, each playing a specific part in telling your app's story. You are not just listing features; you are selling a solution, an experience, or just plain fun. Getting these details right from the start is non-negotiable.
Here is what you will need to pull together:
- App Title: Make it memorable and, if you can, work in your main keyword. You only get 30 characters, so choose them wisely.
- Short Description: This is your elevator pitch. A snappy, one-sentence hook to grab attention. With only 80 characters, it needs to be powerful.
- Long Description: Here’s your chance to really sell it. Dive into the features, explain the benefits, and show what makes your app stand out. You have up to 4,000 characters to make your case.
- Visual Assets: This covers your app icon, feature graphic, and, most importantly, your screenshots.
In the crowded Google Play arena, with over 2.15 million apps competing for eyeballs, building trust is key. Google's standards are getting tougher, too a staggering 46% removal rate of apps in a single year shows a clear pivot toward quality and compliance. To get a piece of the projected 143 billion downloads for 2026, your listing needs to be professional, transparent, and perfectly aligned with Google's guidelines from day one.
Creating Efficient and High-Converting App Store Screenshots
Let's be honest: your screenshots are the most persuasive part of your entire listing. Most users will skim the description, but almost everyone scrolls through the images. This is your moment to show off your app's UI and hammer home its core value.
Well-designed, vibrant screenshots can send your conversion rates through the roof. Do not just upload raw captures of your app. Instead, build a visual story. Add short, punchy captions, use pointers to highlight key features, and frame the UI inside slick device mockups to give it a polished, professional feel.
Take a look at this example. It immediately tells a story.
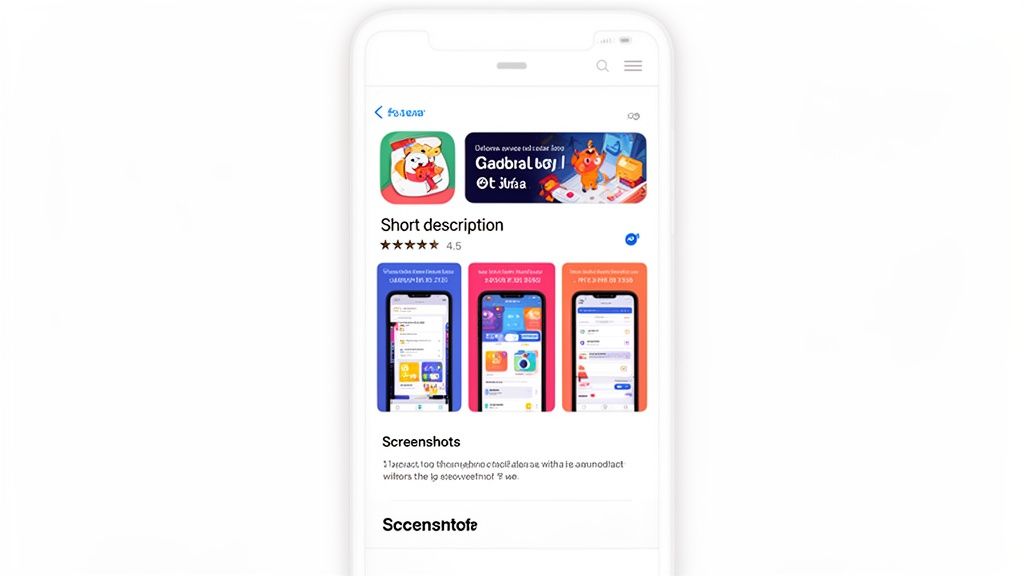
The vibrant colors, clear text callouts, and clean device frame work together to communicate the app's purpose and appeal instantly.
A great screenshot does not just show what your app looks like; it shows what your app does for the user. Focus on benefits, not just features.
Trying to create these assets by hand is a massive time sink, especially when you need to support different screen sizes for phones and tablets for both Android and iOS stores. Using a dedicated screenshot tool can save you hours of tedious work. For example, a site editor might let you select a vibrant background gradient, choose a clean font for your captions, and apply a professional device frame like a Google Pixel, all within a few clicks. This allows you to generate a full set of on-brand, high-converting visuals in just a few minutes, boosting your app store growth.
The Power of Visual Storytelling
Visuals are the lifeblood of your store listing. They create the first impression and are often the deciding factor for a download. Here’s a quick overview of the essential assets you will need.
| Essential Visual Assets for Your Google Play Listing |
| :--- | :--- | :--- | :--- |
| Asset Type | Required Dimensions | Format | Purpose and Best Practices |
| App Icon | 512 x 512 pixels | 32-bit PNG (with alpha) | Your app's brand identity. Keep it simple, recognizable, and free of text. It needs to look sharp at all sizes. |
| Feature Graphic | 1024 x 500 pixels | JPEG or 24-bit PNG | The banner at the top of your listing. Use it to showcase your brand, announce a promotion, or create an emotional connection. |
| Screenshots | Varies by device (phone, tablet, etc.) | JPEG or PNG | The visual tour of your app. Use captions to highlight benefits and show the app in action. You need at least 2, but 5-7 is ideal. |
| Promo Video (Optional) | YouTube URL | N/A (YouTube link) | A highly effective way to demonstrate your app's flow and energy. Keep it short (30-60 seconds) and engaging from the very first frame. |
Getting these visuals right is not just about looking good it is about communicating value quickly and effectively, which is the key to turning browsers into loyal users and increasing conversions.
Reaching a Global Audience with Localization
If you are launching your app in multiple countries, just translating your text is only half the battle. True localization means adapting your entire store listing including your visual assets to connect with different cultures.
What resonates in one market might fall flat in another. Cultural norms, color psychology, and even the people shown in your screenshots can have a huge impact on your conversion rates.
Here are a few actionable insights to get it right:
- Translate Screenshot Captions: Use a reliable translation service to adapt your text callouts for different languages. Do not rely solely on automated tools for this. A screenshot editor can make this efficient by letting you clone a design set and simply replace the text for each language.
- Adapt Imagery: If your app features people, consider swapping out models to reflect the local demographic. It is a small touch that builds a big connection.
- Localize Formats: Make sure any prices, dates, or numbers shown in your screenshots use the local format. This builds trust and makes the app feel native.
By localizing your visuals, you are sending a clear message to international users: this app was made for you. It is a thoughtful approach that can seriously boost your app's growth in global markets.
Testing Your App Before It Goes Live
Pushing your app straight to the public without testing is a surefire way to get a flood of one-star reviews. I have seen it happen. You absolutely have to catch those device-specific bugs and awkward user flows before the whole world does. Thankfully, the Google Play Console gives you a structured way to do this with its testing tracks.
Think of it as a series of gates. You start with a tiny, trusted group, find the obvious problems, fix them, and then open the next gate to a slightly larger audience. This step-by-step process is non-negotiable if you want to launch a stable, well-received app.

Understanding the Different Testing Tracks
The Play Console breaks down testing into a few key environments, and knowing which one to use when is critical.
- Internal Testing: This is your inner circle. It is the private sandbox for your immediate team devs, QA, maybe a project manager. Builds show up almost instantly, so it is perfect for quick sanity checks and verifying bug fixes. You can add up to 100 testers with a simple shared link.
- Closed Testing: Here, you widen the circle but keep it invite-only. This is where you bring in early adopters or a specific group of beta users. You invite them by email, and this is your first chance to get feedback from people who are not on your payroll.
- Open Testing: This is your public beta. Anyone on the Play Store can find your app listing and opt-in to test it. It is a fantastic way to stress-test your app on a huge variety of devices and see how it holds up at scale before the official launch.
The New Mandatory Testing Rule from Google
The Google Play Store is a crowded place. With over 2.06 million apps available to 2.5 billion users, Google is cracking down hard on low-quality submissions. In one year, they removed a staggering 46% of apps to clean things up.
To enforce a higher standard, they rolled out a new requirement for all developers with new personal accounts.
Before you can hit "Publish," you must run a closed test with at least 20 testers who have opted in for 14 consecutive days.
There is no way around this. It forces you to actually test your app, gather real feedback, and fix the most glaring issues before going live. It is a good thing, even if it feels like an extra hoop to jump through.
How to Find and Manage 20 Testers
Getting 20 people to test your app sounds tough, but it is more about being resourceful than anything else. Your first stop should always be your own network friends, family, and coworkers are usually happy to help.
If you need to cast a wider net, try these tactics:
- Social Media: Post about your beta on LinkedIn, Twitter, or in relevant Facebook groups for tech enthusiasts.
- Online Communities: Subreddits like
r/AndroidAppDevorr/alphaandbetauserscan be goldmines. Just be clear about what your app does and the kind of feedback you are looking for. - Beta Testing Platforms: There are entire websites dedicated to connecting developers with testers.
Once you have your group, give them a clear way to report bugs. A private Discord or Slack channel works great for real-time chat, while a simple Google Form is perfect for collecting structured feedback.
Promoting Your Build from Testing to Production
Once you have squashed the bugs and feel confident your app is stable, it is time to think about the full release. The Play Console lets you "promote" a build directly from one track to another. For example, that solid build from your Closed track can be moved straight to Production without re-uploading anything.
But whatever you do, do not release to 100% of users all at once. The same principles of deploying to production safely apply here. This is where the Staged Rollout feature becomes your best friend.
A staged rollout lets you release your app to a small slice of users first say, 1% or 5%. You can then watch your crash reports in the Play Console like a hawk. If everything looks good, you can dial up the percentage. If a critical bug slips through, you have contained the damage to a tiny portion of your audience. This controlled, gradual release is the final, crucial step to a professional, low-risk launch.
You have navigated the technical hurdles and designed some killer creative assets. Now, you are on the home stretch. This last phase is all about dotting the i's and crossing the t's in the Play Console the settings that define who sees your app, where they see it, and the legal ground rules they agree to.
Do not treat this as just a formality. Getting these details right is what separates a smooth launch from a last-minute rejection email from Google.
First up is the Content Rating questionnaire. Whatever you do, do not just click through this. These questions about your app's content everything from violence to language determine its maturity rating, which directly controls its visibility to different age groups around the world.
Be honest and thorough here. Answering inaccurately, even by mistake, is a fast track to getting your app suspended or pulled entirely. Once you are done, Google Play automatically assigns the right ratings from official bodies like the IARC.
Setting Your Price and Global Reach
Next, you will land in the Pricing & Distribution section, which is where you map out your app's commercial strategy. The big decision here is free vs. paid.
Choose carefully. While you can always switch a paid app to free later on, you can never change a free app to a paid one. If you ever want to charge for an app that was initially free, you would have to unpublish the original and launch a completely new one with a different package name. It is a real headache.
This section is also your global mission control. You get to decide exactly which countries your app will be available in. You can go for a massive global launch right out of the gate or start by targeting a few key markets.
You can also get granular with device compatibility. The Play Store is smart enough to filter devices based on your app's manifest file, but you can take it a step further. If you know from testing that your app runs poorly on a specific phone model, you can manually exclude it here. This is a great way to protect your early reviews and ensure a better user experience from day one.
The Non-Negotiable Privacy Policy
If there is one thing that trips up developers, it is the privacy policy. A missing or inadequate policy is one of the most common reasons for an app to be rejected. Every single app on the Google Play Store needs one, and it has to be a public URL that you link directly from your store listing.
This is not just a legal document; it is a pact of trust with your users. It needs to tell them exactly how you handle their data.
Your privacy policy must clearly spell out:
- What data you collect: Get specific. From email addresses to precise location data, list it all.
- How you use the data: Explain why you are collecting it. Is it for personalizing their experience? Analytics? Ads?
- How you share the data: Disclose any third-party services you share data with, like Google Analytics or ad networks.
- Your data retention and deletion policies: Let users know how long you keep their info and how they can ask you to delete it.
A clear, comprehensive, and easy-to-find privacy policy is the foundation of user trust. It is not just a box to check for Google; it is a commitment to your users that you take their data seriously.
You can find online policy generators to get you started, but I always recommend having a legal professional review it. You need to be sure it accurately reflects your app's data practices. Once your policy is live on a webpage, just paste the URL into the field on your store listing. Nailing these final steps is the last hurdle before you can finally hit "Submit for review" and get ready for launch.
Hitting "Publish" on your app is not the finish line it is the starting gun. Now the real work of growing a successful app begins. Your first stop should be the Google Play Console to get a handle on your app's vital signs. This data is the bedrock of everything you do next.
You will want to keep a close eye on your core metrics right from the start. Installs and uninstalls tell a powerful story about your app's first impression and whether it is actually delivering on its promises. A high uninstall rate soon after download is a huge red flag; it often points to performance bugs or a major disconnect between your store listing and the real user experience.
Just as critical are your crash rates and "ANR" (Application Not Responding) errors. A stable app is non-negotiable for keeping users around. The Console gives you incredibly detailed reports that can help you zero in on the specific devices and Android versions where things are going wrong, letting you prioritize fixes that will have the biggest impact.
Tune In to Your User Feedback
Those user reviews are gold. They are more than just a star rating; they are a direct line to the people actually using your app. Engaging with that feedback both the good and the bad is one of the most effective things you can do to build a loyal community and show that you are a developer who actually listens.
- Acknowledge the good: A simple "thank you" can turn a happy user into a vocal supporter.
- Respond to the bad: Address criticism head-on, but do it constructively. Let users know you have heard their frustration and you are working on a solution. This not only helps that one person but also shows potential new users that you are active and responsive.
Responding to user feedback has been shown to improve an app's rating by an average of +0.7 stars. That simple act of engagement directly impacts your app's visibility and conversion rates. It is a small effort with a massive payoff.
Plan Your Update Cadence
Regular updates are the lifeblood of a healthy app. They signal to both users and Google’s algorithm that your app is actively maintained and getting better over time. An app that has not been touched in months looks abandoned, and that is a surefire way to scare off new downloads.
Your update strategy should be a smart mix of bug fixes and new feature releases. Use the feedback you are gathering from reviews and your analytics to build a realistic roadmap. Always prioritize the fixes that address major crashes or usability nightmares first. Once the foundation is stable, you can start layering in the new features your users are asking for.
A steady stream of meaningful updates is a key driver for both growth and retention, helping you maintain momentum long after you figure out the initial steps of how to publish an app on Google Play. For more advanced strategies on visibility, our guide on ASO for Google Play offers a deeper dive.
FAQs From The Trenches: Last-Minute Questions Before Hitting ‘Publish’
You are at the finish line. The build is ready, your store listing is polished, but a few nagging questions always seem to pop up right before you are about to go live. Let's tackle them head-on, because knowing the answers can save you from a world of headache and last-minute delays.
"How Long Does the Google Play Review Actually Take?"
This is the big one, and the answer is... it depends.
If you are a brand new developer publishing your very first app, brace yourself. Google puts new accounts under a much tighter microscope, so that initial review can easily take a week or even longer. I have seen it happen time and time again.
On the flip side, if you are an established developer with a solid track record, an update might fly through in just a few hours.
My Advice: Always, always build a buffer into your launch timeline. Do not promise your stakeholders a launch on Tuesday if you are only submitting on Monday. Give yourself that breathing room.
"What Gets Apps Rejected Most Often?"
Getting that dreaded rejection email is a gut punch. But after seeing hundreds of apps go through the process, I can tell you the culprits are almost always the same simple, avoidable mistakes.
Most rejections boil down to violating a handful of core policies:
- A broken or missing privacy policy: Every single app must link to a live, comprehensive privacy policy. No exceptions.
- Over-the-top permissions: Only ask for what your app absolutely needs to function. If you are a simple calculator app asking for location data, that is a massive red flag.
- Playing fast and loose with IP: Using someone else's copyrighted logos, character names, or brand assets without permission is the fastest way to get your app bounced.
The best defense is a good offense. Before you even think about submitting, do a thorough read-through of the latest Google Play Developer Policies. It is not the most exciting read, but it will save you so much time in the long run.
"Can I Change My Store Listing After I've Published?"
Absolutely, and you should be.
Your store listing is not set in stone. You can update your app’s title, description, promotional text, and even your screenshots at any time. These changes typically go live within a few hours, which is fantastic because it means you can constantly be testing and optimizing your listing to see what converts best.
Think of your store listing as a living document, not a one-and-done task.
Speaking of optimizing, those high-converting screenshots are non-negotiable for boosting your app store growth. At ScreenshotWhale, we make that part dead simple. Jump into our professionally designed templates and see how fast you can give your store listing the visual punch it deserves. https://screenshotwhale.com