
How to Take a Screenshot with an iPhone
Learn how to take a screenshot with an iPhone using buttons or hands-free methods like Back Tap. Get pro tips for editing, sharing, and troubleshooting.
Grabbing a screenshot on your iPhone is one of those simple things you do all the time, but the exact button combo can trip you up. For newer iPhones without a Home button, you will want to press the Side and Volume Up buttons together. If you have an older model with the classic Home button, it is the Side (or Top) and Home buttons you will need.
Quick Guide to Capturing Your iPhone Screen
Knowing how to take a screenshot is a fundamental iPhone skill. It is how you save a hilarious text, keep a record of a flight confirmation, or just grab a snippet of a webpage to look at later. The whole process is meant to be quick and second nature.
The catch, of course, is that the method changes depending on your iPhone model. Apple has tweaked the button layout over the years, so there are two main ways to do it: one for modern Face ID phones and another for the older models with the iconic circular Home button. Once you know which one applies to your device, you are golden.
iPhone Screenshot Methods at a Glance
To cut through any confusion, here is a quick reference table. Just find your model type, and you will see the exact button combination to press and release.
| iPhone Model Type | Button Combination to Press Simultaneously |
|---|---|
| iPhone with Face ID (iPhone X, 11, 12, 13, 14, 15 series) | Side button + Volume Up button |
| iPhone with a Home Button (iPhone SE, 8, 7, and older) | Side button + Home button or Top button + Home button |
This little table should cover just about any iPhone you might be using, making it easy to remember the right move.
Capturing your screen is just the start. What you do next, annotating, sharing, or just filing it away, is where the real value is. Getting a clean, crisp capture is the essential first step to making that screenshot useful.
While we are focused on iPhones here, it is helpful to know what else is out there. If you work across different devices, you might want to check out a list of the best free screen capture tools available for all sorts of platforms. Mastering these simple commands means you will never miss a chance to save what is on your screen, no matter what device you are on.
The Classic Method for iPhones with a Home Button
If you are still rocking an iPhone with that classic Home button, think the iPhone 8 or an iPhone SE, the way you snap a screenshot is a time tested classic. It is super straightforward, but the whole trick relies on nailing the timing. Get it wrong, and you might accidentally wake up Siri or lock your screen.
The key is a quick, synchronized press.
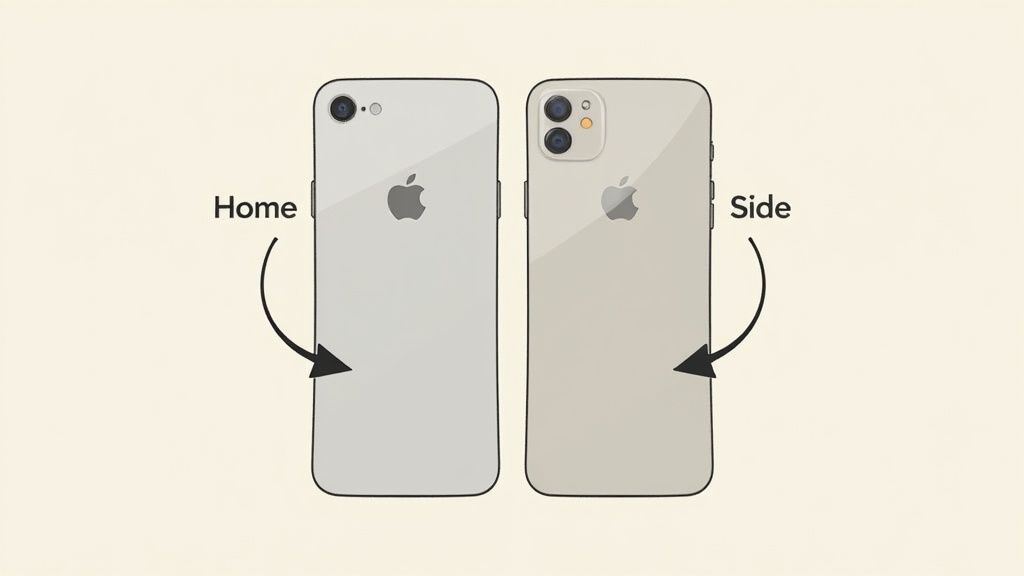
For any iPhone with a Home button, you will need to press two buttons at the exact same moment. On most of these models, it is the Side button and the Home button. If you are using a much older device like an iPhone 5, it will be the Top button and the Home button.
Mastering the Button Press
Here is the secret: press and release both buttons immediately. Do not hold them down. If you press for even a second too long, your iPhone will think you are trying to shut it down or launch Siri, which gets annoying fast when you are trying to grab a fleeting image. All you need is a crisp, quick click.
You will know it worked when the screen flashes white and you hear a camera shutter sound (as long as your phone is not on silent). A little thumbnail of your screenshot will then pop up in the bottom left corner.
The most common mistake I see is pressing the buttons one after the other instead of at the same time. You have to aim for a single, synchronized press to get the screenshot instantly.
This two button combo is perfect for all sorts of everyday situations. Think about saving a map route just before you drive into an area with no service, or trying to capture a single perfect frame from a video. Once you get the hang of it, this action becomes pure muscle memory, making it easy to save whatever you need in a split second.
Taking a Screenshot on iPhones with Face ID
If you are using a newer iPhone, anything from the iPhone X all the way up to the latest iPhone 15, you will not find a Home button. The process for grabbing a screenshot is a bit different, but it is just as quick once you get the hang of it. Honestly, it becomes muscle memory after a few tries.
To capture what is on your screen, you will press two buttons at the exact same time: the Side button on the right and the Volume Up button on the left.
The trick is to make it a quick, simultaneous press and release. Do not press and hold. Just a quick click is all it takes. You will see the screen flash and hear that familiar camera shutter sound, which confirms the screenshot was saved.
Nailing the Technique
One of the most common slip ups is holding the buttons down for too long. If you do that, you will accidentally bring up the "slide to power off" screen or even trigger the Emergency SOS feature. That is definitely not what you want when you are just trying to save a funny tweet. Remember: it is a quick press, not a long hold.
Think of it this way: you are creating a tutorial for your new app. Mastering that quick press action is a lifesaver for capturing the perfect sequence of screens to showcase your app's features in the iOS App Store.
The goal is to make the action so instinctive you do not even have to look at the buttons. A single, decisive click is all that separates you from capturing that perfect moment on your screen.
It is amazing how this feature has evolved. What was once a slightly obscure function is now a daily habit for many of the 1.56 billion iPhone users out there. Apple did a great job integrating this into the core iOS workflow, making it an essential part of how we use our phones. You can read more on the massive user base in this in-depth report on iPhone statistics.
As soon as you take the shot, a little thumbnail preview pops up in the bottom left corner. You can tap it to immediately edit, crop, or share it. Or, just swipe it away, and it will save straight to your Photos app. This immediate access makes the whole process feel incredibly smooth.
Hands-Free Screenshots with Back Tap and AssistiveTouch
Physical buttons are not the only way to grab a screenshot. Your iPhone is packed with some powerful accessibility features that can actually make the process even smoother, especially when pressing buttons is awkward. Two of the best are Back Tap and AssistiveTouch.
Think about trying to capture something while your phone is in a car mount, or maybe you are juggling coffee and your keys. These methods are perfect for those moments. You can set up a custom shortcut to capture your screen with a simple double tap on the back of your phone or by using a dedicated on screen button. They are built right into iOS, just waiting to be turned on.
Set Up Back Tap for Instant Screenshots
Back Tap is a genuinely clever feature that essentially turns the entire back of your iPhone into a touch sensitive surface. You can assign different actions to a double or triple tap, and using it for screenshots is one of the most practical applications I have found.
Here is how to get it going:
- Head into Settings > Accessibility > Touch.
- Scroll all the way down and tap on Back Tap.
- You can choose either Double Tap or Triple Tap, pick whichever feels more natural to you.
- From the list of system actions, select Screenshot.
Once that is set, a firm double (or triple) tap on the back of your iPhone will instantly capture your screen. It is a game changer for one handed use when you cannot quite reach the side buttons. It is a seamless way to learn how to take a screenshot with an iPhone using nothing more than a quick gesture.
The infographic below shows the simple flow of capturing and editing a screenshot on a modern iPhone.
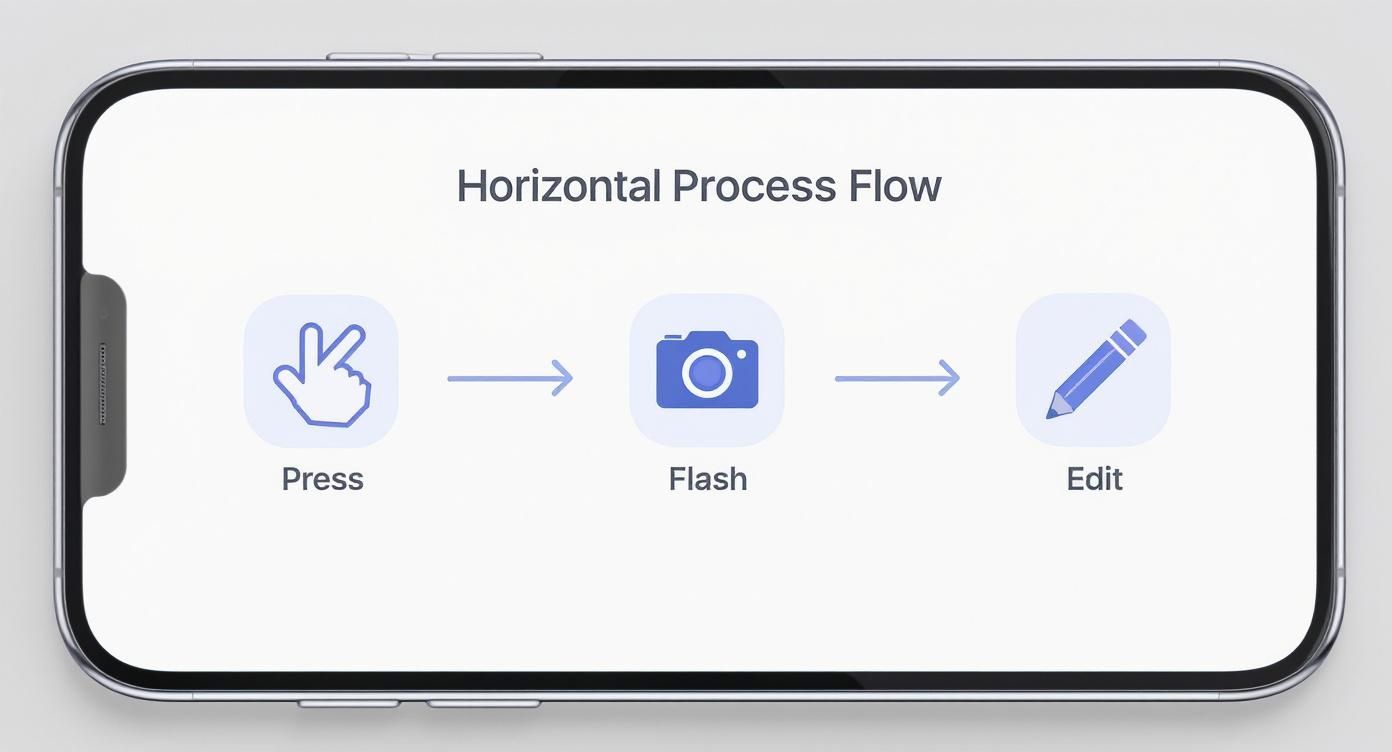
As you can see, the process from the initial capture to the immediate editing thumbnail is designed to be fast and intuitive.
Use AssistiveTouch for an On-Screen Button
AssistiveTouch gives you a persistent on screen button that you can customize with all your favorite actions. It is a lifesaver if you have trouble with physical buttons, or honestly, if you just prefer a software based approach.
Enabling AssistiveTouch creates a floating "home button" on your screen. You can then program this button to take a screenshot with a single tap, removing the need for any button gymnastics.
Ready to set it up for screenshots?
- Go to Settings > Accessibility > Touch > AssistiveTouch.
- First, toggle AssistiveTouch on. A semi transparent button will immediately pop up on your screen.
- Under the Custom Actions section, pick an input like Single-Tap, Double-Tap, or Long Press.
- Finally, assign Screenshot to whatever action you chose.
For instance, you could set "Double-Tap" to take a screenshot. Now, whenever you double tap that floating AssistiveTouch icon, your phone will capture the screen. You can drag this button anywhere along the edges of your screen, so it is always within easy reach but never in the way. It is a really flexible and powerful way to handle screen captures.
Editing and Sharing Your Screenshots Like a Pro
Taking the screenshot is just the beginning; the real magic happens in the moments that follow. As soon as you capture your screen, a small thumbnail preview pops up in the corner. Do not just swipe it away, tap it. That tap is your direct gateway into Markup, the surprisingly capable editor built right into your iPhone.
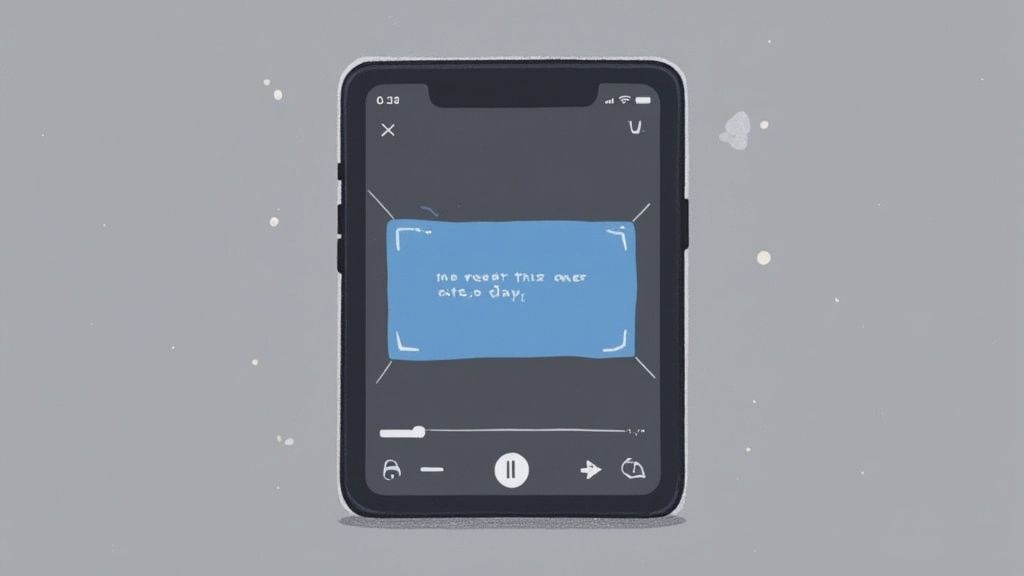
This is where a raw screen grab transforms into a genuinely useful tool. The first thing I almost always do is crop out the clutter. Getting rid of the status bar, dock, or other irrelevant parts of the screen immediately focuses the viewer’s attention on what actually matters.
A practical example is creating polished screenshots for your app store listing. You would capture a key feature in your app, then immediately crop to the perfect aspect ratio. This ensures a clean, professional look that boosts conversions on the iOS App Store or Android's Google Play.
Making Your Point Clear
The Markup toolset is not just for scribbling; it is designed for clear, effective communication.
- Magnifier Loupe: Ever try to point out a tiny detail in a photo or a map? Use the magnifier to zoom in on that critical spot that would otherwise get lost.
- Text and Shapes: You can drop quick text notes directly onto the image or use arrows to show someone exactly which button to tap in a mini tutorial.
- Signature Tool: This one is a huge time saver. You can quickly sign a digital document by dropping in your saved signature, turning your phone into a mobile office on the fly.
The best screenshots are the ones that tell a story or solve a problem. Editing with Markup transforms a simple screen grab into a clear, actionable piece of information without needing a separate app.
Once your masterpiece is ready, sharing is seamless. Just tap the Share icon to send your polished image via Messages, Mail, or AirDrop in a couple of seconds. You can also save it to Files as a PDF or just save the edited version to your Photos app.
For those times when you need to create high converting app store visuals, a dedicated screenshot editor can unlock even more advanced possibilities like professional templates and device mockups, helping to boost app store growth.
Answering Your Top iPhone Screenshot Questions
Even after you have got the basics down, a few questions always seem to pop up. Let's tackle the most common ones so you can use the screenshot feature like a pro and troubleshoot any little hiccups you run into.
Where Do My Screenshots Go?
This is easily the most common question. By default, your iPhone saves every screenshot directly into the Photos app.
You can always find them in your main Library, but for much easier access, head over to the Albums tab. Apple automatically creates a dedicated "Screenshots" album where they are all neatly organized. This saves you from endlessly scrolling through your camera roll to find that one capture from last week.
How Do I Take a Full Page Scrolling Screenshot?
This is a fantastic, slightly hidden feature that is perfect for capturing entire web articles, recipes, or long email threads in one go. It works right inside Safari.
Once you take a screenshot, tap the little thumbnail preview that pops up in the corner. You will see two options at the top of the editing screen: "Screen" and "Full Page". Tap "Full Page," and just like that, you can capture the entire scrollable content.
A key thing to remember: The "Full Page" option saves the capture as a PDF to your Files app, not your Photos app. This is actually pretty smart, as it keeps your photo library from getting clogged up with super long document images.
Help! I Can't Find My Screenshot.
It happens. You saw the screen flash, heard the shutter sound, but the screenshot is nowhere to be found. Do not panic.
First, double check that dedicated "Screenshots" album in Photos. If it is definitely not there, the most likely culprit is low storage. Your iPhone might not have enough space to save a new image file. Another quick fix is to simply restart your phone, which can clear up temporary software glitches that might be preventing saves.
The process is very similar for other Apple devices, too. You can learn more about how to screenshot with an iPad in our guide.
Ready to create stunning, high-converting visuals for your mobile app? With ScreenshotWhale, you can design professional App Store and Google Play screenshots in minutes. Boost your app's growth and conversions with our easy-to-use templates and powerful editor. Try it now at https://screenshotwhale.com.