How to Screenshot with iPad: The Ultimate Guide
Learn how to screenshot with iPad easily. Our guide covers all methods, including button combos and gestures, for all iPad models. Click now!
Knowing how to take a screenshot on your iPad is a fundamental skill. Apple makes this process incredibly simple, though the exact method depends on your specific iPad model.
Your Quick Guide to Taking an iPad Screenshot
Taking a screenshot on the iPad is a core, built-in feature, contributing to the device's intuitive design. This user-friendliness is a key reason the iPad dominates the tablet market. As of 2023, Apple held an impressive 40.6% of the global market share. Part of this success is due to how easy it is to perform basic tasks like screen captures. For more on Apple's market performance, this detailed report offers great insights.
Ultimately, the method you use comes down to one question: does your iPad have a physical Home button?
Let's break down both methods.
Models With a Home Button
If you are using a classic iPad with the round Home button below the screen, the process is straightforward and has a satisfying, tactile feel.
Simply press and quickly release the Top button (also known as the sleep/wake button) and the Home button at the same time. You will know it worked when the screen flashes briefly and you hear a camera shutter sound.
This visual guide shows you exactly which buttons to press.
This simple two-button press quickly becomes second nature.
Models Without a Home Button
For modern iPads with edge-to-edge screens like the iPad Pro, iPad Air, and newer iPad mini, the Home button is absent. The method is slightly different but just as fast.
On these models, simultaneously press and release the Top button and the Volume Up button. Similar to the other method, your screen will flash, and a thumbnail of your screenshot will appear in the bottom-left corner, ready for editing.
If you are unsure which category your iPad falls into, this table will clarify things instantly.
iPad Screenshot Methods at a Glance
Find your iPad model and the corresponding button combination to take a screenshot.
| Your iPad Model Type | The Button Combination to Use |
|---|---|
| iPad (standard models, e.g., 9th gen & older), iPad mini (5th gen & older) | Press the Top button + Home button simultaneously |
| iPad Pro (all models), iPad Air (4th gen & newer), iPad mini (6th gen & newer) | Press the Top button + Volume Up button simultaneously |
Once you identify your model, you will know the exact button combination for every screenshot. It is a simple, reliable shortcut you will use constantly.
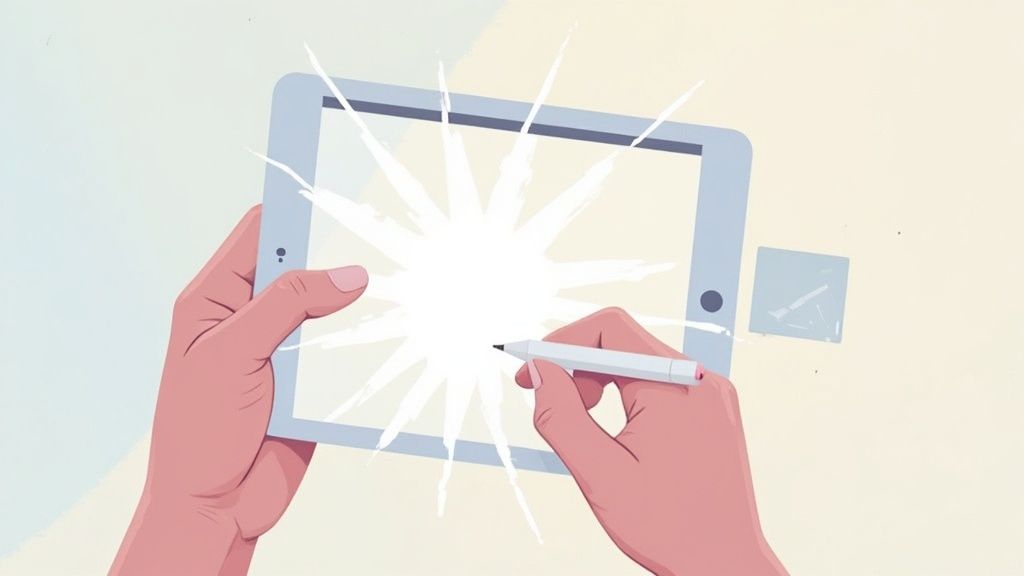
Using Apple Pencil for Instant Screen Captures
If you are a frequent Apple Pencil user, using button combinations for screenshots can feel slow and disruptive to your workflow. There is a much more fluid method built into iPadOS that is a game changer once you adopt it.
Forget the buttons. Just take your Apple Pencil and swipe inwards from either the bottom-left or bottom-right corner of the screen. The screen will flash, a snapshot is taken, and it immediately opens in the Markup editor, ready for your notes.
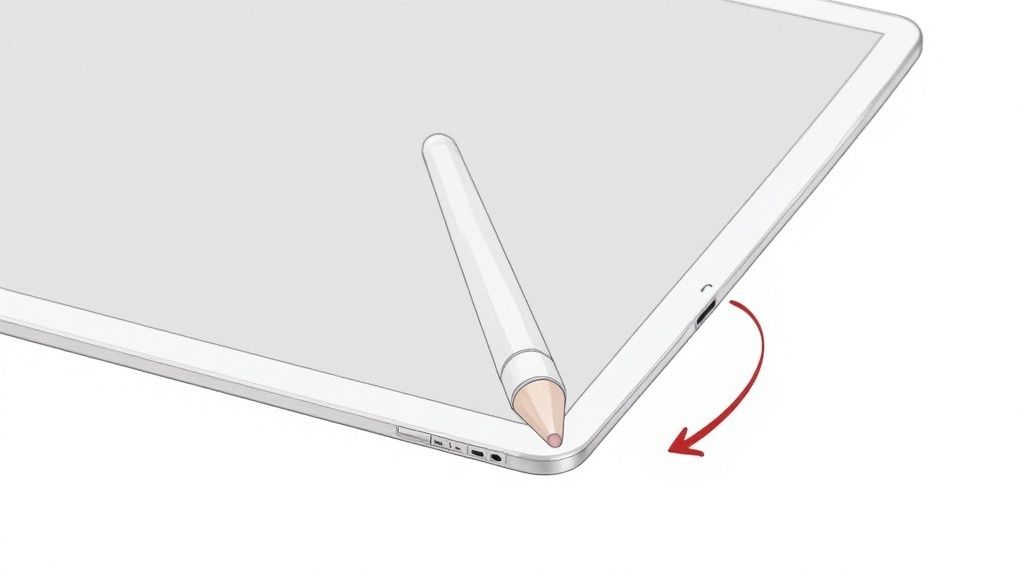
This gesture is incredibly efficient for anyone who needs to capture and annotate visuals quickly.
Practical Scenarios for the Corner Swipe
I use this feature constantly when designing app interfaces. I can swipe to capture the screen, instantly circle a misaligned button with the Pencil, and write a note like "fix padding" without ever putting the Pencil down. It feels like a single, seamless action.
This method is also perfect for:
- Students: Capture a slide during an online lecture and quickly highlight a key formula.
- Artists: Grab an inspirational image from a website and start sketching ideas directly on it.
- Project Managers: Screenshot a progress chart and draw arrows to point out critical data for your team.
The real advantage here is immediacy. It removes the awkward step of putting down your stylus to press physical buttons, combining the act of capturing and marking up into one smooth motion.
Once this gesture becomes muscle memory, your iPad and Apple Pencil feel more like a single, powerful device for visual feedback and brainstorming. It transforms the simple act of taking a screenshot into a natural part of your creative process.
Transform Your Screenshots with Advanced Markup Tools
Taking a screenshot is just the beginning. The real power lies in Markup, the built-in editing suite that appears after you capture your screen. This toolkit is more powerful than most people realize, allowing you to turn a simple image into clear, professional visual communication.
Once you move beyond basic cropping, a world of possibilities opens up. You can add clarity and focus to any image, guiding the viewer's eye exactly where you want it.
Highlighting and Annotating Like a Pro
Imagine reviewing a data chart for a presentation. Instead of just forwarding the raw screenshot, use the Markup tools to make your point impossible to ignore.
- Magnifier: Tap the "+" icon and choose Magnifier. Drag it over a critical statistic to enlarge it, making it the undeniable focal point.
- Shapes and Text: Use the shape tool to professionally obscure sensitive information like names or email addresses. Then, add a clean text box to provide context or ask a question directly on the image.
- Ruler: For perfectly straight underlines or callout lines, the ruler tool is essential. Position it, select a pen, and draw a flawless line every time.
These tools are essential for creating app store screenshots that are not only eye-catching but also highly informative, which can directly boost your conversions. For developers, a dedicated screenshot editor builds on these principles to create high-converting visuals.
By combining these simple tools, a basic screenshot evolves into a storytelling device. You can highlight a key feature in an app, point out a bug to a developer, or annotate feedback on a design mockup with precision.
Creating Efficient App Store Visuals
When designing screenshots for the iOS or Android stores, clarity is crucial. Vibrant colors grab attention, but your annotations must be clean and purposeful. I recommend using a consistent color for all markups to maintain a professional look that aligns with your brand.
Think of each screenshot as a mini-advertisement. It must communicate a key benefit in seconds.
Once you have perfected your visuals, ensure they look sharp everywhere. After enhancing your screenshots, you might need to optimize them for different platforms. Learning how to compress images without losing quality is a crucial next step to ensure your edits look pristine and load quickly.
Create App Store Screenshots That Actually Convert
For app developers, a clean iPad screenshot is just the start. The real challenge, and where the opportunity lies, is turning those screen grabs into your most powerful marketing tool on the iOS and Android app stores. To boost app store growth, your screenshots must do more than show your app; they must tell a compelling story.
Potential users spend only seconds on your store listing. A gallery of plain UI captures will not grab their attention. Your screenshots must sell a solution. This is where actionable insights transform a simple image into a high-converting asset.

This shift in approach separates apps that stagnate from those that climb the charts.
Frame Your UI with Compelling Mockups
A quick way to elevate your screenshots is by placing your UI inside a device mockup. This simple trick provides context and makes your app feel more professional. For a practical example, a site editor can take a raw screenshot of an app's main dashboard and place it within the latest iPhone frame against a vibrant, branded background. This instantly makes the design more appealing.
Don’t just show what your app does. Show what your users can achieve with it. Frame your features within the context of a solution to their problems.
Use neat, appealing imagery with vibrant colors that match your brand to catch the eye. Add short, punchy text callouts to guide the viewer. Instead of a generic "Dashboard," use a benefit-driven headline like “Track Your Progress in Seconds.” This reframes the feature into a real-world win. For more on this, see our guide on creating powerful iOS app screenshots.
Build a Cohesive Visual Story
Your first two or three screenshots are critical; they are what users see without scrolling. Make them count by telling a story that flows logically.
Here’s a proven formula for high-converting app store screenshots:
- Screenshot 1: Hook them with your app's main value proposition. What is the single biggest problem you solve?
- Screenshot 2: Showcase a key feature that delivers on that promise. Show, do not just tell.
- Screenshot 3: Display another major benefit or add social proof, like a snippet from a glowing review.
A screenshot beautifier tool can be a lifesaver for creating polished visuals without design expertise. These tools help add professional backgrounds, text, and device frames, ensuring your app looks top-tier.
If your Photos app is a chaotic sea of random screen captures, you are not alone. We have all scrolled endlessly through a cluttered camera roll to find one important visual. A little organization goes a long way.
Thankfully, your iPad helps. Every screenshot you take is automatically saved in a dedicated Screenshots album in the Photos app. This is your command center, separating screen grabs from personal photos.
To take it a step further, I highly recommend creating custom albums. This is a game-changer for sorting visuals by project or task. Go to Albums, tap the "+" icon, and name a new album something like "Website Redesign Feedback" or "Q3 Marketing Analytics." This simple habit keeps everything tidy and easy to find.
Get Your Screenshots Out There, Fast
With everything organized, sharing should be just as quick. People now average 6 hours and 40 minutes of screen time daily, so sharing visual information instantly is more important than ever. You can learn more about our changing digital habits in this detailed report from mspoweruser.com.
Here are my go-to methods for sharing on the fly:
- AirDrop: This is the best method for in-person collaboration. Instantly send a screenshot to a colleague's nearby Mac, iPhone, or iPad.
- Share Sheet: Tap the Share icon to send your screenshot directly into apps like Slack, Messages, or Mail. You can send annotated feedback to a team channel without leaving the Photos app.
A well-organized screenshot library transforms your iPad into a powerful communication tool. Your important visuals are always ready, not lost in a digital mess.
Getting your captures to their final destination is a crucial part of the process. If you are sending files to a specific platform, check our guide for tips on how to upload a screenshot to various services.
Your Top iPad Screenshot Questions, Answered
Even with a straightforward process, a few common questions often arise. Let's clear up any lingering confusion and cover specific scenarios you might encounter.
Can I Record a Video of My iPad Screen Instead?
Yes, absolutely. Your iPad has a fantastic built-in screen recorder that captures both video and audio, which is perfect for creating tutorials or capturing a bug in action.
To use it, you first need to add the feature to your Control Center. It is a one-time setup:
- Go to Settings > Control Center.
- Scroll down and tap the green plus icon next to Screen Recording.
Now, whenever you want to record, swipe down from the top-right corner of your screen to open the Control Center and tap the circular record icon. It is that simple.
Where Are My Screenshots Saved on My iPad?
All your screen captures are saved directly in the Photos app, so you do not have to hunt for them.
Even better, iPadOS automatically organizes them for you. It creates a dedicated album named “Screenshots,” meaning you can find all your captures in one tidy place without scrolling through your main photo library.
How Do I Take a Screenshot of a Full Webpage?
This is a powerful feature, especially for saving long articles, online receipts, or design inspiration. It only works in Safari, but it is incredibly useful.
After you take a normal screenshot of a webpage, tap the thumbnail preview that appears in the bottom-left corner. At the top of the editing screen, you will see two options: ‘Screen’ and ‘Full Page’. Just tap ‘Full Page’ to capture the entire scrollable webpage. From there, you can mark it up, share it, or save it as a clean PDF to your Files app.
Ready to create stunning, high-converting visuals for your app? ScreenshotWhale provides professionally designed templates and a simple editor to produce on-brand App Store and Google Play screenshots in minutes. Boost your downloads and stand out from the competition at https://screenshotwhale.com.
Generate your store screenshots in minutes
Upload raw app screenshots and let AI produce polished, localized App Store and Google Play sets.
Try the generator free