How to Publish an App to the App Store: A Step-by-Step Guide
Learn how to publish app to app store with a complete, friendly guide covering pre-launch checks, ASO tips, and avoiding rejections.
Before you can even dream of hitting that “Publish” button, there's some critical groundwork to lay. Getting your app onto the App Store isn't just about code; it's about setting up your developer account, getting your digital credentials in order, and making sure you're playing by Apple's rules.
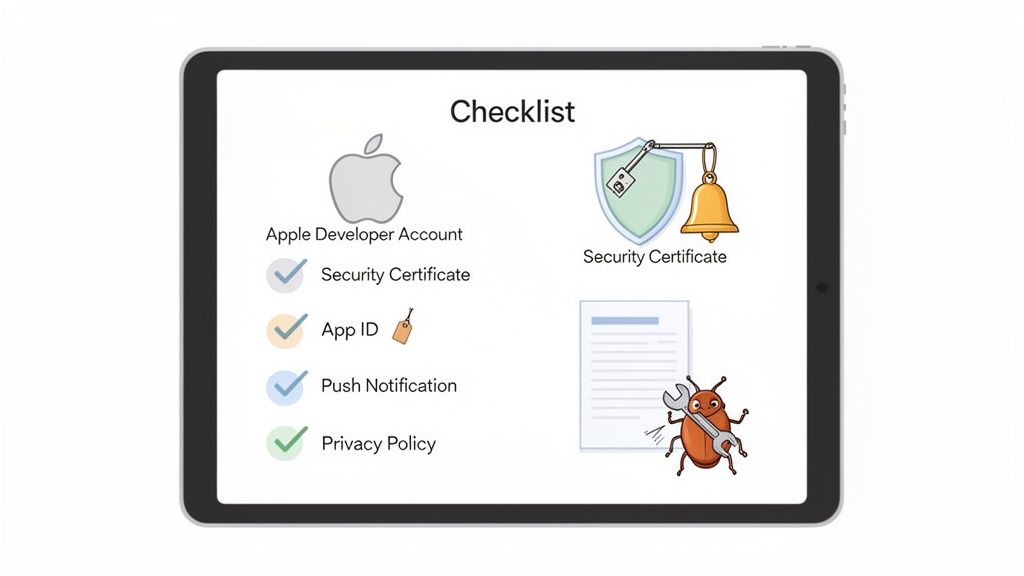
Your Essential Pre-Launch Checklist
Think of this stage as building the launchpad. Without it, your app is just a project on your hard drive, not a product in the App Store. A smooth launch starts way before you upload your first build. Nail these account, legal, and technical steps now, and you'll save yourself a world of headaches later.
And remember, this all comes after you've gone through the entire mobile app development process, from idea to a fully tested build.
Secure Your Developer Program Membership
First things first: you absolutely must enroll in the Apple Developer Program. There's no way around it.
For $99 a year, this membership is your key to the kingdom. It unlocks a whole suite of tools you'll be living in:
- App Store Connect: This is your mission control. It’s the web portal where you'll manage everything, your app listing, metadata, pricing, and the submission itself.
- Beta Testing Tools: You get access to TestFlight, which is invaluable. It lets you invite up to 10,000 testers to kick the tires on your app before it goes live to the public.
- Certificates, Identifiers, and Profiles: These are the digital keys that prove you are who you say you are. They securely link your app to your developer account.
- Advanced App Capabilities: Want to add Push Notifications, Apple Pay, or iCloud? Your membership makes it possible.
Signing up is pretty simple, but don't leave it to the last minute. You'll need an Apple ID with two-factor authentication enabled, and the verification process can sometimes take a few days. Get this done early.
This map gives you a bird's-eye view of how these three pillars, account, legal, and technical, fit together.
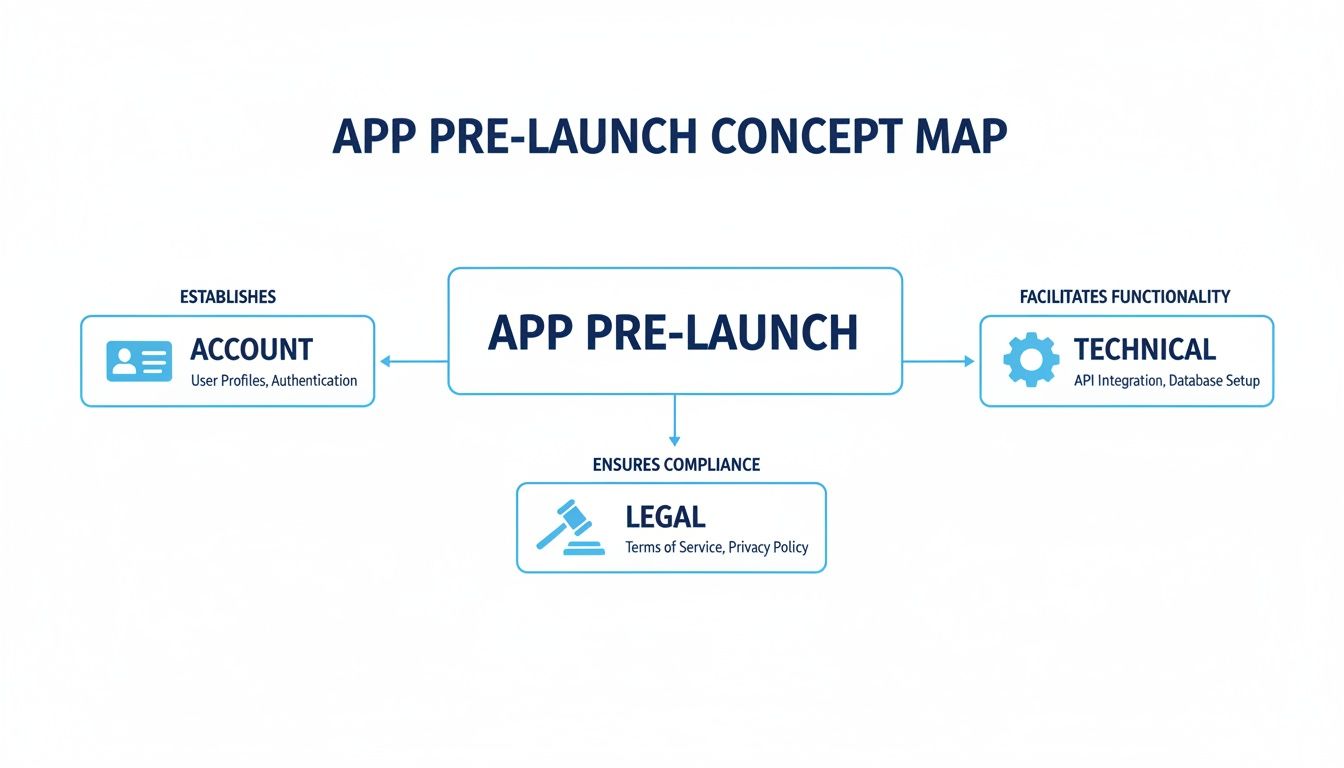
As you can see, a successful submission is a balancing act between administrative tasks and technical prep.
Generate Your Technical Credentials
Once your developer account is active, it’s time to generate the technical assets that act as your app's digital passport. These pieces work together to sign your code, identify your app, and enable services.
You’ll handle all of this in the "Certificates, Identifiers & Profiles" section of the developer portal:
- App ID (Bundle Identifier): This is your app's unique fingerprint, formatted like
com.yourcompany.yourappname. Choose it wisely, because you can't change it once your app is on the store. - Certificates: Think of these as your developer ID card. You'll need a development certificate for testing on your own devices and a distribution certificate for the final App Store submission.
- Provisioning Profiles: These are the glue. A provisioning profile ties your App ID and certificates together, telling Apple which devices can run the app and what services (like push notifications) it's allowed to use.
Key Takeaway: Think of these credentials as your app's passport. Without the correct App ID, certificates, and profiles, your app cannot be securely signed, uploaded, or distributed through the App Store.
Finalize Strategic and Legal Groundwork
Don't let the technical stuff distract you from the legal and strategic details. Overlooking Apple's guidelines or forgetting legal documents is one of the fastest ways to get rejected.
A privacy policy is non-negotiable. It needs to be hosted on a public URL you can link to from your App Store listing. It must clearly spell out what data your app collects and what you do with it. If your app is aimed at kids, get ready for even stricter privacy rules.
Finally, live and breathe Apple’s Human Interface Guidelines. These aren't just suggestions; they are the principles that define the look and feel of iOS. An app that feels clunky, confusing, or just plain out of place on an iPhone is a prime candidate for rejection. Getting these details right is critical for a smooth review.
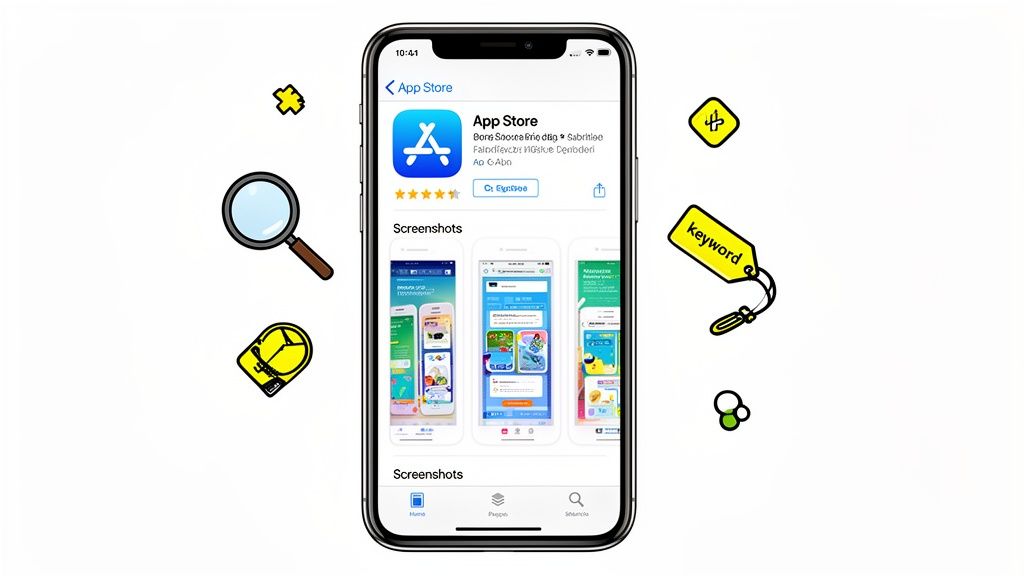
Crafting Your App Store Listing for Maximum Impact
Think of your App Store product page as your digital storefront. It’s the very first thing people see, and you only get one chance to make a good impression. Long before anyone taps that download button, they're sizing you up based on your name, your screenshots, and your description. A great listing doesn't just list features; it sells an experience and convinces people your app will make their life better.
Getting this right isn't just a nice-to-have, it's a survival tactic. The app stores are fiercely competitive. We're looking at a predicted 38 billion annual downloads by 2026, and the lion's share of that goes to the top players. For the other 884,932 publishers, it's a tough slog. In fact, 38% of developers had their app rejected last year, often for simple metadata mistakes that killed their launch momentum.
This is where App Store Optimization (ASO) comes in, driving a massive 65-70% of all organic installs. Let's break down how to nail it.
Nailing Your App Name and Subtitle
Your app's name and subtitle are the first words anyone reads. Together, they need to grab attention and explain what you do in a heartbeat.
The App Name needs to be memorable and easy to spell. You've got 30 characters, but shorter is usually better. Most importantly, it should give a clue about your app's purpose. Think of names like "Calm" or "Duolingo"—they're brandable but also hint at the function.
Your Subtitle is your 30-character elevator pitch. This is your prime real estate for high-value keywords while also spelling out the core benefit. So, instead of a generic "Photo Editor," something like "Pro Photo & Video Editor" works much harder by capturing more search traffic and signaling broader functionality right away.
These two elements are the foundation of your app's discoverability. A strong name and subtitle work together to boost your app store growth from the moment you publish.
Designing High-Converting App Store Screenshots
Let's be honest: your screenshots are probably the most important part of your product page. People are visual. They will absolutely scan your screenshots before they even think about reading your description. These images need to do more than just show off your UI; they need to tell a compelling story about the value you provide.
Your first two or three screenshots should be a mini tutorial, highlighting the best "aha!" moments your app offers. They need to instantly answer the user's biggest question: "What problem does this solve for me?"
Here’s an actionable insight on creating visuals that actually convert:
- Focus on Benefits, Not Just Features: Don't show a button; show what happens after you press it. Instead of a blank calendar, show a fully scheduled week with a caption like, "Plan Your Week in Seconds."
- Use Bold, Legible Captions: Every screenshot needs a short, punchy caption at the top. Use a big, clean font to state the key benefit. This text is your sales copy.
- Create a Visual Narrative: Arrange your screenshots logically. The first one should hit them with your core value. The next few can introduce secondary features and paint a full picture of the experience.
- Use Vibrant Colors and On-Brand Mockups: Your visuals need to pop. Use your brand colors and high-quality device mockups to look polished and professional. An editor like ScreenshotWhale can help you apply professionally designed templates in minutes, keeping everything on brand and perfectly formatted for both Android and iOS stores.
Pro Tip: Your app's icon is just as critical. It shows up everywhere, from search results to the user's home screen. Make it simple, recognizable, and make sure it looks great at all sizes. Avoid putting text in it unless it's part of your actual logo.
Writing Persuasive Descriptions and Keywords
Your app's metadata, the text and visual assets that make up your product page, is a mix of art and science. Below is a quick rundown of the essential pieces you'll need to prepare.
Essential Metadata for Your App Store Listing
| Metadata Element | Character Limit | ASO Best Practice |
|---|---|---|
| App Name | 30 characters | Memorable, unique, and hints at the app's function. Front-load your most important keyword. |
| Subtitle | 30 characters | Your one-line pitch. Use high-value keywords to describe your app's core benefit. |
| Description | 4000 characters | Start with a strong hook. Use short paragraphs and bullet points. Weave in keywords naturally. |
| Keyword Field | 100 characters | Use all characters. Separate with commas, no spaces. Include competitor names and user queries. |
| App Icon | 1024x1024 px | Simple, recognizable, and text-free (unless it's your logo). Must stand out in search results. |
| Screenshots | Up to 10 images | Tell a visual story. Focus on benefits with bold captions. The first 2-3 are the most important. |
| App Preview | Up to 3 videos | Short (15-30 sec) videos showing the app in action. Muted autoplay means visuals are key. |
Getting these elements right is foundational. They work together to tell a cohesive story that attracts the right users and convinces them to download.
While many users might just skim your full description, Apple's algorithm reads every word. This is your chance to expand on your features and strategically place keywords.
Break up the text into short, scannable paragraphs. Bullet points are your friend here; use them to list key features and benefits, making it easy for people to digest the information quickly. Always start with a strong opening paragraph that hooks the reader before you dive into the nitty-gritty.
Finally, there's the keyword field. This is your secret weapon for discoverability. You get 100 characters (use commas to separate, no spaces) to fill with all the search terms a user might type to find an app like yours. Think like your target audience. What problems are they trying to solve? Include competitor names, problem-based queries ("learn spanish"), and feature-based terms ("language lessons"). These keywords, combined with your name and subtitle, form the backbone of a solid ASO strategy.
Alright, you’ve got your killer app description and eye-catching screenshots ready to go. Now it’s time to switch gears from the marketing side of things to the technical nuts and bolts of the submission. We need to package up your app’s code into a final “build” and get it over to Apple.
For a lot of folks, this part feels intimidating, but it’s really not so bad. Think of it as putting your finished product in a box, taping it up, and handing it to the courier. We’re just going from your computer to Apple’s servers. Let’s walk through how to do it right using Xcode and App Store Connect.
Dialing in Your Xcode Project Settings
Before you can create that final build, you have to double-check a few settings inside your Xcode project. Getting these details right from the start is the key to a smooth upload and helps you dodge some really frustrating validation errors down the road.
First up, head to your project’s settings and click on the "Signing & Capabilities" tab. This is where those certificates and profiles you made earlier finally come into play. Make sure that "Automatically manage signing" is checked. This little checkbox is a lifesaver; it tells Xcode to handle the messy business of picking the right distribution certificate and provisioning profile, which seriously cuts down on the chances of a signing error.
Next, you need to get your app’s versioning straight. It’s a small detail, but it’s critical for your first release and every single update after that.
- Version Number (Marketing Version): This is what users will see in the App Store, like 1.0, 1.1, or 2.0. It follows the standard software versioning you’re used to and should be bumped up for each new release you submit.
- Build Number: Think of this as an internal counter. It has to be unique for every single build you upload to App Store Connect. A common approach is to just count up: 1, 2, 3, and so on. Even if you upload five different builds for version 1.0, they’ll need to be build 1, build 2, build 3, etc.
Forgetting to increment the build number is probably one of the most common reasons uploads fail. Make it a habit to change it every single time.
Archiving and Uploading the Build
Once your settings are locked in, you’re ready to create the archive. An archive is just the compiled version of your app, all bundled up with its resources, ready for the App Store.
To get started, check your build destination in Xcode. It needs to be set to "Any iOS Device (arm64)". This tells Xcode to create a generic build that works on all modern devices, not one that’s specific to the iPhone plugged into your Mac.
From the top menu in Xcode, go to Product > Archive. This will kick off the build process. If all goes well, the Organizer window will pop up showing your brand-new archive right at the top of the list.
From here, you’ve got a couple of options for getting it to Apple:
- Distribute App: This button kicks off the direct upload to App Store Connect. Xcode will run a bunch of checks to look for common problems, and if it all looks good, the upload begins.
- Validate App: This is a step I highly recommend you do first. It runs the exact same checks as the full distribution process but stops short of actually uploading the build. It’s your chance to catch and fix any errors before you commit to a full upload, which can save you a ton of time.
Key Insight: Always, always use the "Validate App" option first. It’s like proofreading an email one last time before you hit send. Catching a simple mismatched icon or a provisioning profile error here can save you from a 30-minute upload and rejection cycle.
Once your build passes validation, you can confidently click "Distribute App" and follow the prompts. After the upload finishes, it can take anywhere from a few minutes to an hour for the build to finish processing on Apple's end. You can keep an eye on its status in the "TestFlight" tab of your app in App Store Connect. When you see it’s done processing, you’re ready to attach it to your app version and send it off for review.
Navigating the App Store Review Process
So you’ve hit "Submit for Review" in App Store Connect. Congrats! That's a huge step, but now the real waiting game begins. Your app is officially in the queue for Apple's review team, a group of actual humans who will download, poke, and prod your app to see if it meets their notoriously high standards.
This isn't just about bug hunting. They're checking for safety, quality, and whether your app delivers a good user experience that aligns with the rest of the platform.
The App Store is a jungle. Just last week, 14,117 new apps went live, which averages out to about 2,215 new apps every single day. In that kind of environment, rejections are just part of the game. In fact, about 38% of developers got at least one rejection last year for guideline violations. If you want to dive deeper into the numbers, check out the stats on App Store publishing on 42matters.com.
Avoiding Common Rejection Pitfalls
The best way to sail through the review is to get ahead of the common red flags. Think like a reviewer. They've seen it all, and they have a checklist of things that will get an app bounced immediately. If you can address these before you submit, you'll save yourself a world of hurt.
Here are the big ones I see trip people up all the time:
- Broken Functionality: This is the easiest way to get rejected. A dead link, a button that goes nowhere, or a login that fails is an instant "no." Test everything. And I mean everything.
- Inaccurate Metadata: Your screenshots, app name, and description must honestly reflect what the app does right now. Don’t show off features coming in the next update. What you show is what they must get.
- Insufficient Value: Apple is protective of its ecosystem. If your app is essentially just a web wrapper or feels like it was thrown together in a weekend, it could get flagged under Guideline 4.2 for Minimum Functionality. It has to feel like a real app.
- Improper Use of In-App Purchases (IAP): If you're selling digital content or subscriptions, you have to use Apple's IAP. Trying to sneak in a Stripe link to get around their fee is a classic blunder that they will catch.
Providing Clear Notes for the Review Team
That little "Notes for Reviewer" box in App Store Connect? It’s your best friend. Never, ever leave it blank. This is your one shot to talk directly to the person testing your app.
If your app has a login, you absolutely must provide a working demo account. Give them a username and password that unlocks everything, so they don't hit a paywall or a feature they can't access.
Real-World Scenario: Let's say your app syncs with a piece of proprietary hardware that the reviewer obviously won't have. You can't just submit an app that looks broken. Instead, you'd write a note like: "This app pairs with our custom heart rate monitor. Since you won't have one, please tap the 'Demo Mode' button on the login screen to explore the app with simulated workout data." Problem solved.
The Human Element of App Review
At the end of the day, remember there's a person on the other side of the screen. They don't know your vision or how much work you've put in. All they see is the build you submitted.
Your app needs to be self-explanatory, polished, and fully functional from the moment they open it. If you’re handling user data, be ridiculously transparent. Make your privacy policy easy to find and even easier to read. Only ask for permissions when you need them, and explain why.
Taking the time to get this right dramatically increases your odds of a quick approval. When you publish an app to the app store, a smooth review process is the best possible start you can ask for.
Launching Your App and Driving Growth
So, your app passed review. Congratulations! That’s a huge milestone, but honestly, the real work starts now. Hitting that release button isn't the finish line, it's the starting pistol for the real race to get users and build a business that lasts. The moves you make next are what separate the apps that thrive from those that get lost in the noise.
Once you publish an app to the app store, your job description changes. You’re no longer just a developer; you’re a strategist focused on growth. That means knowing how to control your launch and, more importantly, what to do in those critical first days and weeks.
Mastering Your Release Options
One of the best things about App Store Connect is the control it gives you over your launch. You don't have to push your app live the second it gets approved, and you absolutely shouldn't if you have a marketing plan. This flexibility is a strategic advantage.
Here's the breakdown of your options:
- Release Immediately: The moment Apple says "go," your app is live. This works well for small apps or minor updates where you aren't trying to coordinate a big marketing push.
- Release on a Specific Date: This is the go-to for most serious launches. You can set a future date and time for your app to automatically pop up on the App Store. It’s perfect for syncing your launch with press releases, social media campaigns, and influencer shout-outs.
- Manual Release: This option puts your app in a kind of "approved, waiting for you" state. You can then log into App Store Connect and hit the release button yourself at the exact moment you choose. It offers the ultimate control for time-sensitive launches where every second counts.
Scheduling your release lets you build up hype and make sure all your marketing efforts land at the same time for the biggest possible splash. Once you're live, the game shifts to executing proven mobile app marketing strategies to keep the momentum going.
Monitoring Your Performance in App Store Connect
As soon as your app is out there, App Store Connect Analytics becomes your new best friend. This is where you get the raw, unfiltered truth about how people are finding and engaging with your app on the store. Keeping an eye on these numbers isn't just a good idea; it's how you make smart decisions instead of guessing.
From day one, keep these metrics on your radar:
- Impressions: How many times your app's icon was seen on the App Store for more than a second. This is your top-level visibility metric.
- Product Page Views: The number of people who actually clicked on your app to see the full listing. This tells you if your icon and name are doing their job.
- Conversion Rate: This is the big one. It’s the percentage of people who downloaded your app after landing on your product page. A low number here is a huge red flag that your screenshots or description aren't convincing anyone.
- Downloads: The total number of first-time installs.
These numbers tell a story. High impressions but low page views? Your icon or name isn't compelling. High page views but a terrible conversion rate? Your screenshots and app previews are almost certainly the problem.
The Cycle of Feedback and Iteration
Your first users are a goldmine. Their reviews and ratings are not only public social proof but also your most direct form of product research. You need to be reading every single review, the good, the bad, and the ugly. Look for patterns in bug reports, feature requests, and things people find confusing.
Key Takeaway: User reviews are not just for potential downloaders; they are a direct and free communication channel with your audience. Use this feedback to build your product roadmap and prioritize the updates that matter most to the people actually using your app.
This feedback loop is what drives retention. When users see their suggestions pop up in an update, they feel heard. They stop being just users and start becoming advocates. For a deeper dive into the whole funnel, check out these detailed mobile app marketing strategies.
The financial stakes here are massive. Since 2008, developers have collectively earned over $550 billion on the App Store. But that money isn't spread evenly. Of the 1,916,393 apps available, only 4.59% are paid. The other 95.41% are free, which means their screenshots have to do all the heavy lifting to get that download. We know that apps with killer visuals can see conversion lifts of 20-30%. You can read more about how developers are navigating this economy in this TechCrunch analysis.
This is exactly why keeping your product page fresh is non-negotiable. When you ship a big update with a slick new UI or a killer feature, your screenshots have to show it off. An outdated product page just screams "abandoned app." This is where a tool like ScreenshotWhale can save you. It lets you quickly generate updated, on-brand screenshots for every new release without a ton of design work, making sure your digital storefront always looks its best.
Navigating the app store submission process for the first time, or even the tenth, always kicks up a few questions. It's just part of the game. Let's tackle some of the most common ones that pop up, so you can save yourself a bit of time and stress.
How Long Does the App Store Review Really Take?
This is the big one, isn't it? The honest answer is: it depends.
Apple's official line says most reviews wrap up within 24 to 48 hours, and often, that's true. But a few things can throw a wrench in that timeline. If you're submitting a brand-new app from a fresh developer account, expect a little more scrutiny. They're going to poke around a bit more, which can stretch the review out.
On the flip side, a simple bug-fix update for a well-established app might fly through in just a few hours. Keep in mind that submitting right before a major holiday can also mean joining a much longer queue.
Want to grease the wheels?
- Leave detailed review notes. If your app needs a login or has some tricky features, give the reviewer a demo account and walk them through it. Make their job easy.
- Submit a polished app. Nothing gets you sent to the back of the line faster than an app that's buggy or crashes on launch.
What’s This Going to Cost Me?
The barrier to entry is pretty clear. For Apple, you're looking at a $99 annual fee for the Apple Developer Program. That's non-negotiable and has to be renewed every year to keep your apps live. Over on the Google Play Console, it's a one-time $25 fee.
But that's just the ticket to get in the door. The real costs come later. You’ll need to budget for things like:
- Third-party services or APIs: Many apps lean on external services for things like analytics, databases, or push notifications, and those often have their own subscription fees.
- Marketing and promotion: Getting people to actually download your app usually requires a budget for ads, social media campaigns, or other outreach.
- Ongoing maintenance: Don't forget about the long haul. You'll have costs for server upkeep, bug fixes, and future updates.
The initial developer fee is just the price of entry. The real investment is in building, maintaining, and actually growing your app once it's out in the wild.
Can I Launch on Both Stores at the Same Time?
Absolutely. In fact, launching on both the Apple App Store and Google Play Store simultaneously is often the best strategy if you want to capture the biggest audience right from the get-go.
Just know that it's not a copy-paste job. Even if you're using a cross-platform framework, the submission process for each store is a world apart. They have their own guidelines, their own metadata requirements, and completely separate review teams. You'll be creating two unique product pages, designing screenshots for different device aspect ratios, and juggling two totally distinct workflows. When you decide to publish an app to the app store, be ready to tailor your submission for each ecosystem.
What Happens If My App Gets Rejected?
First off, don't panic. A rejection is practically a rite of passage. It happens to everyone, from indie devs to the big players. It’s not the end of the road.
Apple will always tell you why, citing the specific guideline your app didn't meet. Your job is to read their feedback carefully and truly understand the problem. Don't just make a tiny tweak and resubmit, hoping it slips past them. Address the core issue they've pointed out.
If their feedback feels a bit vague, you can always communicate with them through the Resolution Center to get more clarity. Think of a rejection as a roadblock, not a dead end. Fix the issue, learn from it, and get back in the queue.
Creating a polished, high-converting App Store presence is critical for success. With ScreenshotWhale, you can design stunning, on-brand screenshots in minutes, ensuring your app always makes a powerful first impression. Stop wrestling with design tools and start converting more users today.