How to Do iPhone Screenshot: Simple Steps & Tips
Learn exactly how to do iPhone screenshot with our easy guide. Discover methods like buttons, Back Tap, and editing tips for any iPhone model.
Taking a screenshot on your iPhone is one of those simple, everyday tasks you don't think much about until you need it. Once you know the right button combo for your specific phone, it's second nature.
It’s the quickest way to save a hilarious text conversation, grab important details from an email, or even snag a perfect frame from a video you're watching. The exact method just depends on one thing: whether your iPhone has a Home button or not.
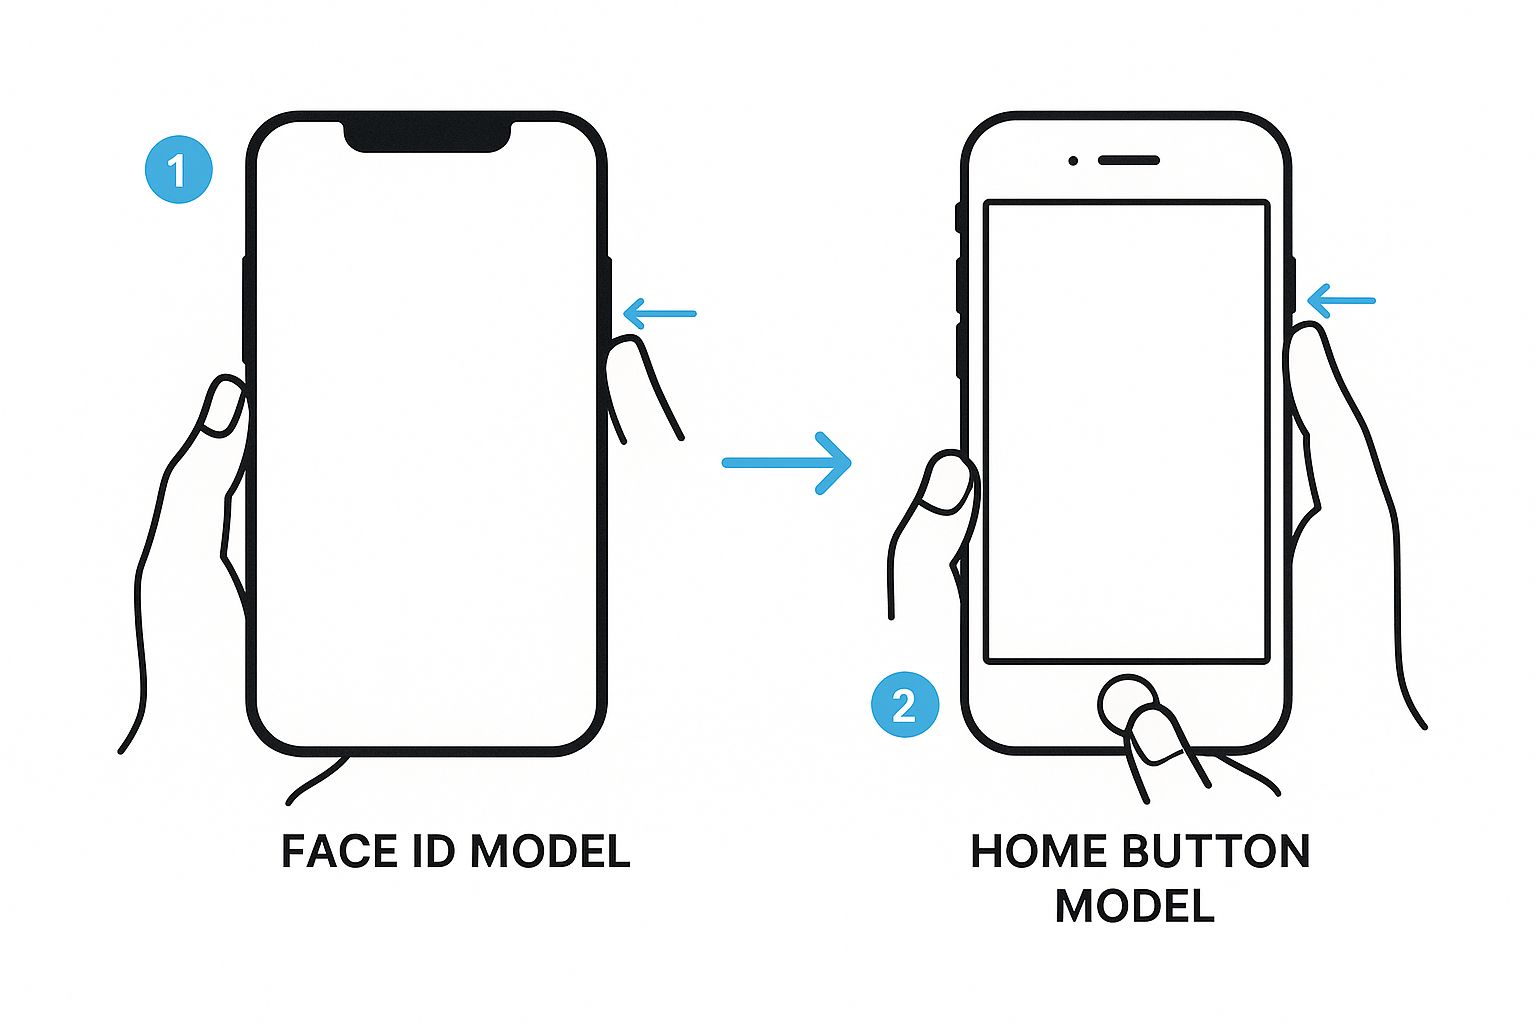
Screenshots for Face ID Models (iPhone X and Newer)
If you're rocking a more recent iPhone like anything from the iPhone X, 11, 12, 13, 14, or 15 series you won't find a physical Home button. The process is a simple, two button press.
Just press and quickly let go of the Side button (on the right) and the Volume Up button (on the left) at the exact same time. You'll see your screen flash white for a split second, and a little thumbnail of your screenshot will pop up in the bottom left corner. From there, you can tap it to edit or just swipe it away to save it to your Photos.
Screenshots for Home Button Models (iPhone SE, 8, and Older)
For those of you with an iPhone that still has its classic Home button like an iPhone SE or an iPhone 8 and earlier the method is just as straightforward, but uses a different set of buttons.
To capture your screen, press and release the Home button and the Side button (on the right) simultaneously. On even older models like the iPhone 5s, it’s the Home button and the Top button. The result is the same: a quick flash confirms the screenshot was taken.
To make it even clearer, here’s a quick reference table that breaks down which buttons to use for your specific device.
iPhone Screenshot Methods at a Glance
| iPhone Model Type | Button Combination | Best For |
|---|---|---|
| Face ID Models (iPhone X & later) | Side button + Volume Up button | Quick, one handed captures on modern iPhones. |
| Home Button Models (iPhone SE, 8 & earlier) | Home button + Side/Top button | The classic, familiar method for older devices. |
This table should help you instantly find the right combination without having to guess. No matter your model, it's a simple, simultaneous press.
This handy visual guide also shows you exactly what to press.
The ability to take a screenshot has been around since iOS 2.0, and it’s become one of the most used features on any phone. When Apple introduced iOS 13 back in 2019, the button combination shifted to the Side and Volume Up press to accommodate the new all screen designs. As Gear Patrol notes in their history of the feature, this small change was a big deal, adapting a core function to a new generation of hardware.
Screenshotting Without Using Physical Buttons
The hardware buttons are the classic way to grab a screenshot, but they aren't always the best tool for the job. Maybe your buttons are on the fritz, or you just want a simple, one handed way to capture your screen. Thankfully, your iPhone has some powerful accessibility features that moonlight as fantastic screenshot tools.
Let’s dive into how to snap a screenshot without touching a single physical button.
These software based tricks are incredibly handy, turning simple gestures into instant actions. It's not a niche feature, either. The average person grabs 10 to 20 screenshots a month, saving everything from memes to receipts. As Gear Patrol's research on the feature shows, we rely on this all the time, and these button free methods just make it easier.
Using AssistiveTouch for On-Screen Captures
AssistiveTouch is a lifesaver if your physical buttons are broken or just awkward to press. It puts a small, floating virtual button on your screen that you can customize with all sorts of shortcuts including, you guessed it, taking a screenshot.
To get it going, head over to Settings > Accessibility > Touch > AssistiveTouch. Flip the switch on, and you'll see a semi transparent dot appear. From there, you can tell it what to do. Set "Screenshot" as the action for a single tap, double tap, or long press on that little dot.
I like to set a double tap to capture the screen. It means I can grab a shot from any app with two quick taps on the floating button. No more fumbling with the side and volume buttons.
This is a game changer for people who need better accessibility or just use a bulky case that makes the physical buttons a pain to press. It puts a core function right at your fingertip.
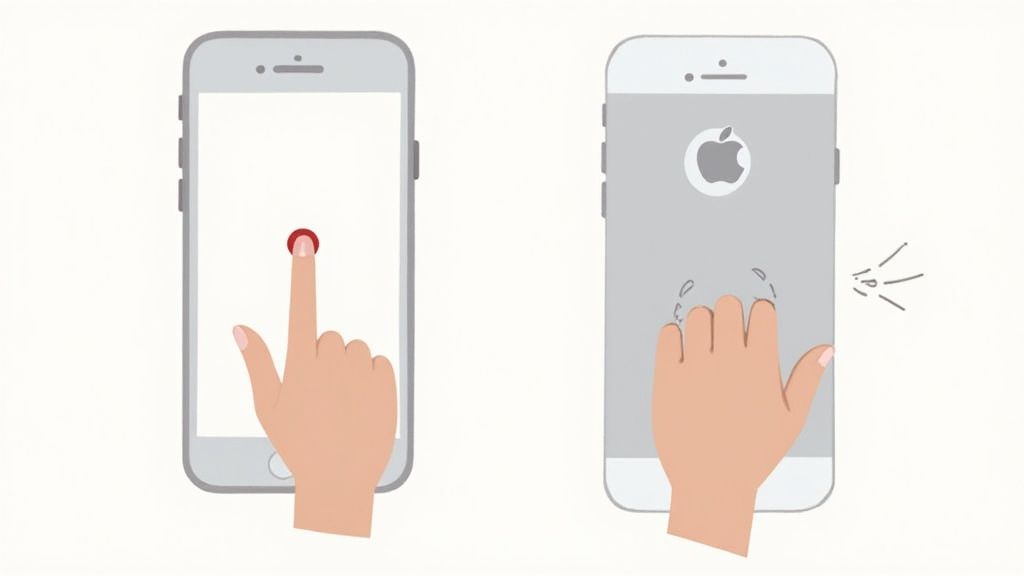
How to Use Back Tap for Screenshots
Here's another clever, button free trick: Back Tap. This turns the entire back of your iPhone into a touch sensitive button. You can trigger a screenshot (or other actions) just by double tapping or triple tapping the back of your phone. It feels like magic.
Setting this up is quick:
- Open up the Settings app.
- Navigate to Accessibility > Touch.
- Scroll all the way down and select Back Tap.
- Pick either Double Tap or Triple Tap and assign Screenshot to it.
Once that’s done, a couple of firm taps on the back of your iPhone instantly snaps a screenshot. The best part? It works right through most standard cases. It's an incredibly fast and discreet way to capture your screen. Imagine you're holding your morning coffee and see something you need to save, a quick tap with your index finger does the trick without any screen gymnastics.
Mastering the Screenshot Editor and Markup Tools
Taking an iPhone screenshot is just the start. The real power move is what you do in the seconds after you press those buttons. That little thumbnail that pops up in the corner isn't just a preview it's your gateway to a surprisingly powerful editor that can turn a basic image into a clear message.
This is where you go from just capturing your screen to actually communicating something useful with it.
Instead of just swiping the raw image away to save it, give that thumbnail a tap. You’ll open up a full suite of Markup tools that let you crop, draw, and highlight information right on the spot. No separate app needed.
Going Beyond Basic Cropping
Sure, cropping is handy, but the real magic is in that little toolbar at the bottom of the screen. This is where you find pens, highlighters, and even an eraser for making quick, precise edits.
Let's say you've screenshotted a bank statement to question a charge. Before you send it off, you can grab the pen tool and quickly scribble over sensitive details like your account number. It's way faster and more secure than sending the full, unedited image. For more advanced edits, brushing up on some general image editing techniques can give you even more control.
The Markup tools are built for speed and clarity. Use the highlighter to draw a hiring manager's eye to a key metric on a performance chart, or circle an incorrect charge on a digital receipt. It’s all about getting your point across fast.
Adding Clarity and Context
Sometimes, a quick circle or highlight isn't quite enough. The editor also lets you add text boxes, shapes, and other elements to give your screenshot more context.
- Add Text: Just tap the "+" icon and select Text to type notes directly onto the image. You can tweak the font, size, and color to make it stand out.
- Magnify Details: The Magnifier is a personal favorite. It creates a circular zoom effect over a tiny detail, making it impossible for someone to miss what you're pointing out.
- Add Your Signature: The Signature tool is a lifesaver. It lets you drop in a pre saved digital signature, which is perfect for quickly signing and returning a document you've just screenshotted.
These features transform a static image into a clear, actionable piece of information. For those who need to create more polished or branded visuals from their captures, especially for things like app marketing, you can explore more advanced options in our dedicated screenshot editor. Mastering these built in tools ensures every screenshot you take is ready to inform, persuade, or instruct with total precision.
Advanced Screenshot Techniques You Should Know
Once you've got the basic button press down, your iPhone has a few more tricks up its sleeve for capturing exactly what you need. These are the methods I turn to when a simple screen grab just won't cut it, like when I need to save an entire webpage or when my hands are full. Mastering these will seriously level up your screenshot game.
One of the most useful tricks is capturing a full, scrolling webpage. By 2023, Apple reported that over 80% of active iPhones were running at least iOS 15, which means most people have this awesome feature built right in. You can check out more cool iOS stats on gearpatrol.com.
Capture a Full Page in Safari
Ever tried saving a long recipe, an important online receipt, or a lengthy article? Taking a bunch of screenshots and trying to piece them together is a total pain. Thankfully, you don't have to. You can capture the entire scrollable page as a single, neat PDF.
Here's my go to method for grabbing a full page:
- Snap a screenshot in Safari just like you normally would.
- Tap the little thumbnail preview that pops up in the bottom left corner.
- Look at the top of the editing screen and tap the Full Page option.
- You'll see a slider on the right use it to scroll through and make sure you got everything.
- Hit Done, then choose Save PDF to Files.
This is a game changer for keeping clean, searchable records of important info without flooding your Photos app with a dozen images. It creates a professional looking document that’s super easy to share or file away.
Hands-Free Screenshots with Siri
Sometimes you need to grab a screenshot at the perfect moment, but your hands are busy. Maybe you're in the middle of a recipe, or you're trying to document a weird bug in an app. In those moments, just ask Siri to do it for you.
Just say "Hey Siri" or hold down the Side button, then say, "Take a screenshot." Siri will instantly capture your screen and show you the familiar thumbnail preview. This hands free method is unbelievably handy in situations where fumbling with buttons would be awkward or just plain impossible.
I find Siri surprisingly fast and reliable for this. It's especially useful when you need to document something inside an app that requires you to be actively touching the screen.
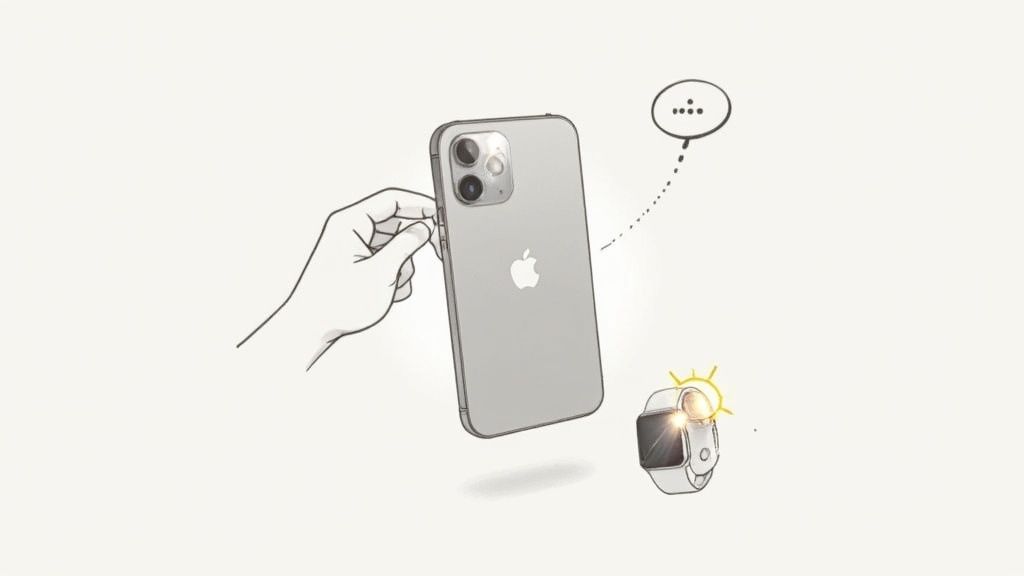
Taking Screenshots from Your Apple Watch
Did you know your Apple Watch can take a screenshot of its own screen? It's a fantastic little feature for saving a workout summary, a cool watch face you just customized, or a specific notification you want to remember. You just have to enable it first.
To get it working, open the Watch app on your iPhone. Head to My Watch > General, and find the switch for Enable Screenshots. Flip it on.
From now on, just press the Digital Crown and the side button on your watch at the same time. The screen will flash, and the screenshot will be saved directly to the Photos app on your iPhone.
And for those of you looking to turn those captures into polished visuals, maybe for app marketing, you might want to check out our guide on the best mockup apps for iPhone.
Creating High-Converting App Store Screenshots
Knowing how to take an iPhone screenshot is just the start. For app developers, the real challenge is turning that raw image into a high converting marketing asset that drives downloads on the App Store and Google Play. Your screenshots are your visual pitch and often the deciding factor for potential users.
A great screenshot tells a story. It doesn't just show a feature; it showcases a benefit. Focus on the user's biggest pain point and clearly demonstrate how your app solves it within the first one or two images. Using a site editor, you can add bold, easy to read captions and vibrant background colors that align with your brand, creating a compelling narrative at a glance.
Designing for Maximum Impact and Conversions
To boost app store growth, your visuals need a clear hierarchy. Your app's unique value proposition must be front and center, supported by short, punchy captions that emphasize benefits, not just features.
Here are actionable insights for both iOS and Android stores:
- Lead with Your "Aha!" Moment: Use the first 1-2 screenshots to highlight your app's core function. What makes your app essential? Show it immediately.
- Captions are Crucial for Conversion: Add text overlays that explain why a feature matters. For example, instead of "Budget Tracker," use a caption like "Track Your Spending in Seconds."
- Maintain Brand Consistency: Use your site's screenshot editor to apply consistent brand colors, fonts, and layouts. A professional look builds trust and boosts conversions.
For more in depth strategies, our guide on crafting stunning iOS app screenshots offers detailed techniques.
High converting app store screenshots act as a quick tutorial. They guide users through your app's best features and give them the confidence to click the download button.
Streamlining Your Workflow for Efficiency
Creating polished, properly sized screenshots for every device is time intensive. An efficient workflow is key to maintaining momentum. To avoid hours in complex design software, use an App Store Screenshot Generator. These tools are built for efficiency, offering templates, device mockups, and localization features that can get you 90% of the way there in minutes. For example, you can upload one screenshot and have it instantly placed in the latest iPhone mockup with a pre-set background and title.
Ultimately, testing is the only way to know what works best. A/B test different screenshot designs, captions, and feature showcases. The data will reveal what resonates with your target audience and leads to the most downloads.
What to Do When iPhone Screenshots Stop Working
It happens to the best of us. You go to grab a screenshot something you’ve done a thousand times and… nothing. The screen doesn't flash, no thumbnail appears. It’s frustrating, but don't panic. More often than not, the fix is surprisingly simple.
Let's walk through the most common reasons your screenshots might be failing and get you back on track.
The Screenshot Never Saves or Shows Up
This one’s a classic head scratcher. You see the screen flash, you hear the shutter sound, but when you check your Photos app, it’s nowhere to be found. A ghost screenshot. This almost always points to a minor software glitch.
Before you go down a rabbit hole of complicated fixes, just try a simple restart. Seriously. Powering your iPhone off and on again clears out temporary bugs and fixes this particular issue more than 50% of the time. It’s the oldest trick in the IT book for a reason.
If that doesn't do the trick, think about what you're trying to screenshot. Certain apps, especially for banking, secure messaging, or streaming services, will deliberately block screenshots to protect sensitive data or copyrighted content. It’s a security feature, not a bug.
Pro Tip: For those really stubborn software issues, a forced restart is your best friend. It’s a little more powerful than a standard restart and can clear up deeper level problems without touching your data.
The Physical Buttons Aren't Responding
What if the button combo itself seems dead? You press the Side and Volume Up buttons together, and absolutely nothing happens. While it could be a hardware problem, it’s usually something far less dramatic.
First, check the obvious: your phone case. A bulky or poorly fitting case can easily get in the way, preventing you from pressing both buttons down at the exact same time. Pop the case off and try again.
If the buttons are still unresponsive, this is the perfect excuse to set up a backup method. I always recommend having AssistiveTouch or Back Tap configured for this very reason. These are killer accessibility features that let you take a screenshot without ever touching the physical buttons, giving you a reliable software based workaround.
We’ve walked through all the ways to grab a screenshot on your iPhone, but a few questions always seem to come up. Let's tackle them head on with some quick answers.
Where Do My iPhone Screenshots Go?
Good news: you don't have to go hunting for them. Every screenshot you take lands directly in your Photos app.
You’ll find them right away in the "Recents" album. But even better, iOS automatically creates a dedicated "Screenshots" album under the Media Types section in Photos, so all your captures are neatly organized in one spot.
Can I Screenshot a Video While It's Playing?
Yep, absolutely. You can freeze any frame of a video and save it as a still image.
Just use your favorite screenshot method whether it’s the classic button combo or a handy shortcut like Back Tap right when the moment you want to capture is on screen. The screenshot will save that exact frame, instantly.
How Do I Take a Screenshot Without That Annoying Volume Bar?
This is a classic problem, and the solution is all about timing. To get a clean shot without the on screen volume indicator, you have to be fast.
The trick is to press and immediately release the Side button and Volume Up button at the exact same time. If you hold them for even a split second too long, the volume HUD will pop up and photobomb your screenshot. A quick, sharp press is key.
Ready to create stunning, high converting visuals for your app? ScreenshotWhale makes it easy to design professional App Store and Google Play screenshots in minutes. Try it for free and see how simple it is to boost your downloads: https://screenshotwhale.com