How to Publish App in Google Play: A Practical, Clickable Guide
Learn how to publish app in google play with a practical, step-by-step guide covering account setup, store listings, testing, and a successful launch.
Getting your app onto Google Play isn't just a technical task; it's a strategic process. With millions of apps all fighting for a user's attention, a well-planned launch can be the difference between getting discovered and getting completely lost in the noise.
Think of it less like flipping a switch and more like executing a multi-stage blueprint. Every step, from setting up your developer account to crafting a store listing that actually converts, plays a critical role in boosting your app store growth.
Your Blueprint for a Successful Google Play Launch
This guide is your roadmap. We're going beyond a simple checklist to give you actionable insights that I've seen work time and time again. We’ll cover the nuts and bolts of the developer account setup, building a compliant app bundle, and, just as importantly, creating a store listing that grabs attention and turns casual browsers into loyal users.
As you map out your own launch, it really helps to look at what works for others. Checking out examples of successful mobile applications can give you a feel for what a polished, user-ready product looks like on the store.
The Three Core Phases of App Publishing
I like to break the whole journey down into a simple, repeatable workflow. You can think of it in three main stages: Prepare, List, and Launch. Each phase builds directly on the last, creating a smooth path from your development environment to a live app in the hands of users.
A great launch isn't a single event. It's the result of getting all the details right beforehand. From your app's technical readiness to the persuasive power of your store listing, every piece contributes to your growth. Nailing these elements from the start prevents frustrating delays and gives you the best shot at standing out.
This visual perfectly captures the flow.
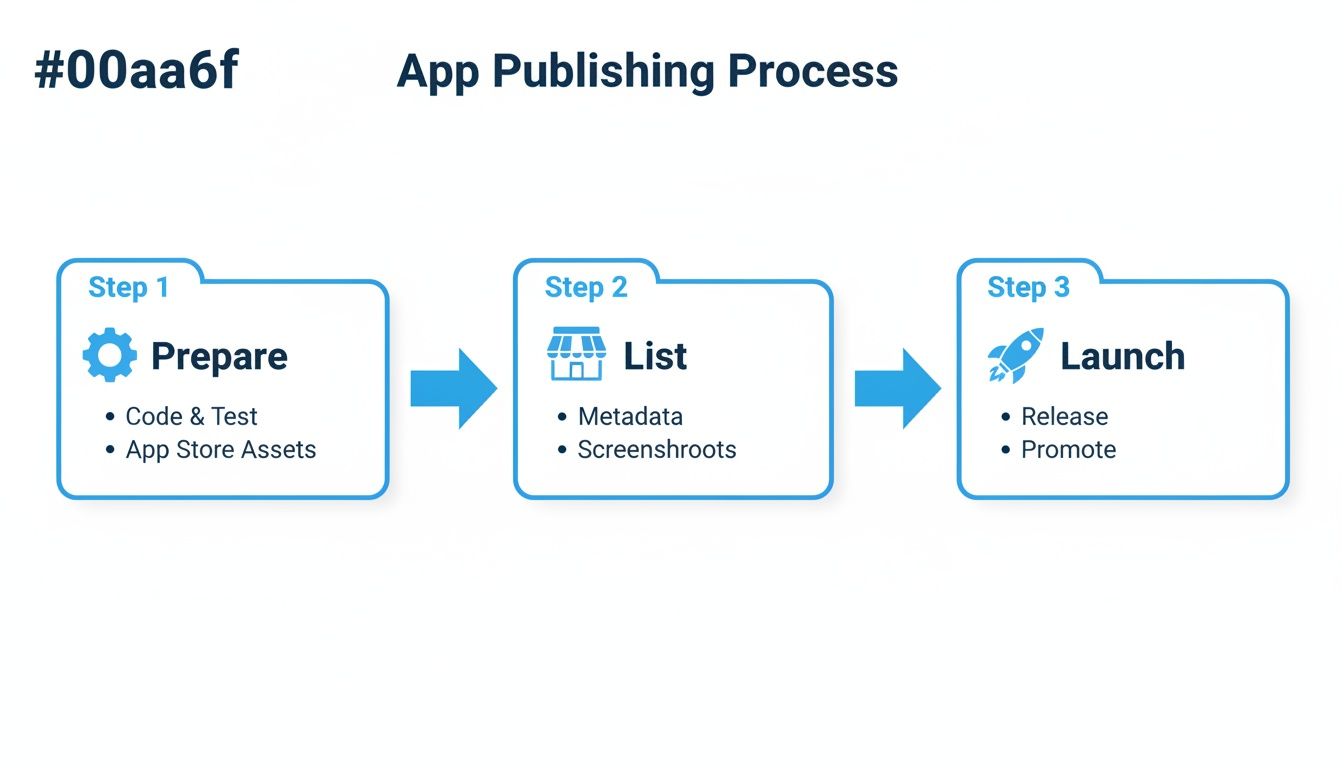
This process really highlights how preparing your assets, listing them effectively, and launching strategically are the cornerstones of any successful release.
A huge part of this is optimizing your store listing's visuals. High-quality screenshots and a killer feature graphic can dramatically boost your app's visibility. Honestly, a strong visual identity is often the very first thing a potential user notices. For a deep dive, you should learn more about creating an effective https://screenshotwhale.com/blog/feature-graphic-google-play to hook users the moment they land on your page.
To help you keep track, I've put together a quick reference table that breaks down the key tasks for each phase of the publishing process.
Google Play Publishing Quick Reference
This table provides a high-level summary of the essential tasks and goals you'll encounter as you move through each stage of publishing your app.
| Phase | Key Task | Primary Goal |
|---|---|---|
| Prepare | Build & Sign AAB, Set Up Developer Account | Ensure the app is technically sound, secure, and ready for Google's platform. |
| List | Create Store Listing, Add Visuals, Set Pricing | Craft a compelling and informative presence on the Play Store to attract users. |
| Launch | Configure Releases, Run Tests, Monitor Rollout | Release the app to users safely, gather feedback, and ensure a stable launch. |
Treat this as a mental checklist to make sure you've covered all your bases before hitting that final "Publish" button. It’s about being methodical, not just fast.
Alright, before your app can go live for millions of people to download, you've got to get your house in order on Google Play. This all starts with setting up your developer account. It's your official key to the kingdom.
First things first, head over to the Google Play Console and get signed up. You can use your regular Google account, but I often see developers create a new one just to keep their work and personal lives separate. Either way works.
You'll have to agree to the Google Play Developer Distribution Agreement, which is standard stuff. Then comes the $25 one-time registration fee. Don't sweat it; this isn't a subscription. Think of it as a small cover charge to get into the biggest app marketplace on the planet. Pay that, fill out your developer name and contact details, and you're in.
Getting Your Identity Verified
Google has really tightened the screws on verification lately to keep the Play Store safe, and that's a good thing for everyone. So, be ready to prove you are who you say you are. This can be quick, maybe just a few hours, but if they find any inconsistencies in your info, it could stretch out for days.
You'll also need to make a key decision: are you registering as an individual or an organization? If it's just you, a personal account is all you need. But if you're a business, even a small one, set up an organization account right from the get-go. It saves a world of administrative pain down the road.
Pro-tip: New personal developer accounts now have much stricter testing requirements before you can go live. We'll get into that later, but the takeaway is clear: get your account set up and verified early. Don't let paperwork be the thing that delays your launch.
Prepping Your Android App Bundle (AAB)
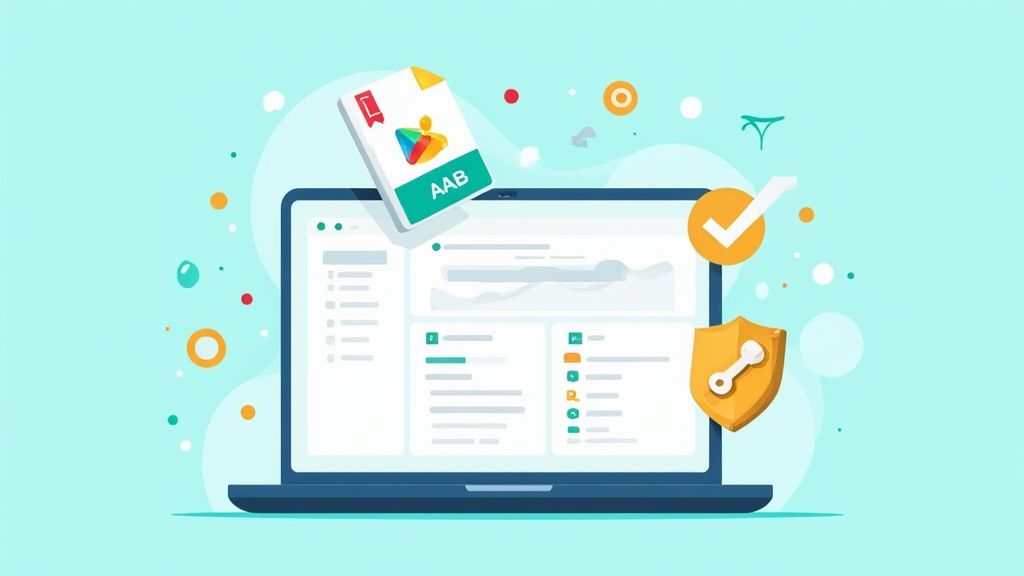
With your account sorted, it's time to package up your app. Forget about the old APKs. Google now requires all new apps to be uploaded as an Android App Bundle (AAB). And honestly, this isn't just another rule. It's a huge win for your users.
The AAB is a pretty clever piece of tech. Instead of a single, bloated file that has to work on every possible device, the AAB bundles up all your app's code and resources. When someone hits "Install," Google's Dynamic Delivery system takes that AAB and builds a custom-tailored APK just for their specific phone.
This little bit of magic has some serious benefits:
- Smaller App Sizes: On average, an AAB can shrink your app's download size by 15% compared to a universal APK. That's a big deal.
- Faster Installs: Smaller files mean less time staring at a progress bar.
- Fewer Uninstalls: People are way less likely to delete an app that isn't hogging all their phone's storage.
Don't Lose Your Keys: App Signing
The last piece of the technical puzzle is your app signing key. This is the digital fingerprint that proves you, and only you, are the developer of your app. Every single update you push has to be signed with this exact same key.
You'll generate this key right inside Android Studio. Once you have it, guard it with your life.
Losing your signing key is a catastrophe. Seriously. If it's gone, you can never update your app again. Your only option would be to publish a brand new app, starting from scratch with zero users, ratings, or reviews. To prevent this nightmare scenario, Google offers Play App Signing. They manage the key for you in their secure infrastructure, and it’s the option I strongly recommend to every developer. Getting these fundamentals right from the start is non-negotiable for a smooth launch.
Designing a High-Converting Store Listing
Think of your Google Play store listing as your digital storefront. For most people browsing the store, this is the one and only place they'll decide whether to tap "Install" or just keep scrolling. Getting this right isn't just about filling in a few fields; it’s a direct exercise in App Store Optimization (ASO) aimed squarely at driving installs.
A great first impression usually starts with your visuals, specifically your app icon and feature graphic. They're the first thing anyone sees. A clean, memorable icon that nails your app's purpose can seriously boost clicks from search results. Likewise, a slick feature graphic acts like a billboard, creating a bit of excitement before a user even bothers to read a single word.
Crafting High-Converting Screenshots
Screenshots are, without a doubt, the most powerful tool in your conversion toolbox. People rarely read the full description, but they always swipe through the images. This is your chance to tell a visual story that shows off your app's best features and boosts conversions.
But don't just upload raw screen captures. The most efficient and high-converting app store screenshots for Android and iOS blend clean UI mockups with short, punchy, benefit-driven text. Wrap it all in a vibrant, on-brand design with appealing imagery. Guide the user's eye from one killer feature to the next, building an undeniable case for why they need your app.
Here are some actionable insights for creating better screenshots:
- Focus on the "Why," Not the "What." Instead of a caption that says "Edit Profile," try something like "Customize Your Profile in Seconds." Always frame features as a direct benefit to the user.
- Tell a Story. Arrange your screenshots in a logical flow. The first image must feature your app's most compelling value proposition. Think of it as the hook that stops them from scrolling.
- Keep it Consistent. Use the same color palette, font, and device frame style across all your screenshots for both Android and iOS stores. It looks professional, polished, and it builds trust.
For a deeper dive on screenshot design, layouts, and grabbing a user's attention, check out our guide on creating powerful Google Play app screenshots.
Writing Copy That Sells
While visuals do the heavy lifting, your text is critical for both getting discovered and sealing the deal. Your app's title and short description are huge for ASO, helping Google figure out what your app does so it can rank you for the right searches.
Your app title is your most important keyword real estate. A good move is to include your main keyword right next to your brand name, like "Sleeptopia - Sleep Tracker & Sounds." It’s good for branding and discoverability.
The short description is your 80-character elevator pitch. It shows up right under your screenshots and needs to nail your app's core value proposition, fast. Be direct and lead with the primary benefit.
The full description is where you can stretch your legs. Use bullet points and short, scannable paragraphs. This is also where you can naturally weave in secondary keywords to help you rank for a wider net of search terms.
This is what you’ll be looking at in the Google Play Console when you're setting all this up:
As you can see, the console lays everything out pretty clearly, making it straightforward to build out your store presence.
Every single element on your store listing should work together to answer one simple question for the user: "How will this app make my life better?" If you can nail that, your conversion rate will thank you.
Getting this right is absolutely essential. Publishing on Google Play means jumping into an arena where somewhere between 794 to 1,708 new apps are launched every single day. That's a staggering amount of competition, which makes a perfectly tuned store listing more critical than ever.
To really dial things in, you should be implementing A/B testing strategies for your visuals and text. The Play Console has a built-in tool called Store Listing Experiments that lets you test different icons, screenshots, and descriptions to see what actually drives more installs. It takes the guesswork out of the equation and lets you systematically optimize for growth.
Meeting Google’s Testing and Policy Demands
Okay, so your code is clean and your store listing looks sharp. Now comes the part that trips up a lot of developers: navigating Google's maze of testing and policy requirements. This isn't just bureaucratic red tape. Getting this wrong can lead to painful delays or an outright rejection. Think of it as the final quality gate before your app meets the world.
Google has gotten serious about app quality, which means you can't just upload a build and hit "publish" anymore. You have to prove your app is stable by running it through the Play Console's testing tracks. It’s all about finding the bugs before your users do.
Getting a Handle on the Testing Tracks
The Play Console gives you a few different ways to test your app, and using them strategically is the key to a smooth launch. I like to think of them as a filtering process, each one catching different kinds of problems.
Internal Testing: This is your first sandbox. You can push builds instantly to a tight-knit group of up to 100 testers. Think your dev team, QA folks, or a few trusted friends. It's perfect for quick sanity checks to make sure the core features aren't broken, all without waiting on a formal review from Google.
Closed Testing: Here, you expand the circle a bit. You can invite a larger, but still controlled, group of users by email or just share a link with your community. This is where you get your first real-world feedback on usability and performance before the general public sees anything.
Open Testing: This is the final dress rehearsal. Anyone on the Play Store can opt into your beta program, giving you a chance to stress-test your app on a massive scale. You'll uncover those weird, device-specific bugs that only surface when thousands of people are using your app on different networks and hardware.
Mastering these tracks isn't just good practice; it's a requirement. Google uses this process to weed out buggy or low-effort apps, which ultimately protects users and keeps the Play Store ecosystem healthy.
The Infamous 20 Tester, 14-Day Rule
If you’re a new developer, this is probably the biggest hurdle you'll face. Since late 2023, Google has cracked down hard, especially on new personal developer accounts. Before you can even think about hitting publish, you must recruit at least 20 testers who have to remain opted-in to a closed test for 14 consecutive days.
This isn't a passive waiting game, either. Your testers actually have to engage with the app. Finding 20 people and keeping them active can feel like a project in itself, so start early. Hit up friends, family, and developer forums, or look into dedicated beta testing communities to get your group together. For a deeper dive, this 2025 Android publishing guide on foresightmobile.com breaks down all the latest requirements.
Nailing the Policy and Compliance Checks
Beyond testing, your app has to be fully compliant with Google's Developer Program Policies. Get these details right the first time to avoid that soul-crushing rejection email.
First up, your Privacy Policy. This is non-negotiable. You need a public, accessible link to a policy that clearly spells out what data your app collects and how you use it. You’ll plug this link directly into the "App content" section in your Play Console. Be brutally honest here, because any mismatch will get you flagged.
Next is the Data Safety section. This is basically a detailed questionnaire where you declare every single type of user data your app touches. What you collect, what you share, and how you secure it. Your answers must perfectly mirror what your app actually does and what your privacy policy says. This is a common failure point, so double-check your work.
Finally, there’s the Content Rating questionnaire. This is a pretty straightforward survey about your app's content. Does it have violence, strong language, etc.? Your answers generate an official IARC rating, which helps users (and parents) know if your app is appropriate. Lying here is a fast track to getting your app pulled from the store. Getting these compliance steps right is your ticket to a quick approval.
Alright, your app has been tested to bits and the store listing is looking sharp. You’re at the finish line now. This is where you lock in the final details, hit that big green "publish" button, and then switch gears into watching how it performs out in the wild.
Nailing this part is what separates a messy launch from a smooth one.
First things first, let's talk about money and maps. Your app's pricing and where it'll be available. In the Google Play Console, you'll need to decide if your app is free or paid. Think this through carefully. You can always change a paid app to be free later, but a free app can never, ever be switched to paid. You'll also pick the specific countries to launch in, letting you target your key markets from day one.
Don't Just Launch. Roll It Out
Instead of flipping the switch and releasing your app to 100% of users at once, there’s a much smarter, safer way: a staged rollout. This feature is your best friend on launch day. It lets you release your update to a tiny, random slice of users first, maybe just 1% or 5%.
Why? Because it’s your final safety net.
By starting small, you get to see how your app behaves in a real-world environment without betting the farm. It’s your last chance to catch those nasty, show-stopping bugs, discover your servers can't handle the load, or find critical crashes before they blow up in your face and tank your ratings. If something goes wrong, you just hit pause on the rollout, fix the bug, and resume. No mass panic, no review-bombing. It's how the pros do it.
A staged rollout flips the script on your launch. It’s no longer a high-stakes gamble but a controlled, data-backed process. It gives you the breathing room to react to what’s actually happening, ensuring a solid, stable experience for everyone else when they get the update.
The Real Work Starts After You Go Live
Once your app is out there, your job isn't done. It’s just getting started. Those first few days and weeks are gold. You're collecting the raw data and feedback that will shape your first update. The Google Play Console becomes your command center for tracking your app's health and what users are really thinking.
Keep a hawk-eye on these metrics:
- Crash Rates and ANRs: The "Crashes and ANRs" (Application Not Responding) report is your early warning system. See a spike after launch? That’s a code red. You’ve got a stability problem that needs fixing, stat.
- User Reviews and Ratings: Read your reviews every single day. They are unfiltered, direct feedback on what people love, what's confusing, and what’s flat-out broken. Taking the time to respond, especially to the negative ones, shows you’re listening and can sometimes turn a one-star critic into a fan.
- Download and Uninstall Numbers: Watch your acquisition and retention. If you see a ton of uninstalls happening right after people download, that's a huge red flag. It could point to a clunky onboarding flow, poor performance, or simply that your store listing promised something the app didn't deliver.
This immediate feedback loop is priceless. It tells you exactly what to prioritize for your next release, kicking off a cycle of continuous improvement. This post-launch vigilance is also a massive part of a good App Store Optimization (ASO) strategy. To keep your momentum going, it’s worth learning the key pillars of ASO for Google Play.
Common Questions Before You Hit Publish
Alright, you're in the home stretch. You've built the app, navigated the Play Console, and you're hovering over that final "Start rollout" button. This is usually when a flood of last-minute questions hits. Even seasoned developers get tripped up here.
Let's clear up the most common uncertainties so you can launch with confidence.
We'll cover review timelines, sneaky rejection pitfalls, and a couple of critical technical details every developer absolutely needs to know before going live.
How Long Does Google Play App Review Take?
This is the big one everyone asks. If this is your very first app, buckle up. The initial review is much more detailed and can take anywhere from three to seven days, sometimes even longer. Google is scrutinizing not just your app but your entire developer account to make sure you're legit.
Once your app is live, future updates are usually a breeze. Most of my updates get approved within a few hours, though it can still stretch to a day or two.
My best advice? Build a buffer into your launch plan. Seriously. Never, ever announce a hard launch date until you have that approval email from Google. Delays happen, and it’s a simple way to save yourself a ton of stress.
Trust me, you don't want to be explaining a missed launch date to your excited users.
What Are the Most Common Reasons for Rejection?
Getting rejected is a massive headache, but most of the time, it's completely avoidable. After years of doing this, I've seen the same mistakes pop up again and again.
Here are the top culprits to watch out for:
- Policy Violations: This is hands-down the number one reason. Things like a misleading store description, an inaccurate data safety form, or forgetting to link to a valid privacy policy will get you an instant rejection.
- Bugs and Crashes: If the reviewer can't even get your app to run without it crashing, you're done. This is exactly why those testing tracks exist. Use them!
- Over-reaching Permissions: Don't ask for permissions your app doesn't actually need. Requesting access to a user's contacts or location without a crystal-clear reason is a huge red flag for reviewers.
- Mishandling Content: If your app includes user-generated content or ads, you need to follow Google's policies to the letter. Failing to do so is a common slip-up.
Do yourself a favor and spend 30 minutes reading through the Google Developer Program Policies before you submit. It's the best way to sidestep these common traps.
Can I Change a Free App to Paid Later?
This is a critical one that catches so many developers off guard. The answer is a hard no. Once you publish an app as "Free" on Google Play, that's it. It's set in stone forever.
If you change your mind and want to charge for it, your only move is to unpublish the free version and launch an entirely new, separate app with a paid price. That means a new package name and starting from scratch with zero downloads, ratings, or reviews.
A much better strategy is to keep the app free and build in revenue streams later through in-app purchases or subscriptions.
Why Is the Android App Bundle (AAB) Required?
Google switched to the Android App Bundle (AAB) format back in August 2021, and it wasn't just to make our lives difficult. The AAB enables a slick feature called Dynamic Delivery.
Instead of one giant, bloated APK with code and resources for every phone on the planet, the AAB lets Google Play get smart. It uses your bundle to create and serve smaller, highly optimized APKs that are tailored to each specific device.
This means your users get a much smaller download, which translates to faster installs and less precious storage space used. It's a win for them, and happier users mean better ratings for you.
Crafting a killer store listing is just as vital as writing clean code. If you want to create professional, high-converting screenshots that grab attention and drive installs, check out ScreenshotWhale. Our tool makes it dead simple to design on-brand visuals that nail all of Google's guidelines in just a few minutes. https://screenshotwhale.com