How to Take a Screenshot on an Android Like a Pro
Discover how to take a screenshot on an Android with our expert guide. Learn button combos, gestures, and advanced tricks for Samsung, Pixel, and more.
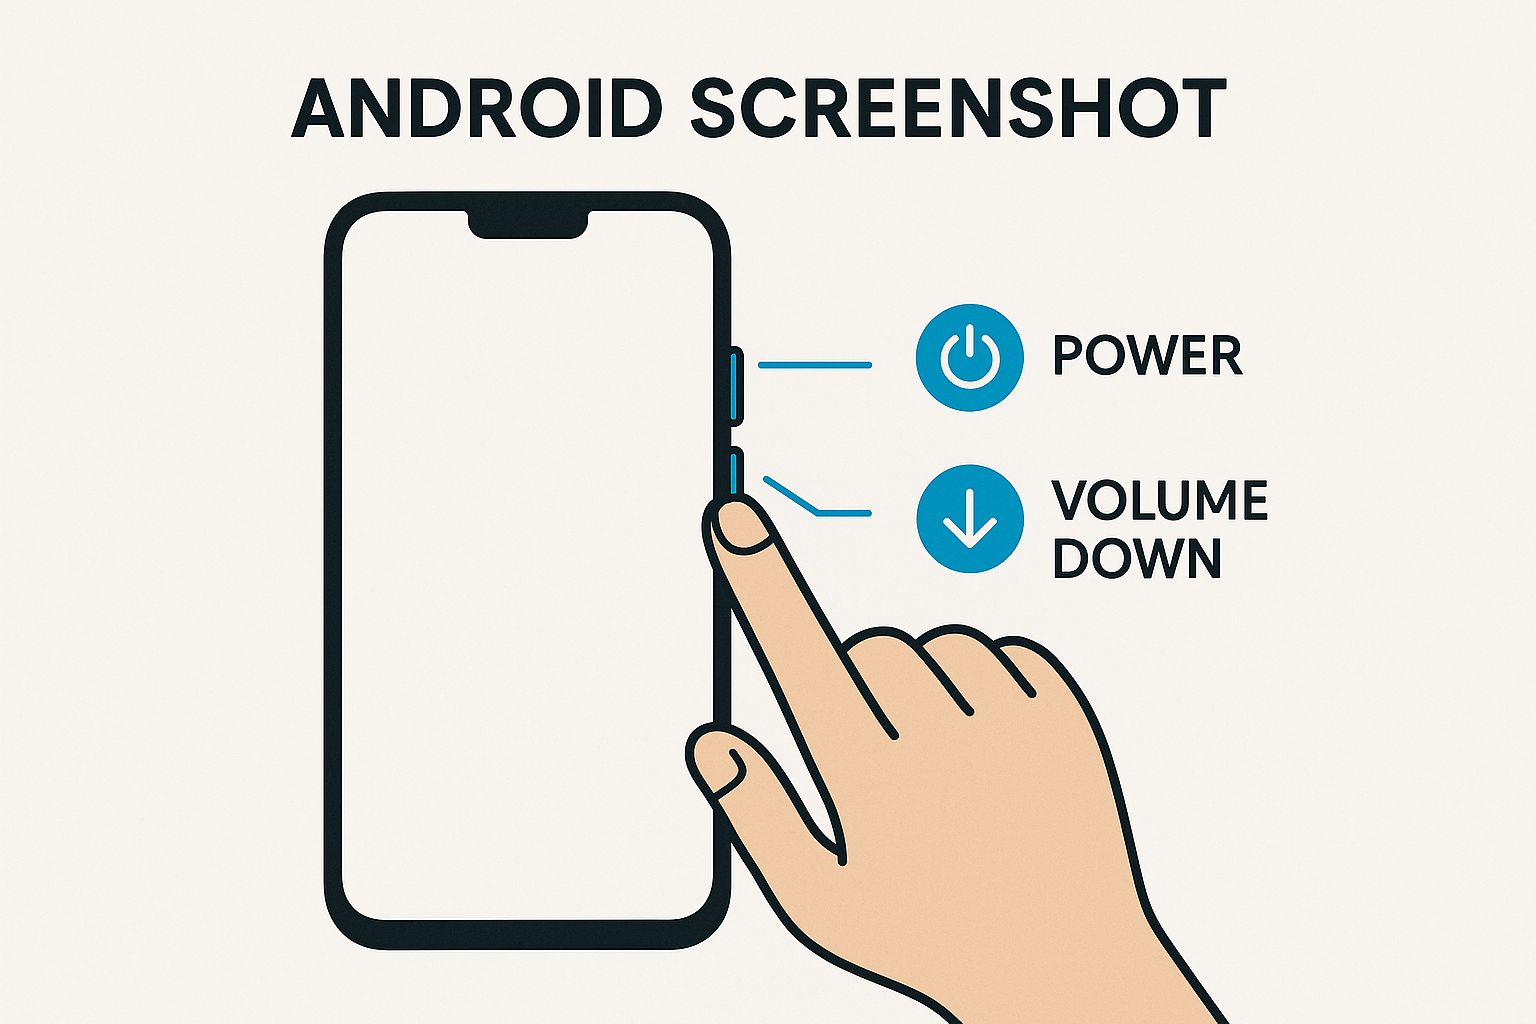
Need to grab a quick screenshot on your Android phone? The fastest and most reliable way is still the classic button combo: press the Power and Volume Down buttons at the same time.
This method is pretty much the universal standard for Android, so it works on almost any device you can get your hands on, saving the image straight to your gallery.
The Easiest Ways to Capture Your Android Screen
When you need to save something on your screen a funny text, a receipt, or a weird error message fumbling with your phone is the last thing you want. Mastering the basic screenshot is a core Android skill, and that button combo is your best starting point.
The only trick is the timing. You have to press and release both buttons at the exact same time. If you hold them down for too long, you’ll probably just bring up the power-off menu instead. It might take a try or two to get the rhythm, but once you do, it’s second nature.
According to Google's official support documentation, this button combination is the standard, built-in way to capture your screen. It’s designed to be accessible and consistent across the board, from high-end flagships to more budget-friendly models.
This infographic breaks down that simple, two-button press.
It really is the go-to method for millions of users every single day.
For a quick overview of your options, this table compares the most common methods at a glance.
Quick Android Screenshot Methods Compared
| Method | Common Devices | How It Works | Pro Tip |
|---|---|---|---|
| Button Combo | Nearly all Android phones (Samsung, Google Pixel, etc.) | Press and release Power + Volume Down simultaneously. | Quickest and most reliable method. Avoid holding the buttons too long. |
| Palm Swipe | Samsung Galaxy devices | Swipe the edge of your hand across the screen (left to right, or right to left). | You have to enable this in your device’s motion and gesture settings first. |
| Three-Finger Swipe | OnePlus, Xiaomi, Oppo, and others | Place three fingers on the screen and swipe down. | Great for one-handed use and often faster than the button combo once you’re used to it. |
| Quick Settings | Many Android versions (especially stock Android) | Swipe down from the top and tap the "Screenshot" or "Screen capture" tile. | You may need to edit your Quick Settings panel to add this tile if it’s not there by default. |
As you can see, while the button method is universal, your specific device might offer even faster, more convenient ways to get the job done.
Exploring Gesture Controls
Beyond pressing physical buttons, many phone makers have built-in some pretty slick gesture controls that can be even quicker once you get the hang of them.
- Palm Swipe: If you have a Samsung Galaxy phone, you can enable "Palm swipe to capture" in your settings. Once it's on, you just swipe the entire edge of your hand across the screen. It feels a little weird at first, but it works surprisingly well.
- Three-Finger Swipe: This is a popular one on phones from brands like OnePlus, Xiaomi, and others. Just swipe down anywhere on the screen with three fingers, and snap! You've got your screenshot.
These gesture controls are perfect for situations where using two hands to press buttons feels awkward or slow. It’s always worth digging into your phone’s motion and gesture settings to see what shortcuts are waiting for you you might find a new favorite method.
Exploring Screenshot Methods Beyond the Buttons
Fumbling with physical buttons isn't the only game in town. Your Android phone has a few clever tricks up its sleeve to make grabbing a screenshot faster, especially when you need to act quickly. One of my favorites is hidden in plain sight: the Quick Settings panel.
You can actually add a dedicated 'Screen Capture' tile right there. It gives you a persistent, one-tap button to instantly save whatever’s on your screen. It’s perfect for capturing a fleeting social media post or saving a confirmation screen without breaking your stride.
Get One-Tap Screenshots from Quick Settings
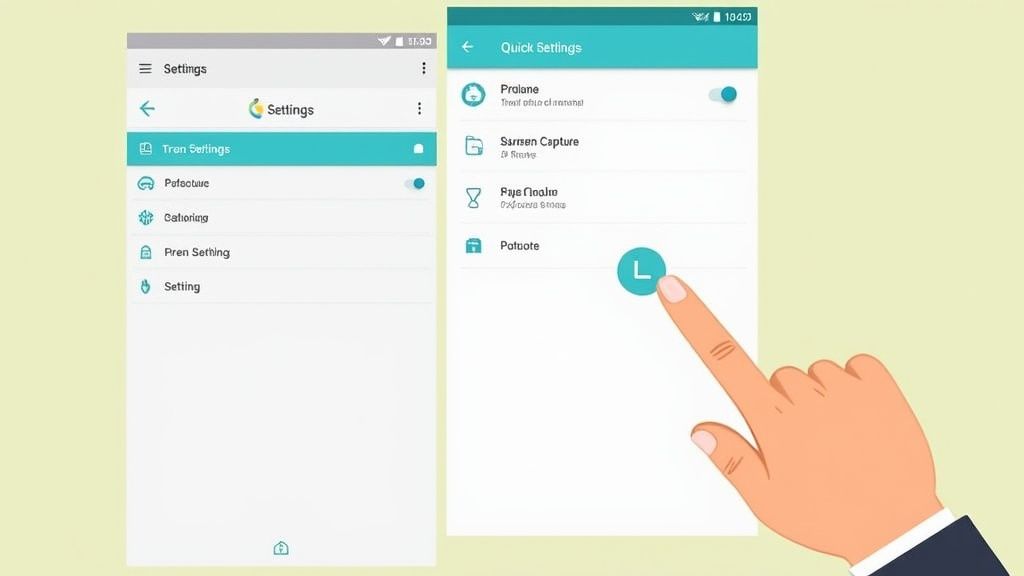
Setting this up is a breeze. Swipe down from the top of your screen to pull up the Quick Settings grid. Look for an edit button it's usually a little pencil icon. Tap it, and you'll see a list of available tiles you can add.
Find the 'Screen Capture' or 'Screenshot' tile, then just drag it into your active area.
Here’s what it looks like once you’ve got it set up and ready to go.
I always drag mine into the first few slots, making it just a swipe and a tap away. This method is incredibly reliable and completely avoids those clumsy accidental button presses. If you take screenshots often, this small tweak is a huge time-saver. It's a similar idea to how you can how to screenshot with an iPad using its on-screen controls instead of the hardware buttons.
Go Completely Hands-Free with Google Assistant
For those moments when your hands are full, there's an even easier way: just use your voice.
Simply say, "Hey Google, take a screenshot," and your phone handles the rest. This is an absolute game-changer when you're cooking with a recipe on-screen, driving (and using a hands-free mount, of course), or just can't physically reach your phone.
What’s great is that this hands-free method not only captures the screen but also gives you a quick notification to confirm it worked, so you know the command was successful without having to touch a thing.
This voice-activated approach really shows how deeply these features are integrated, turning a simple task into a seamless part of your day.
Taking a screenshot on your phone feels like second nature now, doesn't it? But this simple feature wasn't always so slick. It's been carefully honed over years of Android updates, evolving from a clunky, inconsistent mess into the seamless tool we use today.
In the early days, Android didn't even have a universal, built-in way to grab a screenshot. You often had to resort to quirky third-party apps or dive into complicated developer tools just to capture what was on your screen. It was anything but intuitive.
Over time, Google worked to standardize the process, eventually landing on the button combinations most of us are familiar with now. But the real magic happened behind the scenes, changing not just how we take screenshots, but how the entire system feels.
A Smarter System for Snapshots
The evolution from a simple capture tool to a deeply integrated system feature is a story of clever engineering. A huge leap forward came with Android 8.0 Oreo, which rolled out a new system called Task Snapshots. This wasn't just about what you see on the screen; it was a fundamental shift in how your phone handles app previews in the multitasking view.
Instead of forcing your phone to redraw an app's interface from scratch every time you switch tasks, Task Snapshots uses graphic buffers to keep a recent image of that app in memory. The result? Switching between apps feels noticeably faster and smoother. You can read more about how Task Snapshots improve performance if you want to get into the technical weeds.
This system-level improvement shows how a seemingly minor feature is tied to the core performance of your device. It’s also the magic that powers those little thumbnail previews that pop up the instant you take a screenshot, giving you that immediate chance to edit, share, or scrap it.
This journey shows a clear focus on not just tacking on features, but weaving them into the OS to create a more fluid and responsive experience for everyone.
What started as a messy, afterthought function has become a prime example of Android's continuous refinement. It’s the kind of under-the-hood improvement you might not notice, but you’d definitely miss it if it were gone.
Go Beyond the Basic Screen Grab
So, you've mastered the basic button combo. What's next? Modern Android phones have some seriously powerful tools built right in that can change the way you capture and share information. These features are all about saving more than just what you can see on the screen at one time.
One of the most useful tricks in the book is the scrolling screenshot, sometimes called a long screenshot. This thing is a lifesaver when you need to capture an entire webpage, a long text message thread, or a full recipe without breaking it into a dozen different images. It completely removes the headache of taking multiple shots and trying to piece them together later.
Capture the Whole Story with Scrolling Screenshots
Once you snap a screenshot on most Android phones, a small toolbar instantly appears at the bottom. Keep an eye out for an icon with down arrows, which is usually labeled "Capture more" or "Scroll." Give that a tap, and your phone will automatically start scrolling down, stitching everything together into one long image.
Here's what that option typically looks like right after you take a screenshot.
This little menu is your gateway to doing more with your captures. You can keep tapping the scroll button until you've got everything you need. When you're done, just save it, and you'll have one single, seamless image.
Edit and Annotate on the Fly
That same toolbar almost always has an edit or pencil icon. Tapping it throws you straight into a built-in editor, so you can make quick changes without hunting for another app. This is perfect for calling attention to exactly what you want someone to see.
Right away, you can:
- Crop: Trim away the clutter and focus on the important stuff.
- Highlight: Use a highlighter tool to make key text or numbers stand out.
- Annotate: Add text or draw arrows to give context or point something out.
Taking just a second to crop and mark up your screenshot makes a world of difference. It directs the viewer's eye right where it needs to go, leaving no room for confusion.
For example, when creating app store visuals, you can take a screenshot of your app's key feature, then use a screenshot editor to add compelling text overlays, vibrant backgrounds, and device frames. This transforms a basic screen grab into a high-converting marketing asset that boosts app store growth.
Show, Don't Just Tell, with Screen Recording
Sometimes a static picture just doesn't cut it. For those moments, Android’s built-in screen recorder is your best friend. It’s fantastic for creating quick tutorials, showing a developer a bug in action, or sharing a great gaming moment. You'll usually find the Screen Record tile in your Quick Settings panel (the menu you pull down from the top of your screen).
When you kick off a recording, you often get the choice to capture audio from your microphone, your phone's internal audio, or both. This is ideal for narrating your steps, making it incredibly easy to create clear, helpful how-to videos.
When deciding which tool to use, it helps to think about what you're trying to achieve. Here’s a quick breakdown of where each feature really shines.
Advanced Capture vs Standard Screenshot
| Feature | Best For | Key Benefit |
|---|---|---|
| Standard Screenshot | Capturing a single screen, like an error message or a specific UI element. | Quick, simple, and perfect for capturing a specific moment in time. |
| Scrolling Screenshot | Saving long webpages, chat histories, or articles in one image. | Avoids clutter by combining multiple screens into a single, easy-to-share file. |
| Screen Recording | Demonstrating a process, recording a bug, or creating a video tutorial. | Shows dynamic actions and provides context that a static image can't. |
Ultimately, choosing the right tool makes your communication clearer and more effective, whether you're sending a quick bug report or a detailed guide.
Troubleshooting Common Screenshot Problems
It happens to the best of us. You line up the perfect shot, press the power and volume down buttons, and… nothing. No flash, no sound, just a locked screen or an annoying volume slider. When the standard screenshot method fails, it’s almost always down to a couple of simple culprits.
More often than not, it's a timing issue. You have to press and release both buttons at the exact same moment. If you hold one down even a fraction of a second longer than the other, your phone just thinks you want to change the volume or lock it. A bulky case can also be the enemy here, getting in the way and preventing a clean press.
Why Some Apps Block Screenshots
Ever tried to grab a quick capture of your banking details or a scene from a streaming app, only to get a black screen or a stern security warning? That’s not a bug it’s a feature.
Many apps that deal with sensitive information or copyrighted content will deliberately block you from taking screenshots. It’s a security measure designed to protect your data and prevent piracy. Banks do it to stop malware from secretly recording your account info. Streaming services do it to protect their content. You'll usually see a notification that makes it clear what's happening.
When this happens, the app itself is overriding Android’s built-in screenshot function.
While you might find third-party tools online that claim they can get around these blocks, they usually demand risky permissions that could open up your device to security threats. Honestly, it's rarely worth the risk. Your best bet is to respect the app's limitations and look for a built-in "share" or "export" option instead.
The most common reason for a screenshot failing isn't a broken phone, but either a simple timing issue with the buttons or an app's built-in security policy.
Another headache I hear about all the time is not being able to find where screenshots go. By default, Android is pretty organized about this. It saves every capture in a dedicated “Screenshots” folder, which you’ll find inside your main “Pictures” or “DCIM” directory. Just open your phone’s gallery or files app, and it should be right there.
Got Questions About Android Screenshots?
Even after you've mastered the basics, a few common questions always seem to pop up. Let's tackle them so you can get back to capturing and sharing.
Where Do My Screenshots Go?
This is easily the most common question. When you snap a screenshot, your phone doesn't just leave it floating in digital space. By default, it neatly files it away in a dedicated "Screenshots" folder.
You can find this folder right inside your phone’s main Gallery or Photos app. It’s usually set up as its own album, which makes finding that one specific capture from last week a whole lot easier.
Sharing, Storing, and Those Annoying Black Screens
So you've taken the perfect screenshot. What's next?
Sharing is built right into the process. The moment you take a screenshot, a little thumbnail preview pops up. Just tap it. This opens up an editor where you can make quick tweaks and, more importantly, hit the share icon to send it straight to a friend or another app. If you want to dive deeper into getting your images off your phone, our guide on how to upload a screenshot has you covered.
Ever tried to screenshot your banking app or a movie on a streaming service and just got a black screen? That’s not a bug it’s a feature. Many apps block screen captures to protect sensitive financial data or copyrighted material. It’s a built-in security measure, and you generally won't find a safe way around it.
Fun fact: Billions of screenshots are taken on Android devices every single day. They’re used for everything from saving a funny meme to keeping a digital copy of a receipt.
This feature is a core part of the mobile experience, especially since Android's market share has hovered above 70% globally for years. This makes the simple screenshot one of the most universal digital tools out there. You can read more about its origins in this fascinating piece on the history of the screenshot.
Ready to create stunning, high-converting visuals for your app? ScreenshotWhale combines professional templates with a simple editor, helping you design App Store and Google Play screenshots that drive installs. Get started in minutes at https://screenshotwhale.com.
Every current size, one page
The 2026 screenshot dimensions for every iPhone, iPad, and Android device — with an editor that exports them all at once.
See all screenshot sizes