How to Take a Screenshot on iPad Pro: A Complete Guide
Learn how to take a screenshot on iPad Pro using every method. Master button shortcuts, Apple Pencil, and advanced editing tricks to capture and share anything.
Taking a screenshot on your iPad Pro is a simple, everyday task you will do countless times. Once you know the right button combination for your model, it becomes second nature. The process is lightning fast, but it hinges on one key detail: whether your iPad has Face ID or a classic Home Button.
The Two Core iPad Pro Screenshot Methods
Whether you are saving an online receipt, flagging a software bug, or capturing a key moment in a game, the shortcut is designed to be instinctive. Think of it as a quick muscle memory action.
Here is a simple visual guide that gets straight to the point, showing you exactly which buttons to press.
This graphic is perfect for a quick glance, so you are not left fumbling with buttons when you need to capture something fast.
What Happens Right After You Snap the Shot
The moment you press the buttons, you will see a quick flash on the screen and hear a camera shutter sound (if your volume is on). A small thumbnail preview immediately pops up in the bottom left corner.
That little thumbnail is your window of opportunity. Tap it, and you are instantly in the Markup editor, where you can crop, draw, add text, or even use the ruler tool for straight lines. If you ignore it, the thumbnail will vanish after a few seconds, and the screenshot will save directly to your Photos app. It is a fluid system that lets you either edit on the fly or keep working without interruption.
While this process is standard across Apple's lineup, there are minor variations. If you are jumping between devices, our complete guide on how to take a screenshot on a tablet covers the nuances for different brands and models.
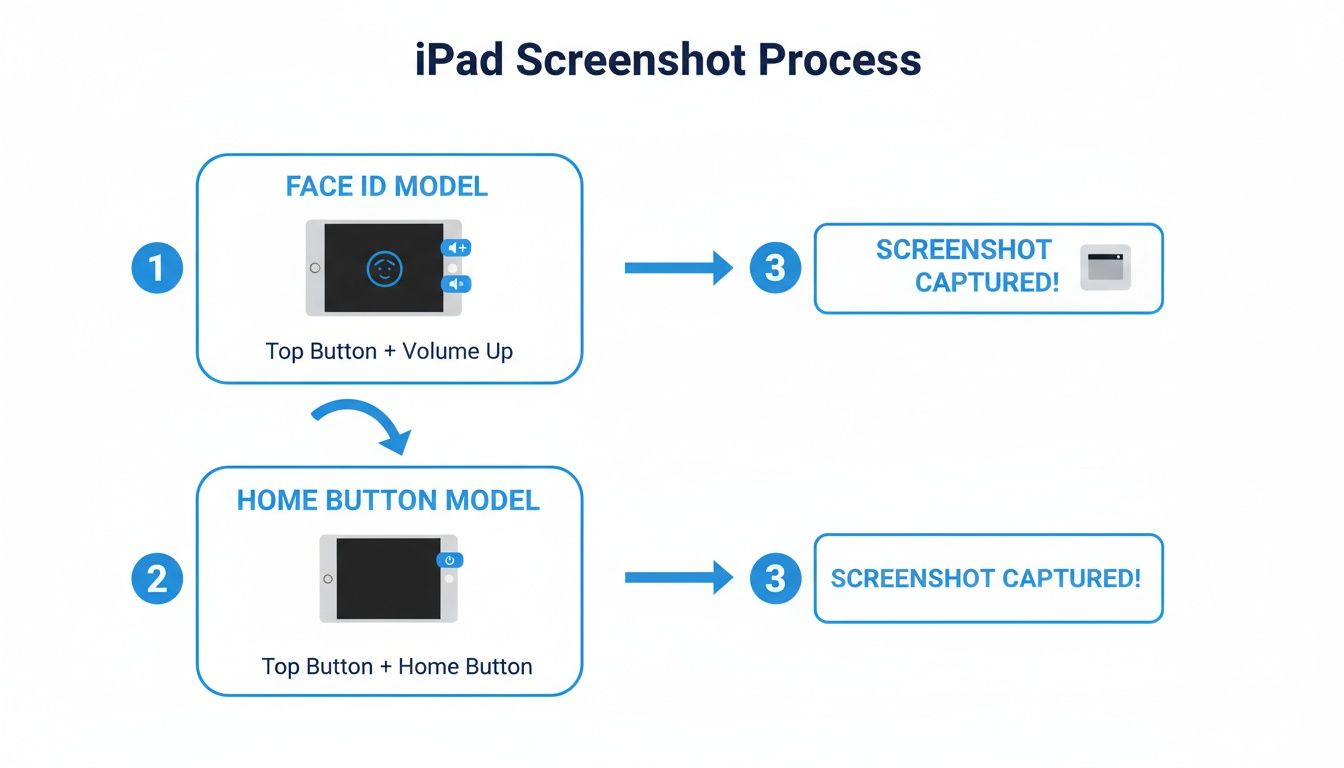
A Quick Cheat Sheet for Every iPad Pro Model
Let's clear up any confusion with a simple reference table. Find your model, find your method.
iPad Pro Screenshot Shortcuts
| iPad Pro Model | Required Button Combination |
|---|---|
| iPad Pro with Face ID | Press and release the Top + Volume Up/Down buttons |
| iPad Pro with Home Button | Press and release the Top + Home buttons |
This table is your definitive guide. Once you have this down, the physical button method will feel like second nature, and you will be ready to explore other ways to capture your screen.
Beyond Buttons: Creative Capture Techniques
The standard button combination is solid, but it is not the only way to grab a screenshot on your iPad Pro. Sometimes, it is not even the best way. Depending on what you are doing, moving beyond physical buttons can unlock much faster, more intuitive workflows.
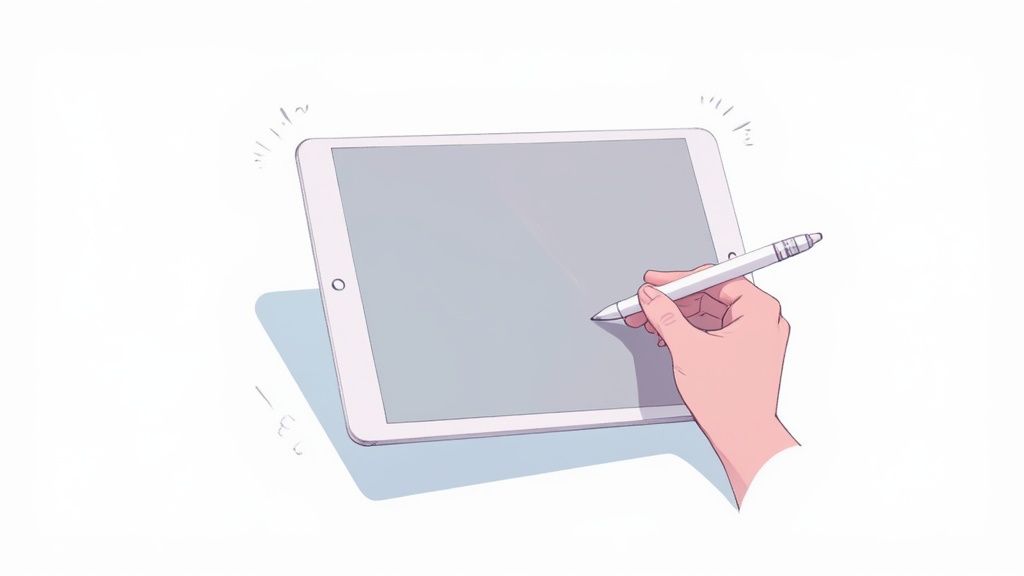
For instance, if you are deep in a design session or marking up a PDF with your Apple Pencil, stopping to press buttons feels like a total workflow interruption.
This is where the Pencil comes in handy. Just swipe diagonally up from either the bottom left or bottom right corner of the screen. Your iPad snaps a screenshot and immediately opens it in Markup view, ready for your annotations.
It is an absolute game changer for students highlighting textbook passages or artists grabbing a quick reference image without missing a beat.
Hands-Free and One-Tap Solutions
But what if you find the buttons awkward or need a completely hands free option? iPadOS has clever accessibility features and voice commands that can help.
- AssistiveTouch for One-Tap Captures: Think of this as creating a persistent, on screen button for screenshots. Head to Settings > Accessibility > Touch > AssistiveTouch and turn it on. From there, you can customize the Top Level Menu to add a Screenshot button for simple access.
- Keyboard Shortcuts for Power Users: If you are using an external keyboard like the Magic Keyboard or Smart Keyboard Folio, the classic Mac shortcut works flawlessly. Just press Command + Shift + 3 to snap the entire screen. Need to capture just a specific area? Use Command + Shift + 4.
- Siri for Voice Activated Screenshots: For a truly hands off experience, just say, "Hey Siri, take a screenshot." Siri will confirm and capture whatever is on your screen. This is perfect for moments when your hands are messy in the kitchen or tied up with a project.
These are not just neat tricks; they are practical solutions for real world situations. A developer using a keyboard can snap bug reports instantly, while a chef following a recipe can ask Siri to capture it without getting flour all over the screen.
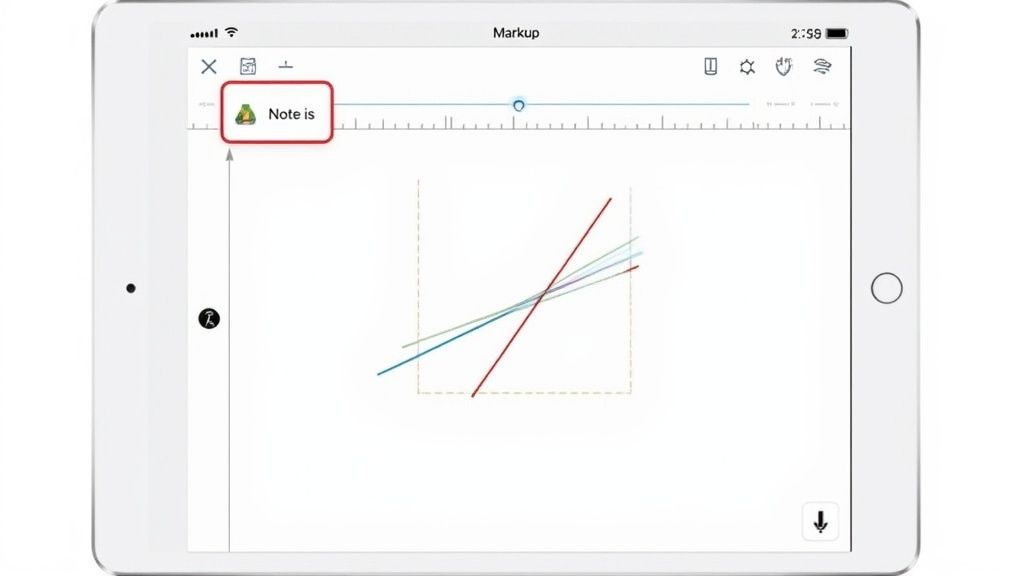
A raw screenshot is often just the beginning. The real magic happens when you start marking it up, turning a simple picture into a powerful communication tool. The moment you tap that screenshot thumbnail, iPadOS puts a suite of Markup tools at your fingertips.
This is about more than just circling something. Picture this: you are reviewing a new website design. Instead of typing a long, confusing email, you can grab a screenshot, scribble notes directly on the mockup, and use arrows to point out exactly what needs to change. It is faster, clearer, and leaves zero room for misinterpretation.
Or maybe you are looking at a dense financial report. With the pen tool, you can instantly highlight the most critical numbers before sending it to your team. These tools transform your iPad Pro from a passive screen into an active feedback machine.
Mastering the Markup Toolkit
The range of tools Apple gives you is surprisingly deep. For anything that needs precision, like marking up a floor plan, the ruler tool is a lifesaver for drawing perfectly straight lines. You can swap colors, play with opacity, and even drop in your signature, making it a go to editor for both work and personal use.
This instant access to editing fundamentally changes how you use screenshots. They stop being passive captures you save for later and become an active part of your workflow.
You can also use the lasso tool to grab an annotation and reposition it, or use the magnifier to zoom in on a tiny detail you need to call out. Once you have nailed your markup, you might want to take it a step further. For more advanced tweaks, a tool like an AI Image Editor can handle more complex jobs.
Capture More with Full Page Screenshots
One of the most powerful and overlooked features is the Full Page capture. When you screenshot something with scrollable content, like a webpage in Safari, just tap the thumbnail. You will see a "Full Page" option pop up at the top of the editor.
This feature is a game changer. It captures the entire webpage or document, top to bottom, and saves it as a single PDF. It is incredibly useful for:
- Saving long articles to read offline.
- Archiving multi page online receipts or invoices.
- Grabbing a complete design comp from a live website.
Even after you capture the full page, you can still crop it and add annotations to the PDF before saving it to your Files app. For developers building app store visuals, this is a great starting point. You can then use a dedicated tool like the ScreenshotWhale editor to drop these captures into professional device mockups with clean captions.
When you are all done, sharing is a breeze. Just hit the share button right from the editor to send your masterpiece via AirDrop, Messages, or Mail.
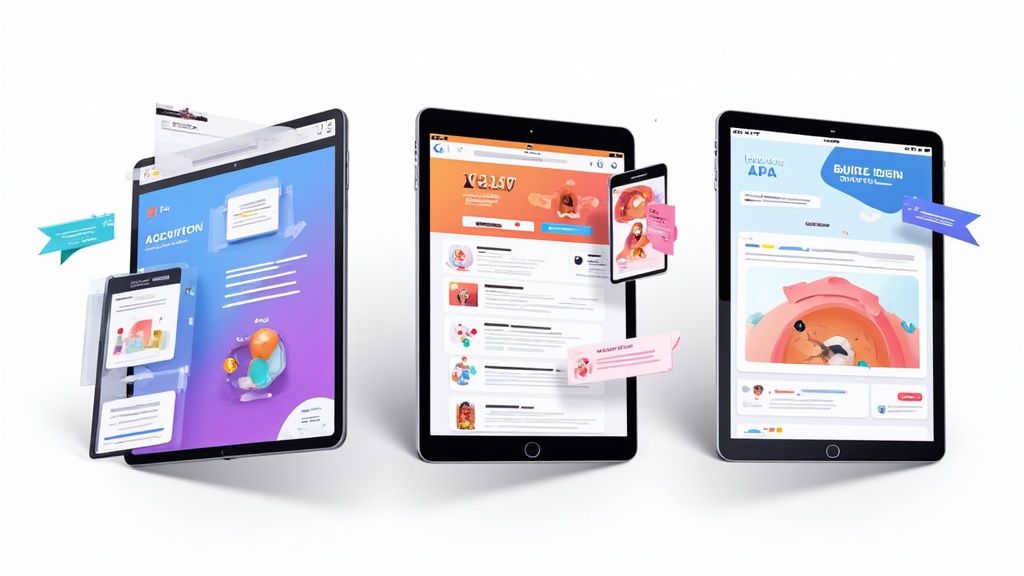
Crafting High-Converting App Store Screenshots
For app developers, a screenshot is not just a capture; it is one of your most powerful sales tools for the iOS and Android stores. To stand out in a crowded app store, your screenshots must tell a compelling visual story that instantly communicates your app's value and drives conversions.
Think of your screenshots as a visual elevator pitch. You are not just showing what your app looks like; you are showing what it can do for the user. Instead of using a blank, empty state, stage the app to highlight a key benefit. For a fitness app, show the calorie tracker populated with data from a vibrant, healthy meal. Frame that clean UI inside a polished device mockup using the ScreenshotWhale editor and add a punchy, benefit driven caption like "Track Meals in Seconds." This actionable insight helps boost app store growth.
Optimizing for Conversions
Quality is non negotiable. The first two or three images are often the only ones a user will see, and their decision to install hinges on them. Blurry, poorly sized, or compressed screenshots immediately devalue your app. Apple and Google's guidelines demand crisp, high resolution captures that look sharp on any device.
A fuzzy image can tank your click through rates and make your app feel unprofessional. It is a small detail with a huge impact on perceived value and conversions.
The best screenshot galleries guide the user through a narrative. Start with your app's core value, follow up with key features in action, and end with social proof or a unique selling point. This approach transforms a static set of images into a persuasive journey.
If you are serious about creating polished, professional screenshots that drive downloads, you might want to look beyond the built in tools. For a deeper dive, check out Screenask's advanced features for professional screenshots.
To learn how to turn basic captures into efficient, ASO optimized assets that get results, read our in depth guide to creating the best app store screenshots.
Troubleshooting Common Screenshot Issues
Taking a screenshot on your iPad Pro should be effortless, but sometimes tech does not cooperate. If you are hitting the buttons and nothing is happening, do not worry. A few common culprits are usually to blame, and the fixes are almost always straightforward.
First, check your case. Many poorly fitting cases can get in the way of the Top or Volume buttons, preventing a solid, simultaneous press. Pop the case off and try again. If that does not work, a simple restart can often clear up minor software glitches causing the unresponsiveness.
Solving Saving and Preview Problems
What if you take the screenshot, see the flash, but then nothing? The screenshot seems to have vanished. Nine times out of ten, this is a storage issue.
Your iPad is probably full. To check, head to Settings > General > iPad Storage. If that bar is solid red, you have found your problem. Your iPad has nowhere to save the new image. Deleting a few old videos, offloading unused apps, or clearing out your downloads folder will usually fix this instantly.
Another issue is the "Full Page" screenshot option misbehaving in Safari. You try to capture an entire article, but it just will not work. This is typically due to how a specific website is coded, but it can also be a temporary browser bug. Try clearing your Safari cache or force quitting and reopening the app before trying the screenshot again.
This functionality is critical in professional settings. In education and business, screenshots are a core tool for remote troubleshooting and support, with IT help desks relying on them to diagnose issues. Learn more about the iPad's role in various industries.
Finally, if the small thumbnail preview in the corner is suddenly missing, you might have accidentally tweaked a setting. Go to Settings > Apple Pencil and check your settings for "Left Corner Swipe" and "Right Corner Swipe." If one of these is set to Screenshot, it can sometimes interfere with the button based method and its preview behavior. Toggling it off might bring things back to normal.
Common Questions Answered
Have a specific question about taking screenshots on your iPad Pro? Let's clear up a few of the most common scenarios.
Can I Screenshot a Video on My iPad Pro?
Absolutely. You can use any standard screenshot method while a video is playing to grab a still image. For the best result, pause the video right at the frame you want to capture for a much sharper, cleaner shot.
Keep in mind that some streaming apps have copy protection built in. If you try to screenshot a show on an app like Netflix or Disney+, you will likely get a black screen. That is their Digital Rights Management (DRM) at work, designed to prevent content from being recorded.
How Do I Take a Scrolling Screenshot on an iPad Pro?
This is one of the most useful features, officially called 'Full Page' capture. It is a lifesaver for grabbing long articles or entire message threads.
After you snap a screenshot in a supported app like Safari, Notes, or Messages, just tap the small thumbnail preview that appears.
At the top of the editing screen, you will see two options: 'Screen' and 'Full Page'. Tap 'Full Page'. Your iPad will instantly capture everything on the scrollable page and package it as a single PDF. From there, you can crop it, mark it up, and save it straight to your Files app.
Why Do My iPad Pro Screenshots Look Blurry When I Share Them?
This almost always comes down to image compression. When you send a screenshot through a messaging app or post it on social media, those platforms often shrink the file size to save data, which can make your crisp image look blurry.
To keep your screenshots looking sharp, you must bypass that compression.
Your best bet for sharing between Apple devices is AirDrop. It sends the file in its original, full resolution glory. If you are using email, always look for the option to send the image at 'Actual Size'.
This makes sure the person on the other end sees the screenshot exactly as it looks on your screen with no compression and no blurriness.
Ready to create stunning, high-converting visuals for your app? With ScreenshotWhale, you can generate professional App Store and Google Play screenshots in minutes. Try it for free today.