Mastering Android Image Resize for App Performance and Growth
Unlock faster app performance and higher conversions with our guide to Android image resize techniques. Learn Bitmap, Glide, Coil, and ASO best practices.
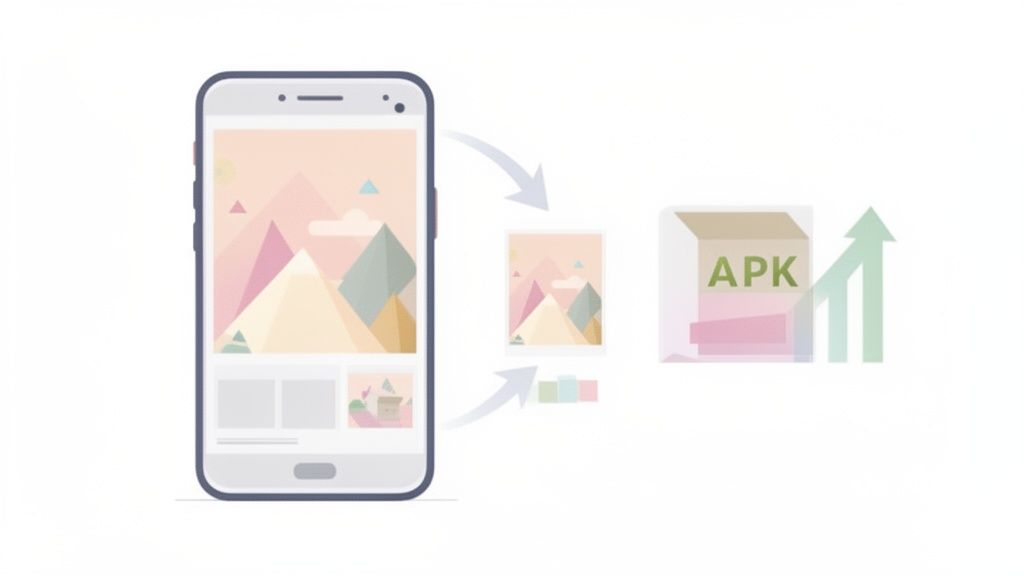
Resizing images for Android isn't just a technical box to check. It’s a core part of your app's growth strategy. Getting it right shrinks your APK size, stamps out crashes, and directly impacts user retention and app store visibility. In the end, it leads to more downloads.
Why Image Resizing Is Your Secret Weapon for App Growth
Struggling with slow load times or those mysterious OutOfMemoryError crashes? Your images are the likely culprit. Mastering Android image resize techniques is one of those critical skills that bridges the gap between technical performance and real business results, like higher install rates and better engagement. When an app just feels fast and stable, users stick around.
This goes beyond in-app performance, too. Your app store listing is your digital storefront, and the visuals do all the talking. In the crowded world of mobile apps, optimizing images for the store has become non-negotiable, especially with Android holding a massive 70% global market share. That means your screenshots have to look perfect on a dizzying range of devices, from a Samsung Galaxy S25 Ultra to a Google Pixel 9 Pro. For more on this trend, check out this detailed report on the photo resizer market.
Connecting Technical Wins to Real Growth
Every millisecond counts. When you handle image resizing correctly, you unlock a few key benefits that directly fuel your app's growth.
Smaller image files mean a smaller APK size. That’s a huge deal for users on limited data plans or with older phones. A lean APK translates to faster downloads and a much lower chance of someone abandoning the install halfway through.
Once they're in the app, optimized images prevent one of the most common causes of crashes: the dreaded OutOfMemoryError. A stable, reliable experience is the bedrock of user retention, which in turn leads to positive reviews and better app store rankings.
By mastering image resizing, you're not just fixing bugs. You're building a faster, more reliable app that users will actually love and recommend. That’s the foundation for sustainable growth.
Streamlining Your App Store Visuals
The same optimization mindset applies directly to your App Store Optimization (ASO) strategy. High-quality, perfectly sized screenshots are non-negotiable if you want to turn page views into installs. This is where dedicated tools can be a game-changer.
Platforms like ScreenshotWhale are built specifically to streamline this workflow, helping you create sharp, high-converting store visuals that look professional on both Android and iOS. Instead of manually cropping, resizing, and designing each screenshot, you can lean on templates and editors designed for this exact purpose. For more on this, check out our guide on creating powerful visuals for the App Store.
This approach ensures your screenshots not only meet the strict technical specs of each store but are also designed to grab attention and persuade potential users to hit that install button.
Before we jump into the slick, modern libraries that make image handling a breeze, it's crucial to understand what's happening under the hood. The foundation of all image manipulation in Android rests on the Bitmap and BitmapFactory classes. Getting a good grip on these native tools gives you ultimate control over how images are loaded, decoded, and scaled, setting you up to tackle pretty much any image challenge thrown your way.
The most common trap developers fall into is loading a high-resolution image straight into memory. A single 12-megapixel photo can easily chew up over 48MB of RAM. Do that a few times in a row, and you're practically guaranteed to meet the infamous OutOfMemoryError crash. The native solution is simple in theory: never load the full-sized image if you only plan to show a small thumbnail.
The Smart Way to Decode: Subsampling with BitmapFactory
The key to avoiding memory-related disasters is a technique called subsampling. Instead of decoding an entire image file into a Bitmap at once, you first check its dimensions without actually allocating memory for the pixels. This first step is a game-changer.
You pull this off using BitmapFactory.Options. By setting the inJustDecodeBounds property to true, you're telling the decoder, "Hey, just give me the metadata, the width and height, but don't load the actual image yet." It's a super lightweight operation that gives you the critical info you need to make an intelligent decision about memory.
Once you know the original dimensions, you can calculate an inSampleSize. This magic number tells the decoder to load a smaller, subsampled version of the image.
- An
inSampleSizeof 2 loads an image at half the width and height, but here's the kicker: it uses only one-quarter of the memory. - An
inSampleSizeof 4 gives you an image that's one-quarter of the original dimensions, using a tiny 1/16th of the memory.
It's amazing how this one simple integer can have such a massive impact on your app's memory footprint and stability.
The most effective way to prevent memory issues is to load a downscaled version of an image into memory that is roughly the size you need to display. The
inSampleSizeproperty is your most powerful tool for achieving this with the native Android APIs.
A Quick Walkthrough of Subsampling
Let's make this real. Imagine you need to display a photo from the user's gallery inside a 100x100 dp ImageView. Loading the full 4000x3000 pixel image would be an incredible waste of resources. Instead, you'd calculate the right inSampleSize.
Here's the two-pass process you'd follow:
- First Pass (Check Dimensions): You create a
BitmapFactory.Optionsobject, setinJustDecodeBounds = true, and then callBitmapFactory.decodeFile(). This gives you the image'soutWidthandoutHeightwithout costing you any significant memory. - Calculate the Sample Size: Now, you compare the image's dimensions to your target
ImageViewsize. You'll calculate the largestinSampleSizevalue (which should be a power of two) that keeps both the height and width of the decoded image larger than your target view. - Second Pass (Decode the Bitmap): Flip
inJustDecodeBoundsback tofalse, set your calculatedinSampleSizeon the options object, and callBitmapFactory.decodeFile()again. This time, you get a perfectly downsized, memory-efficientBitmap.
This approach ensures you're only allocating the memory you absolutely need, keeping your app lean and responsive.
For Pixel-Perfect Sizing: createScaledBitmap
There are times when subsampling with inSampleSize won't get you the exact dimensions you need, especially since it only scales by powers of two. For that last bit of precision, Bitmap.createScaledBitmap() is your friend. This method takes a Bitmap that's already in memory and creates a new one scaled to your exact target width and height.
While it gives you perfect control, be mindful of the performance hit. It requires an existing Bitmap to be in memory first, and then it allocates more memory for the new scaled bitmap. So, for a moment, you have two bitmaps in memory.
To help you decide which tool to reach for, here's a quick comparison of the native resizing methods.
Bitmap Resizing Approaches Comparison
| Method | Primary Use Case | Memory Efficiency | Pros | Cons |
|---|---|---|---|---|
inSampleSize |
Loading a smaller version of a large image from a file. | High | Prevents large initial memory allocation by decoding a downsampled image. | Not precise; only scales by powers of two. |
createScaledBitmap |
Creating an exactly-sized bitmap from one already in memory. | Lower | Provides exact, pixel-perfect scaling to any dimension. | Requires two bitmaps in memory temporarily, which can be inefficient. |
For the best results, you can actually combine these two techniques. First, use inSampleSize to get a roughly-sized image that’s still a bit larger than your final target. Then, feed that smaller bitmap into createScaledBitmap to scale it down to the final, precise dimensions. This hybrid approach gives you a fantastic balance of memory efficiency and fine-grained control for any Android image resize task.
Streamlining Workflows with Glide, Coil, and Picasso
While getting your hands dirty with the native Bitmap API gives you a powerful foundation, it’s a very manual process. In the real world of modern Android development, we need more efficient tools, and that’s exactly where image loading libraries come in. For most successful apps, these libraries are the default choice because they handle all the complex, error-prone work for you.
Enter the big three: Glide, Coil, and Picasso. These libraries are purpose-built to make loading, caching, resizing, and displaying images almost trivial. They completely abstract away the boilerplate for tasks like network fetching, memory and disk caching, and lifecycle management. A complex android image resize operation shrinks down to a single, readable line of code.
This is essentially what's happening under the hood when you resize an image manually. A process these libraries automate beautifully.
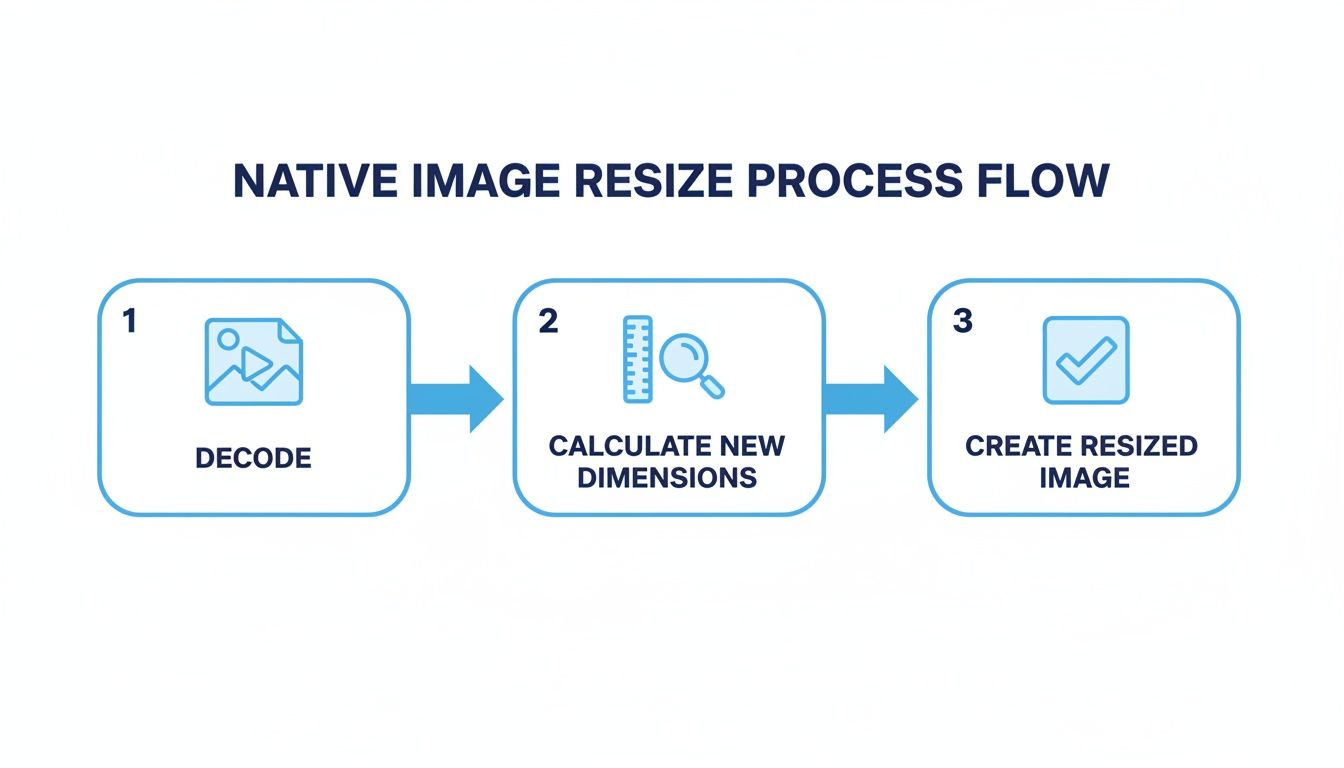
This diagram shows the decode, calculate, and create workflow that libraries like Glide, Coil, and Picasso handle for you, saving a ton of development time and preventing a whole class of bugs.
Why Libraries Are the Modern Standard
Using an image loading library isn't just about writing less code. It’s about building more robust and performant apps. They’re intelligently designed to solve tricky problems you’d otherwise have to figure out on your own.
- Automatic Caching: They implement multi-layered caching (memory and disk), so images load instantly the second time they’re needed. This saves user data and dramatically cuts down load times.
- Lifecycle Awareness: The libraries automatically manage requests based on the lifecycle of your Activity or Fragment. This is huge for preventing crashes and memory leaks, as requests are canceled the moment a view is no longer visible.
- Bitmap Pooling: To keep your app's UI buttery smooth, they reuse bitmaps to reduce memory churn and stop the garbage collector from running too often.
Essentially, these libraries take all the guesswork out of image handling. You get to focus on building features instead of wrestling with low-level memory management.
Resizing with One Line of Code
Let's look at just how simple it is to resize an image with each library. Say you need to load an image from a URL and fit it into a 400x400 pixel ImageView.
With Glide Glide is a powerhouse, known for its performance and flexibility. Its API is fluent and just plain easy to read.
Glide.with(context)
    .load("https://your-image-url.com/image.jpg")
    .override(400, 400) // Specify exact pixel size
    .into(imageView)
With Coil Coil (Coroutine Image Loader) is the modern, Kotlin-first choice that leverages coroutines for super-efficient background work. Its syntax is clean and concise.
imageView.load("https://your-image-url.com/image.jpg") {
    size(400, 400) // Simple size transformation
}
With Picasso Picasso, from the team at Square, was one of the originals. It’s still loved for its dead-simple, straightforward API.
Picasso.get()
    .load("https://your-image-url.com/image.jpg")
    .resize(400, 400) // Direct resize method
    .into(imageView)
In all three cases, a complex operation becomes a single, declarative statement. The library handles everything else behind the scenes.
Choosing the Right Library for Your Project
The market for these tools has exploded, mirroring a bigger trend. The smartphone image editing market is on track to hit $2.5 billion by 2033, with Android owning a massive 75% of that segment. This growth tells us that users expect powerful image features, making efficient resizing tools non-negotiable for developers. You can find a detailed analysis of the smartphone image editing application market for a deeper dive into these trends.
For new projects, Coil is often the top recommendation. Its modern architecture, Kotlin-first design, and excellent performance make it a clear winner. For existing projects, Glide remains a powerful and incredibly reliable choice with a massive feature set. And if your top priorities are simplicity and a smaller library size, Picasso is a fantastic option.
No matter which one you land on, integrating a dedicated image loading library is one of the best decisions you can make for your app’s performance, stability, and maintainability. It cleans up your code, prevents common pitfalls, and ultimately delivers a much smoother experience for your users.
Getting an Android image resize right involves more than just tweaking dimensions. Once you move past the basics, you'll hit a bunch of real-world headaches that can completely ruin the user experience if you're not careful. Let's dig into the tricky stuff you'll face every day, from wrestling with file sizes to making sure images don't show up sideways.
Mastering Image Compression
After you've resized an image, the next job is compression. This is all about shrinking the file size, a non-negotiable step for faster load times and saving your users' data. The trick is to find that perfect balance between a small file and good visual quality.
Android’s Bitmap.compress() method gives you all the control you need here. You can pick the format and quality level, which lets you fine-tune the output. You'll mostly be dealing with two formats: JPEG and PNG.
- JPEG (or JPG): This is a lossy format, which means it cleverly throws away a bit of image data to get those file sizes way down. It's the go-to choice for photos and other complex images where a tiny bit of quality loss is invisible to the naked eye. A quality setting between 80-85 is usually the sweet spot.
- PNG: This is a lossless format that also handles transparency, which is a huge plus. Stick with PNG for things like logos, icons, and graphics where you need perfectly sharp lines and can't afford any blurriness. Just remember, PNG files are almost always larger than their JPEG counterparts.
Think about a user's profile picture. They snap it with their phone's camera, and it's a massive file. Compressing it as a JPEG at 80% quality can slash its size dramatically with zero perceptible difference.
Correctly Handling EXIF Orientation
Ever loaded a photo from the camera only to see it displayed sideways or completely upside down? Yeah, that’s a classic. This frustrating bug comes from EXIF (Exchangeable Image File Format) orientation data. When you take a picture, the camera sensor embeds metadata about how the phone was being held.
Most gallery apps are smart enough to read this data and rotate the image correctly. But when you decode a Bitmap in your own Android code, that metadata often gets ignored, and you're left with a crooked image.
Ignoring EXIF data is a rookie mistake that's incredibly easy to make. Always check for and apply the orientation tag after decoding a bitmap from a camera or the gallery. It’s a simple step that makes sure your images show up exactly how the user expects.
To fix this, you need to read the EXIF tag yourself and manually rotate the Bitmap if necessary. Thankfully, the ExifInterface library makes this pretty painless. You can use it to pull the orientation info and apply the right rotation before the image ever hits the screen.
Demystifying Screen Density Buckets
The Android ecosystem is a wild west of different screen sizes and resolutions. To bring some order to the chaos, Android groups screens into density buckets. You’ll see these everywhere:
- mdpi (medium)
- hdpi (high)
- xhdpi (extra-high)
- xxhdpi (extra-extra-high)
- xxxhdpi (extra-extra-extra-high)
Creating image assets for each of these buckets is absolutely essential if you want your app to look professional. If you cheap out and only provide a low-res image (say, for mdpi), Android will stretch it out on a high-density screen like an xxhdpi device. The result? A blurry, pixelated mess that screams "unpolished app."
To really nail this, you need a solid grasp of how layouts adapt. If you want to go deeper, our guide on responsive design for mobile apps is a great place to start.
A pro workflow means generating multiple versions of your drawable assets, with each one sized for a specific density bucket. You then drop them into the right res/drawable-{density} folders. This lets the Android OS do the heavy lifting, automatically picking the perfect asset for whatever device the user has. It’s the secret to keeping your UI elements crisp and sharp, delivering that high-quality experience that builds trust.
Creating App Store Screenshots That Actually Convert
Let's shift gears from what happens inside your app to your digital storefront. When it comes to App Store Optimization (ASO), your visuals do all the heavy lifting. Your screenshots are arguably the single most powerful factor in converting a casual browser into an installer, so messing them up is not an option. This isn't just about resizing an image. It's about crafting a visual pitch that stops scrollers dead in their tracks.
Think of it as telling a story, one screenshot at a time. This story has to be crystal clear, showcasing your app's main benefits in a way that looks professional and trustworthy. A set of sloppy, poorly sized, or confusing screenshots can kill your app's chances before a user even bothers to read your description.
Designing Screenshots That Drive Installs
To create high-converting screenshots, you need a strategy. The most effective visuals combine a clean device frame, a punchy benefit-driven caption, and a consistent brand style. This turns a simple screen capture into a powerful marketing tool that boosts app store growth.
Here’s an actionable workflow using a tool like the ScreenshotWhale editor:
- Choose a Template: Start with a pre-built layout. Select one with a vibrant background color that aligns with your brand and a device frame (like a Google Pixel or iPhone) that makes your app look professional.
- Add Your Caption: Write a short, powerful title that highlights a key benefit, not a feature. For example, instead of "Expense Tracking," use "Track Spending in Seconds." Use a large, bold font for maximum readability.
- Upload and Position: Drag your raw app screenshot into the device frame. The editor automatically resizes and aligns it perfectly.
- Export for All Devices: With one click, export the entire set. The tool generates perfectly sized images for every required dimension for both the Apple App Store and Google Play Store, eliminating guesswork and submission rejections.
This practical approach guarantees your visuals are not just attractive but also technically perfect, driving more installs.
The real takeaway here is that you don't have to be a graphic designer. Using templates and dedicated tools streamlines the whole creative process, guaranteeing every screenshot is perfectly sized and optimized to convert.
Nailing the Technical Requirements
Both the Google Play Store and Apple's App Store are notoriously strict about screenshot dimensions. If you don't meet their exact specs, your app submission gets rejected. Simple as that. You're expected to provide perfectly resized assets for phones, tablets, and now even foldables. To stay on top of the ever-changing rules, we put together a detailed guide on the latest https://screenshotwhale.com/blog/google-play-app-screenshot-size.
The need for tools that automate this resizing is exploding. You just have to look at the market. One niche app, 'Image Resizer,' shot up from 1,000 installs to 5,000 in a single month. A 400% jump. That tells you everything you need to know about the pain point among Android's 3 billion users. It's no surprise the broader photo resizer market is valued at over $250M, especially when high-res phone cameras force 70% of users to resize images every week.
A winning app store listing is a marriage of creative design and technical precision. Your visuals have to look amazing, sure, but they also have to meet every single dimension requirement for every device you target. Automating this saves a ton of headaches and eliminates submission errors.
Automation and Localization at Scale
If you're targeting a global audience, the challenge gets even bigger. Manually resizing, translating, and redesigning screenshots for dozens of languages is a soul-crushing time sink. This is where modern ASO tools become absolutely essential.
Platforms that integrate AI-powered internationalization (i18n) engines can translate your captions into over 100 languages almost instantly. This means you can generate localized, on-brand, and perfectly sized screenshots for every single market in minutes, not weeks. It’s the same principle behind why a real estate photo app can transform property listings. Dedicated tools for visual optimization deliver powerful results.
By leaning on templates and automation, you ensure your app puts its best foot forward everywhere. It gives you a serious edge in a crowded global marketplace and turns your app store page into a true conversion engine.
A Few Common Questions About Resizing Android Images
When you're knee-deep in code, wrestling with images on Android, the same questions tend to pop up time and time again. Whether you're a seasoned pro or just getting started, it's easy to get tripped up by memory errors or confusing ImageView attributes. Let's tackle some of the most frequent ones I've run into over the years.
What's the Best Image Format to Use in an Android App?
This is a critical choice that impacts both app size and performance. My go-to recommendation, and Google's, is WebP. For just about any photographic content, WebP consistently delivers smaller file sizes than traditional JPEGs with comparable quality. It even supports transparency, making it a solid replacement for PNGs in many cases.
But for simpler graphics like icons, nothing beats VectorDrawables. They are tiny XML files that scale to any screen density without a hint of quality loss. Using vectors for your UI elements is one of the single best optimizations you can make.
How Can I Stop My App from Crashing with an OutOfMemoryError?
Ah, the dreaded OutOfMemoryError. It’s probably the most common and dangerous issue you'll face when handling images. The golden rule here is simple: never, ever load a full-resolution image into memory if you don't need to.
The classic native way to handle this is by subsampling with BitmapFactory.Options. You do a two-pass load:
- First, you set
inJustDecodeBounds=trueto check the image's dimensions without actually allocating memory for it. - Then, you calculate an appropriate
inSampleSizebased on your target view size and decode a much smaller, downscaled version of the bitmap.
Honestly, though, the modern approach is just to let a library do the heavy lifting. Glide, Coil, or Picasso are built specifically to handle this stuff. They manage memory, caching, and sampling automatically, saving you from a world of headaches.
What's the Real Difference Between centerCrop and fitCenter?
These two ImageView scale types seem similar, but they produce wildly different visual results. Picking the right one is key to getting your UI to look just right.
fitCenteris all about showing the entire image. It scales the image down, preserving its aspect ratio, until it fits perfectly inside theImageView. The catch? You might end up with empty space (letterboxing) on the sides or top if the aspect ratios don't match.
centerCrop, on the other hand, is about filling the entire view. It scales the image up or down until it completely fills theImageView, also maintaining the aspect ratio. Then, it crops off any part of the image that spills outside the view's bounds.
Use fitCenter when the whole picture is important, like a user's profile photo. Use centerCrop for things like background images where filling the space is more important than seeing every last pixel.
Should I Resize Images on the Phone or on the Server?
Whenever you have the choice, resize on the server. Hands down, it's the most efficient and user-friendly strategy.
A server can generate and cache multiple image sizes for different screen densities and layouts. Your app then simply requests the smallest possible version it needs. This saves a ton of bandwidth, makes images load faster, and dramatically reduces the memory and CPU load on the user's device.
Client-side resizing should really only be for images created on the device, like a photo just taken with the camera or an image the user is actively editing. For everything else, let the backend handle it.
Ready to create stunning, high-converting app store screenshots that drive installs? With ScreenshotWhale, you can generate on-brand, perfectly sized visuals for the App Store and Google Play in minutes. Start designing for free today.