Awesome Screenshots Chrome Guide for App Store Growth and Conversions
Discover how to use Awesome Screenshots Chrome to create high-converting visuals. Learn pro tips for capturing and annotating screenshots that boost app growth.
In the hyper competitive world of app stores, your screenshots are not just a gallery; they are your digital storefront. High quality visuals can be the one thing that convinces a user to download your app over a competitor's. They are a critical lever for boosting app store growth and conversions.
Why Better Screenshots Are Your App Store Superpower
First impressions are everything on the App Store and Google Play. People make snap judgments. They are scrolling, glancing, and deciding in seconds, long before they ever read your carefully crafted description.
Great screenshots do the heavy lifting. They tell a story, show off your app's value, and build trust in a heartbeat. This is why getting your visual workflow dialed in is not just a "nice to have," it is a must for creating high converting app store screenshots.
Many developers and marketers get bogged down with clunky desktop software or basic OS screen grabbers. It slows everything down. When you need to keep up with app updates, run A/B tests, or localize for different markets, you need a process that is fast and repeatable.
A Smarter Way to Handle Your Visuals
This is exactly where a tool like the Awesome Screenshot Chrome extension becomes a game changer. It lets you create these crucial assets right inside your browser, which means no more jumping between different apps.
You can capture, annotate, and prep stunning visuals for iPhone, iPad, and Android devices without ever leaving the page you are working on. This is more than just a convenience; it lets you be more agile with your App Store Optimization (ASO).
Your app store screenshots are your most powerful marketing tool. They communicate your app's core value proposition instantly and are directly responsible for driving conversions. Investing in a streamlined creation process pays significant dividends.
The focus on "awesome screenshots" has grown right alongside mobile ASO. We know that top tier visuals can boost App Store conversion rates by as much as 30%, and Chrome extensions have become the go to for getting things done quickly. You can see how much these tools have evolved by checking out the options on the Chrome Web Store.
Chrome Screenshot Methods at a Glance
Before we dive deep into one tool, it is helpful to see the landscape. Different situations call for different tools, and knowing the pros and cons saves a ton of time.
| Method | Best For | Speed | Annotation Features |
|---|---|---|---|
| Chrome Native Tool | Quick, no frills device simulation captures. | Very Fast | None |
| OS Screenshot | Capturing anything on your screen, not just the browser. | Fast | Basic (OS dependent) |
| Awesome Screenshot | In browser capture, advanced annotation, and cloud storage. | Fast | Excellent |
Ultimately, while the native and OS tools are fine for a quick grab, a dedicated extension like Awesome Screenshot gives you the annotation and export features you really need for polished, professional app store assets.
Setting the Stage for Success
Using a dedicated tool like Awesome Screenshot lets you quickly build a library of high quality captures. Think of these as the raw ingredients. They are the foundation for the polished mockups that will showcase your app’s best features and convince users to tap "Install."
This guide will walk you through an entire workflow, covering everything from the initial capture to the final export. You will learn how to:
- Capture any part of a webpage with pixel perfect precision.
- Annotate your screenshots to highlight key features and benefits.
- Optimize your images so they look sharp on every app store.
Mastering this process will help you produce visuals that do not just look great; they will drive real, measurable growth for your app.
Mastering Every Capture Mode for Flawless Visuals
Moving past simple screen grabs is where your visual strategy really begins. Different marketing goals demand different types of captures, and the Awesome Screenshot Chrome extension gives you a specific tool for each job. Getting a handle on these modes is the key to an efficient workflow that produces app store visuals that actually convert.
The first step in any great screenshot workflow is capturing the perfect raw material. It helps to think of it as a simple, three stage process.
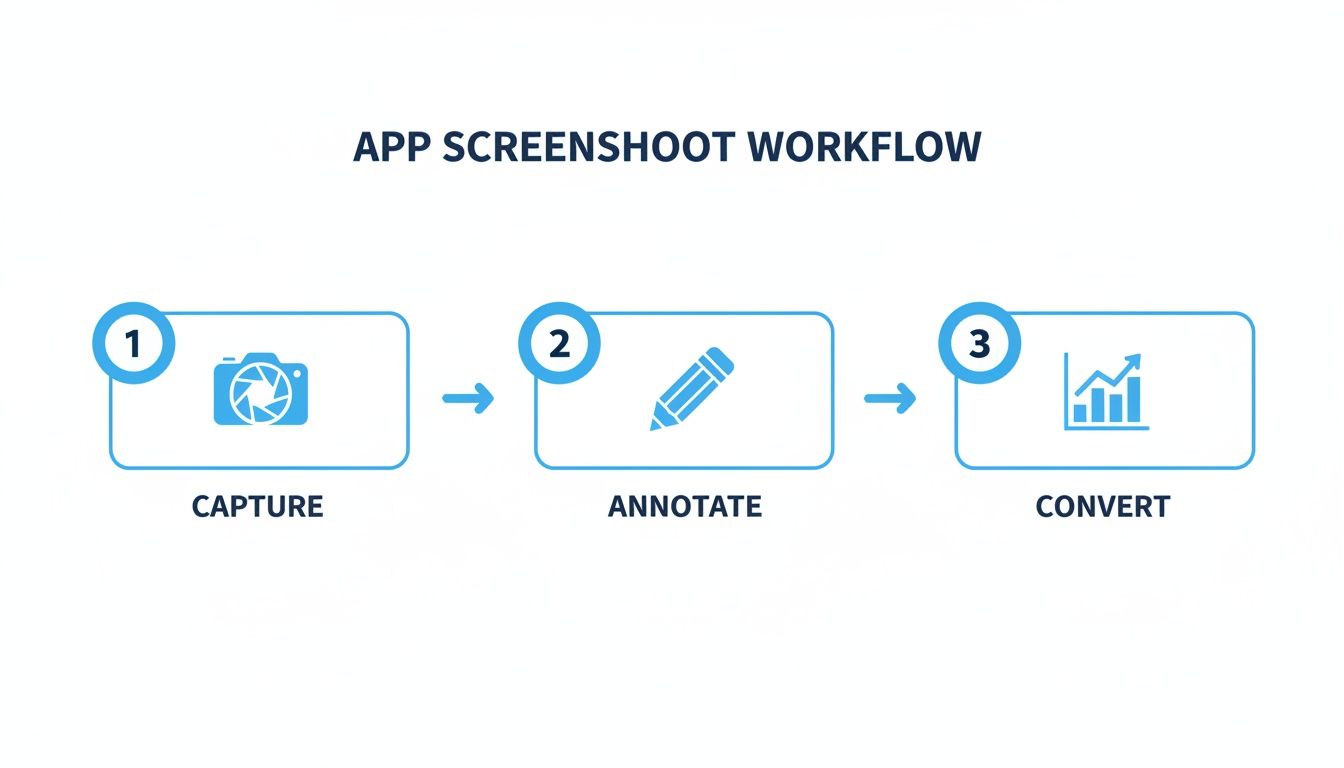
This little diagram nails it: a successful outcome depends on mastering each stage, and it all starts with a flawless capture. Let’s dig into how to get that right every time.
Choosing the Right Capture for the Job
The capture mode you choose directly impacts the story you are trying to tell. Think about it: documenting a competitor's entire multi step onboarding flow requires a totally different approach than just highlighting a single, shiny new button.
Here are the main capture modes I use and what they're best for in the world of app marketing:
- Visible Part of Page: This is my go to for quick, contextual shots. It instantly grabs everything you can see in your browser window, making it perfect for capturing a specific user view without any extra scrolling or cropping.
- Full Page: An incredibly powerful feature for capturing an entire scrolling webpage in one clean image. I find this invaluable for analyzing competitor landing pages or documenting long user flows, like a full registration process or a complete feature list.
- Selected Area: When you need to zero in on a specific UI element, this is the tool. Just drag a selection box around a new feature, a call to action, or a critical piece of user feedback to create a focused visual that is ready for annotation.
By picking the right mode from the start, you slash your editing time later and make sure your raw image is perfectly suited for its final destination on the iOS or Android app stores.
Pro Tip: Seriously, learn the keyboard shortcuts. You can set up your own in the extension’s settings, but the default Ctrl+Shift+E (or Cmd+Shift+E on Mac) for capturing a selected area is a massive time saver.
Fine-Tuning Your Settings for Quality
Before you even start snapping screenshots, a one time settings adjustment can guarantee every image is pixel perfect. The defaults are okay, but for creating professional app store assets, you need the best quality you can get.
Navigate to the extension's Options page and find the image quality settings. Make sure you always set the image format to PNG.
Why? While JPGs are smaller, PNGs use lossless compression. This is absolutely essential for keeping the text and UI elements in your app screenshots crisp and clear. It prevents those blurry artifacts that can make an otherwise great app look unprofessional.
I would also recommend turning off "Auto download screenshots." This sends you directly to the editor after each capture, giving you immediate options to save as a PNG or PDF, or just copy the image to your clipboard. It is a small change that smooths out the whole process.
A raw screenshot shows what your app does. A great screenshot shows someone why they need it.
This is the whole game right here. It is about shifting from simply showing features to telling a compelling story, and that is how you turn a basic image into a tool that actually gets people to click "download." Your secret weapon for doing this quickly is the editor built right into an awesome screenshots Chrome extension.
Think of each app store image as a tiny, focused ad. You have maybe two seconds to grab someone's attention and communicate a real benefit before they swipe on to the next one, which might be your competitor.
That means every arrow, every caption, every little highlight has to earn its place. Do not just point to a button and label it "Settings." That is a waste of pixels. Instead, highlight a killer feature with a caption like, "Customize Your Daily Goals in Seconds." One is a boring label; the other sells a benefit.
![]()
Annotating for Impact and Clarity
So, how do you actually do this? Let's walk through it with a fitness app example. You have just snapped a shot of the main dashboard. It looks fine, but it is not exciting anyone. Time to fix that in the editor.
Write Benefit Driven Captions: Start with a bold headline right above the screenshot. Ditch "Main Dashboard" for something like "Track Your Progress, Crush Your Goals." This immediately tells the user what is in it for them. If you want to get better at this, digging into persuasive advertising techniques can give you a ton of ideas for crafting messages that stick.
Guide the Eye Strategically: Use the editor's shape tools to add bright, contrasting arrows or simple rectangles to pull focus to the most valuable parts of the UI. An arrow pointing to the progress chart with a quick callout saying, "Visualize Your Wins," does two things: it directs their gaze and reinforces the value.
Use Blur for Privacy and Focus: See a user’s name, photo, or other personal info in the shot? Select the blur tool from the editor's toolbar. It is your best friend for protecting privacy. But it is also a powerful design tool. Use it to fade out distracting ads, irrelevant navigation, or anything else that does not support the story you are telling.
With just these few tweaks, you have turned a static image into a guided tour of your app's best features.
From Raw Capture to App Store Ready
Let's take another example: the fitness app's workout log. The raw screenshot just shows a list of dates and exercises. It is functional, but it is not selling anything. Here's a practical workflow in the site editor:
- First, hit them with a headline: Use the text tool to add "Your Entire Workout History, All in One Place."
- Next, draw a rectangle around the section that shows a streak of completed workouts. Use a vibrant color that matches your brand. Add a text caption: "Never Miss a Day and Build Your Streak!"
- Then, point an arrow to the "Share" button and add another caption: "Share Your Success with Friends."
By layering these simple annotations, you have told a story of motivation, consistency, and community. The screenshot is no longer just a feature list; it is an invitation to a better fitness experience.
This annotated image is now ready for the final step: putting it inside a device frame. Polishing your visuals with clean templates is what separates amateur looking apps from professional ones. Creating high quality app store mockups is a crucial skill, because it is the combination of clear annotation and slick presentation that really moves the needle on conversions.
Finding the Right Screenshot Tool for Your Workflow
While Awesome Screenshot is a beast, the best tool is always the one that actually fits your process. Picking the right Chrome extension can make a night and day difference in how fast you work, especially when you are cranking out visuals for the App Store and Google Play. What works for a solo dev is rarely what a big marketing team needs.
The market for these tools is absolutely massive. Chrome screenshot extensions have exploded, and the Chrome Web Store now hosts thousands of them with millions of users combined. They have become essential for anyone crafting app visuals. Take CocoShot, for example; it has over 60,000 users who rely on it for capturing entire scrollable pages and tricky iframes, all while meeting modern Manifest V3 security standards. You can get a sense of just how deep the options go by checking out these insights on the top Chrome screenshot extensions.
This sheer variety means you can find an extension that feels like it was made just for you, whether you need dead simple one click captures or a full blown editing suite.
Comparing the Top Contenders
Let's break down a few popular alternatives to see how they stack up for creating app store assets. The trick is to look past basic screen grabs and zero in on the features that help you produce high converting visuals without wasting time.
| Tool | Key Strength | Best For Developers Who... |
|---|---|---|
| Awesome Screenshot | All in one editor and cloud sync. | Need a complete workflow from capture to annotation and team sharing in one place. |
| CocoShot | Robust full page captures & Manifest V3. | Prioritize capturing long, scrolling pages accurately and value modern security standards. |
| Movavi ScreenShot | One click simplicity. | Need the absolute fastest way to grab a screen region with minimal steps. |
This little comparison highlights a crucial point: there is no single "best" tool for everyone. An ASO manager juggling multiple app updates might lean on the comprehensive features of an awesome screenshots Chrome tool like the one we are focused on here. On the other hand, a UX designer quickly documenting a competitor’s user flow might find CocoShot's full page accuracy way more valuable for that specific task.
Features That Boost App Store Growth
When you are weighing your options, some features are just more important than others for driving app store growth. Do not just ask what the tool captures; ask what it helps you produce.
- Batch Capture Capabilities: Can you snap a series of screenshots without having to restart the whole process each time? This is a huge deal for creating a cohesive visual story for your app store listing.
- Cloud Integration: The ability to save captures directly to a shared cloud drive is a game changer for team collaboration. It lets designers and marketers grab the raw assets instantly.
- Advanced Export Options: Look for tools that let you export in high quality PNG format, control file names, and resize images. These seemingly small details are what ensure your final assets meet the strict app store guidelines.
The right tool removes friction from your creative process. It should feel less like a utility and more like a natural extension of your marketing workflow, empowering you to create better visuals faster.
Ultimately, your choice should serve one goal: creating effective, high converting app store screenshots as efficiently as possible. Think about your team size, your technical needs, and the complexity of your ASO strategy. For a deeper dive into what makes visuals actually work, check out our guide on the best app screenshots, which covers the core principles of great design.
You have nailed the capture, your annotations are looking sharp, and now it is time for the final push: getting those screenshots ready for the App Store and Google Play. This is where you lock in all that hard work. Do not just rush through the export; the settings you choose here can make or break how your app is perceived.
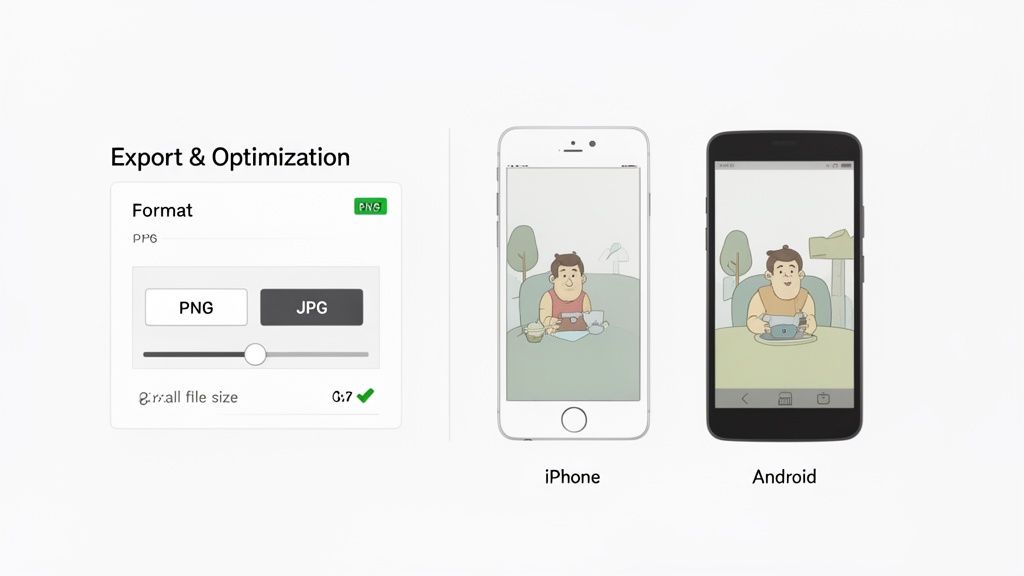
PNG is Non-Negotiable
First things first, when you hit that download button in Awesome Screenshot, you will see options for PNG and JPG. For anything going on the app stores, this is not even a choice. Always, always choose PNG.
Why? JPGs use a "lossy" compression, which is great for photos but terrible for UI. It can create nasty, fuzzy artifacts around your text and icons, making your app look amateurish. PNG, on the other hand, is "lossless." Every single pixel is preserved, which means your text stays crisp, your colors stay vibrant, and your interface looks pristine.
Get Your Dimensions and File Size Right
Both Apple and Google are notoriously picky about image dimensions. If you get this wrong, your submission could be rejected, or worse, your beautiful screenshots could get stretched and distorted. You will need to create a whole set of images for different devices, from the latest iPhones to various Android flagships and tablets.
The requirements change more often than you would think, so it is smart to have a go to resource. I always double check against a reliable guide. This list of current app store screenshot sizes is a great one to bookmark to make sure you are always compliant.
While PNG is king for quality, the files can be a bit larger. The trick is to find that sweet spot between image fidelity and file size for fast loading times. Most tools are pretty good at optimizing PNGs these days, but if a file is unusually large, run it through a dedicated compression tool as a final step.
A seamless workflow is an efficient workflow. Organize your exported assets into clearly labeled folders for each device type (e.g., 'iPhone 15 Pro Max', 'Google Pixel 8') in a shared cloud drive. This makes the upload process painless and keeps your team in sync.
Fine-Tune Your Export Workflow
Here’s a small tweak that makes a big difference in my own process. By default, Awesome Screenshot might automatically download your captures. I turn this off.
Head into the extension's settings and disable the auto download feature. Now, instead of a file just appearing in your downloads folder, you will be taken straight to the editor after every capture. This puts the "Download," "Copy," and other options right in front of you, forcing a conscious decision to save a high quality PNG every time. It is a simple change that puts you in the driver's seat, ensuring every asset is perfectly formatted before it even touches your hard drive.
How to Choose a Screenshot Extension Without Getting Burned
Look, a great screenshot extension feels like a superpower. It speeds up everything from creating app store assets to flagging UI bugs. But you are also handing over the keys to your browser, and that is a big deal.
You have to be careful here. Not all extensions are built with your best interests at heart. We have seen this play out in the news more than once: a popular tool with over 100,000 installs was caught acting as spyware. It was secretly snapping pictures of users' screens 1.1 seconds after every single page load. If you want to go down a rabbit hole, there are plenty of stories about these Chrome extension security risks.
This is not just a scare tactic. It is a real world warning. The goal is to share amazing screenshots, not your company’s private data or your next big idea.
Vetting Extensions Like You Mean It
So, how do you tell the good guys from the bad guys? It really just comes down to a few quick checks that can save you a world of pain down the road.
- Read the Reviews Critically: Do not just glance at the five star rating. Dive into the recent reviews. Are people suddenly complaining about weird ads, slow performance, or features acting strangely? That is a huge red flag. It often means the extension was sold and the new owner has different, shadier intentions.
- Check the Permission Slip: When you hit "Install," Chrome shows you a list of permissions the extension wants. Be skeptical. A screenshot tool needs to see your screen, sure. But does it really need to "read and change all your data on all websites"? If it feels like an overreach, it probably is. Just say no.
- Who Is Behind the Curtain? Try to find extensions from developers or companies you can actually identify. Do they have a professional website? A clear privacy policy? A history of other well regarded tools? An established developer is almost always a safer bet than some anonymous account with a single, brand new extension.
Why Manifest V3 Is a Big Deal
If you want to get a little more technical, there is one key thing to look for: Manifest V3. This is Google's newer, much more secure standard for how Chrome extensions are built.
Think of Manifest V3 as a new set of rules that puts extensions on a much shorter leash. It severely limits what they can do in the background and how much data they can access, making it significantly harder for them to do anything malicious.
By choosing tools built on Manifest V3, you are not just picking a feature; you are picking a philosophy. You are opting for an extension designed for the modern web, with privacy and security baked in from the start. Combine that with a quick look at reviews and permissions, and you can get back to creating, worry free.
Ready to create stunning, high converting visuals without the security guesswork? ScreenshotWhale provides a secure platform with professionally designed templates, an intuitive editor, and powerful localization features to help you generate App Store and Google Play screenshots that drive installs. Start creating for free at ScreenshotWhale.