How Do You Screenshot on an iPad: A Practical Guide
Wondering how do you screenshot on an iPad? Learn every method, from basic button combos to advanced techniques for editing and sharing professional captures.
Grabbing a screenshot on your iPad is one of those simple things you’ll do all the time. If your iPad has a Home button, just press the Top button and Home button at the same time. For the newer models without a Home button, it’s the Top button and the Volume Up button.
Your Instant Guide to Taking an iPad Screenshot
Knowing how to capture what’s on your iPad screen is a must have skill. I use it constantly, whether I’m saving a recipe I found online, grabbing a funny text conversation with a friend, or creating assets for a new app I'm working on. The exact method changes slightly depending on which iPad you have, but Apple designed the whole process to be fast and second nature.
Once you know the right button combo for your model, you’ll save yourself a ton of time and frustration. It’s all about instantly grabbing what you need, right when you need it.
This quick visual guide should clear up any confusion right away.
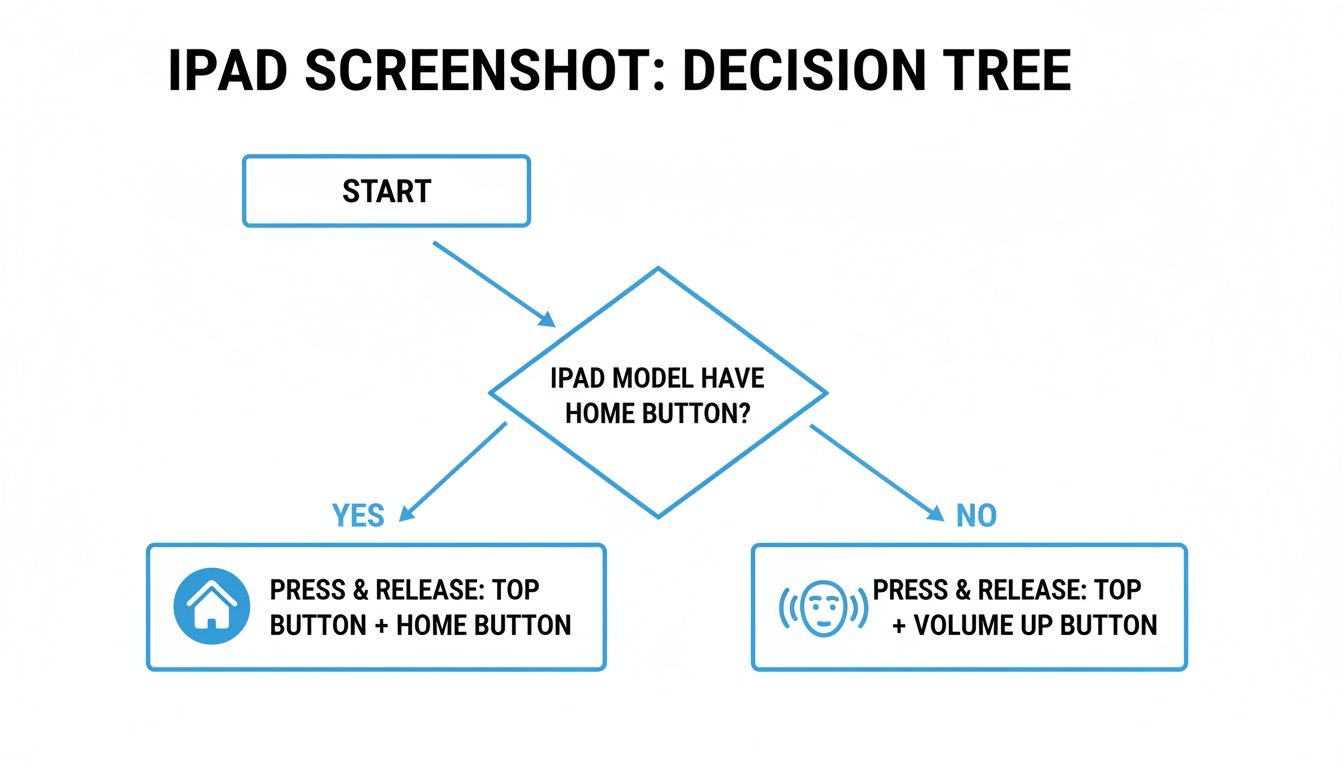
As you can see, it really just boils down to one simple question: does your iPad have a Home button or not?
For anyone in app development or marketing, getting these basics down is the first step toward creating high quality, high converting app store screenshots. Polished visuals with vibrant colors are absolutely critical for driving app store growth and conversions. A clean screen capture is the raw material for a compelling store asset that actually gets people to download.
Creating a great app store presence starts with the basics. A clean, well composed screenshot is your first opportunity to show users what your app can do. It's not just a technical action; it's the beginning of your marketing story.
Whether you're just a casual user or a pro building apps, mastering this skill is essential. To make it even easier, I've put together a quick reference table so you can get the perfect screenshot every time, no matter your device.
Screenshot Methods for Every iPad Model
Here’s a simple breakdown I use to keep track of the different button combinations. Just find your model type to see exactly what to press.
| iPad Model Type | Button Combination to Screenshot |
|---|---|
| iPad (10th generation), iPad Air (4th gen & later), iPad mini (6th gen), iPad Pro (11-inch & 12.9-inch) | Top button + Volume Up button |
| iPad (9th generation & earlier), iPad Air (3rd gen), iPad mini (5th gen), iPad Pro (1st & 2nd gen 12.9-inch) | Top button + Home button |
Think of this as your foundation. Once you have this down, you can start exploring more advanced editing and markup techniques to make your visuals truly stand out, whether they're for personal use or for making your app a hit on the iOS store.
Mastering the Core iPad Screenshot Methods
Taking a screenshot on an iPad is one of those things that becomes pure muscle memory once you get the hang of it. Think of it as a quick camera shutter for your screen, instantly grabbing whatever you're looking at, whether it's an important email, a funny text, or a new high score in your favorite game. The whole point is to make it fast so you don't miss the moment.
For iPads that still have the classic round Home button at the bottom, the method is a quick two button combo. Just press and hold the Top button (you might know it as the sleep/wake button) and, at the same time, give the Home button a quick press. The screen will flash white for a second to let you know it worked.
The Modern iPad Screenshot Method
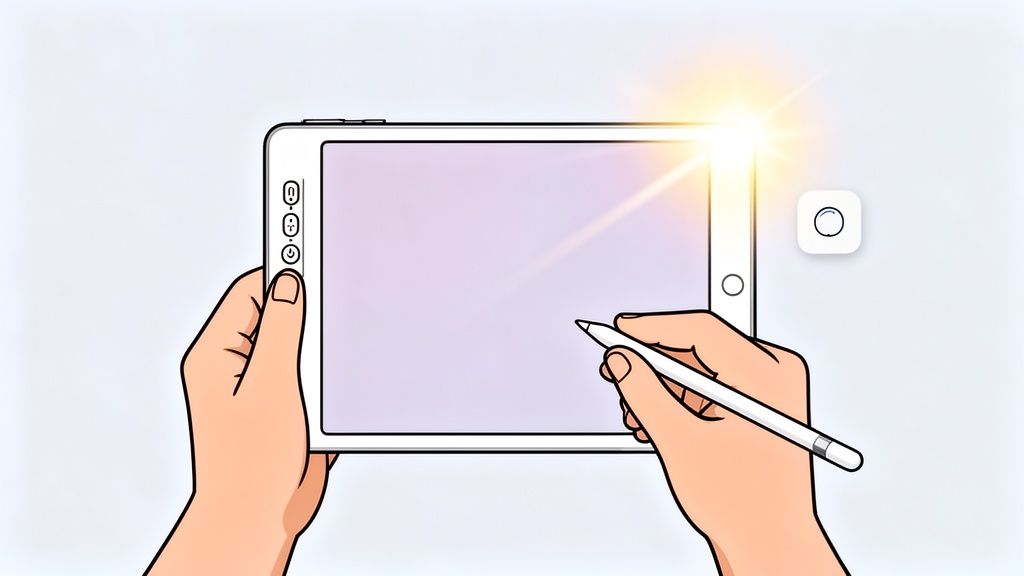
If you've got a newer iPad without a Home button, like a recent iPad Pro or iPad Air, the process is a little different, but just as snappy. On these models, you'll press and release the Top button and the Volume up button at the same time. This is the standard on all modern iPads and the one most people will use today.
Here’s a quick look at both methods so you can see exactly which buttons to press.
See how it’s a quick press and release, not a long hold? As soon as the screen flashes, a little thumbnail of your screenshot will pop up in the bottom left corner.
Pro Tip: Don't just swipe that thumbnail away! Tapping on it is a huge time saver. It immediately opens the Markup editor, letting you crop, draw, and share your screenshot on the spot without ever having to dig through your Photos app.
This simple screenshot feature, a staple since around 2019, is something I use daily for everything from bug reports to sharing cool designs. With over 40% of Americans owning an iPad in 2024, it’s a feature millions rely on. In fact, for app developers, knowing how to take a clean screenshot is the first step in creating efficient and high converting app store screenshots. For more stats on the iPad's growing popularity, SellCell.com has some interesting data.
And if you're an iPad Pro user, there are even more tricks up your sleeve. For a deeper dive, check out our dedicated guide on how to take a screenshot on iPad Pro. Once you nail these core methods, you'll be set to capture and share anything on your screen in seconds.
Once you've mastered the basic button combos, you can really speed up your workflow with a few advanced tricks. These aren't just for power users; they're genuinely useful methods that make capturing your screen feel much more natural and efficient.
For instance, the Apple Pencil isn't just for drawing or taking notes. It's secretly one of the fastest ways to grab a screenshot.
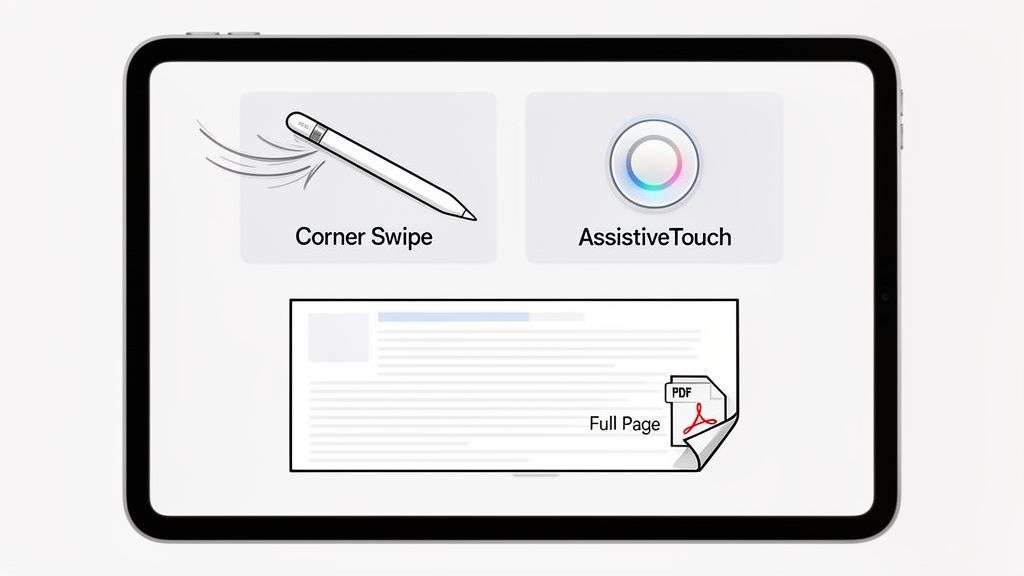
If you're an artist, designer, or just someone who loves to mark things up, this gesture is a game changer. Just swipe up from either the bottom left or bottom right corner of your screen with your Apple Pencil. The iPad instantly snaps a screenshot and throws you straight into the Markup editor. No fumbling with buttons, no delays, just a quick, fluid action that lets you get right to annotating.
Custom Shortcuts and Keyboard Magic
Another fantastic but often overlooked method is AssistiveTouch. It's an accessibility feature that puts a customizable button right on your screen. You can set it up so a single tap takes a screenshot, which is a lifesaver if you find the physical buttons awkward to press or just want a one touch option.
And for those of us who live with an external keyboard attached to our iPad, good news: the classic Mac shortcut works flawlessly. Just hit Command + Shift + 3, and you'll capture the entire screen instantly. It’s a huge time saver when you're deep in a typing session and don't want to break your flow.
This little animation shows both the Apple Pencil swipe and the AssistiveTouch button in action.

These gestures really do transform how you grab screen captures on an iPad, turning it from a clunky two handed task into a seamless part of what you're doing.
How to Capture an Entire Webpage
One of the most practical tricks in the book is the Full Page screenshot feature hiding in Safari. After you take a screenshot of a website, tap the little thumbnail preview that pops up. At the top of the editor, you'll see a "Full Page" tab. Tap it.
This captures the entire webpage from the very top to the very bottom and lets you save it as a single, clean PDF.
I use this all the time for saving articles to read later, archiving online receipts, or grabbing design inspiration without having to stitch together a bunch of separate images. It keeps everything in one tidy, shareable document.
As our screen time continues to climb, with the average person spending 3 hours and 46 minutes on their phone daily, features like this have become essential for saving and organizing information efficiently. Full Page capture is a perfect example of a small feature that makes a big difference.
If you're looking to go even further, you might want to explore various screen capture tools that offer more advanced editing and organization features beyond what's built into iPadOS. But for most everyday needs, mastering these native techniques is a great way to see just how versatile your iPad really is.
So, you've snapped your screenshot. But taking the shot is really just the beginning.
The real power move is what you do next. When that little thumbnail pops up in the corner, don't just swipe it away, tap on it. This drops you straight into the Markup editor, which is where a simple screen grab becomes a seriously useful tool.
Think of Markup as your on the fly editing bay. You can grab the pen tool to circle a weird bug you found, use the highlighter to draw attention to a specific line of text, or even add a text box to jot down a quick note for a teammate. The tools are super intuitive, which is exactly what you need when you're trying to communicate something clearly and quickly.
Here’s a look at the Markup editor in action once you start making your edits.
Everything you need is right there, one tap away. No need to hunt for another app just to make a point visually.
A Secret Weapon for App Store Visuals
If you're an app developer, the Markup editor is an underrated gem for creating effective App Store screenshots. A well marked up image can genuinely move the needle on app store growth and conversions because it shows people an app's value instead of just telling them. In seconds, you can:
- Highlight key features using arrows and shapes to direct a potential user's attention.
- Add compelling captions with the text tool to explain the benefits of what they're seeing.
- Black out sensitive info like personal data with a solid shape or the pen tool before you publish.
These quick tweaks transform a plain image into a high converting asset for both the Android and iOS stores. In a world of App Store Optimization, polished and informative visuals aren't just nice to have, they're essential.
A great screenshot does more than just show your app; it tells a story. Use annotations to guide users through that story, focusing on the problems your app solves and the benefits it delivers. This simple step can make a huge difference in download rates.
Once you've got your screenshot looking perfect, sharing it is a breeze. Just tap the Share icon (that's the little box with an arrow pointing up) to send it over via Messages, Mail, Slack, or any other app you use. When you need to get it onto a website or another platform, our guide on how do I upload a screenshot walks through the process.
Finally, just hit Done and choose whether to save your masterpiece to your Photos app or the Files app. Simple as that.
It’s always a pain when you go to snap a quick screenshot on your iPad and... nothing happens. We’ve all been there. If the usual button combo isn't doing the trick, don't panic. More often than not, it's a simple fix.
Before you dive into settings, take a look at your iPad case. I’ve seen plenty of cases, especially bulkier ones, that don’t quite line up with the buttons. They can get in the way just enough to prevent you from pressing the buttons down all the way. Try popping the case off and taking a screenshot again.
If it’s not the case, a random software glitch could be the culprit. A quick restart is the oldest trick in the IT book for a reason: it works. Just press and hold either volume button and the top button until the power off slider shows up. Slide it, give your iPad a minute to think, and then power it back on.
When Screenshots Go Wrong
Ever tried to grab a screenshot from a movie on a streaming app, only to find a perfectly black rectangle saved in your photos? That’s not a bug; it's a feature. To protect their content from being copied, many video apps intentionally block screen captures. There’s really no way around this one.
Another head scratcher is when screenshots seem to disappear into thin air. If you're taking screenshots but they aren't saving, the first thing to check is your iPad’s storage. If you're running low on space, there's nowhere for them to go. You can see how much room you have left by heading to Settings > General > iPad Storage.

Running through these quick checks should solve most of the common issues and get you back to capturing and sharing whatever’s on your screen.
Got a few lingering questions about taking screenshots on your iPad? You're not alone. Here are the quick answers to the most common things people ask after they've mastered the basics.
So, Where Do My Screenshots Actually Go?
By default, every single screenshot you snap on your iPad heads straight to the Photos app.
Inside Photos, you'll find them mixed in with your regular pictures in the main library. More helpfully, they're also neatly organized into a dedicated album called Screenshots, which makes finding that one specific capture from last week a whole lot easier.
Now, if you use the "Full Page" option in Safari to grab an entire webpage, that's a different story. The iPad saves those as a PDF, and you'll be asked to save it to the Files app. It'll usually suggest the Downloads folder, but you can put it anywhere you like.
Can I Change the Default Save Location?
For your standard, everyday screenshots, the answer is no, they're hardwired to save into the Photos app. It’s just how Apple designed it.
But for those Full Page captures, you have total freedom. You can save the PDF to any folder in your Files app, including iCloud Drive or other cloud services like Dropbox if you have them connected. This is super handy for keeping project documents or receipts organized.
And here's a pro tip: you can always use the Share menu right after taking a screenshot (from that little thumbnail preview) to save a copy directly to Files or another app. It's a great workaround if you don't want to clog up your photo library.
The absolute fastest way to handle a new screenshot is to tap the thumbnail that pops up in the corner. From there, you can mark it up, share it, or save it to a specific spot using the Share sheet, all without ever having to go hunt for it in your Photos app.
How Different Is This from Taking Screenshots on an iPhone?
Honestly, it's almost identical, which is fantastic if you're switching between devices. Apple kept the core mechanics the same.
The main difference is just the physical placement of the buttons. The combinations are the same, Top or Side button plus a Volume Up button for models with Face ID, but those buttons are obviously in different spots on a larger iPad compared to an iPhone.
The editing and Markup tools are exactly the same on both. If you want a full breakdown of the nuances, we have a complete guide on how to screen shot on an iPhone that covers every detail.